Contents Start here
Start here
Before you start: what you should already know, and building your security lab on AWS step by step
The terminal and Python basics the course assumes, the tools to install, and the course lab built in your own AWS account, with its cost, a budget alert and a one-command teardown.
Free page Code zip with this page
About 42 minutes to read, and about 45 minutes for the hands-on lab.
Your progress0 of 6 checks answered right
It fills only when a prediction matches the measured result. Reading a page does not move it. It is kept in this browser.
Hands-On AI SOC Analyst: Build AI Agents for Security Operations. Start here.
Download the code for this page: lesson-before.zip. It holds START-HERE.md with every step and its expected output, the lab's template and helper script, two small programs, a real login log from our cloud lab, the diagrams, and this page as a PDF.
This page makes sure nothing stops you at the first lab. It says what you should already know, with a short self-check. It lists the tools to install on your own computer and how to check each one. Then it walks you through building the course's security lab in your own AWS account, one command at a time, with what it costs, how to keep it safe, and how to delete every part of it when you finish.
After this page you will be able to:
- say whether you have the terminal and Python basics this course assumes, using a ten-minute self-check on a real log;
- install the AWS command-line tool, the Session Manager plugin, Python, uv, VS Code and Git, and check each one with one command;
- explain what each machine in the lab does, and why none of them can be reached from the internet;
- build the lab with one command, check that Wazuh and its agent are running, and open the Wazuh dashboard through a private tunnel;
- say what the lab costs per hour, stop it between sessions, and delete all of it, then prove that nothing is left.
Time: about 45 minutes to read and install, and about 20 more minutes while the lab builds itself.
What it costs: about 18 cents an hour while the lab runs, about 1 cent an hour while it is stopped, and nothing once it is deleted. The whole course needs roughly $5 to $7 of lab time. Before anything is built, you set a budget alert that emails you if spending passes $5 or $10 in a month.
Dates and times: every time on this page is in UTC. We built the lab twice on 13 November 2026, which was the morning of 13 November where we work, in India. The first build, from 01:46 to 02:48 UTC, included the Windows server and ran the shift that every page of the course uses. Then three reviewers checked the template, and we built the corrected template again from scratch, from 03:11 to 03:32 UTC, without Windows. Steps 5, 6 and 9 below show that second build. Later the same morning, from 03:49 to 04:11 UTC, one of our reviewers built the lab a third time, from this page and its zip alone, ran the shift, and deleted everything again.

The problem: a course that stops at the first command
Most people who give up on a technical course do not give up on the hard ideas. They give up on the first evening, when a command prints an error they have never seen, and they cannot tell whether the problem is them, their computer, or the course. A security lab makes this worse, because it is several machines that have to find each other: a server that collects logs, a server that is attacked, and a machine that attacks it.
This page removes that first evening. You check, before the first lab, that you have the few skills the course assumes and that your tools work. Then you build the lab with commands we have run ourselves, and every command shows you the output it printed for us, so you can compare.
What you should already know
The course teaches security, AI and the parts of AWS it uses, from zero. It does not teach the terminal or Python. You need them at a beginner's level, not an expert's:
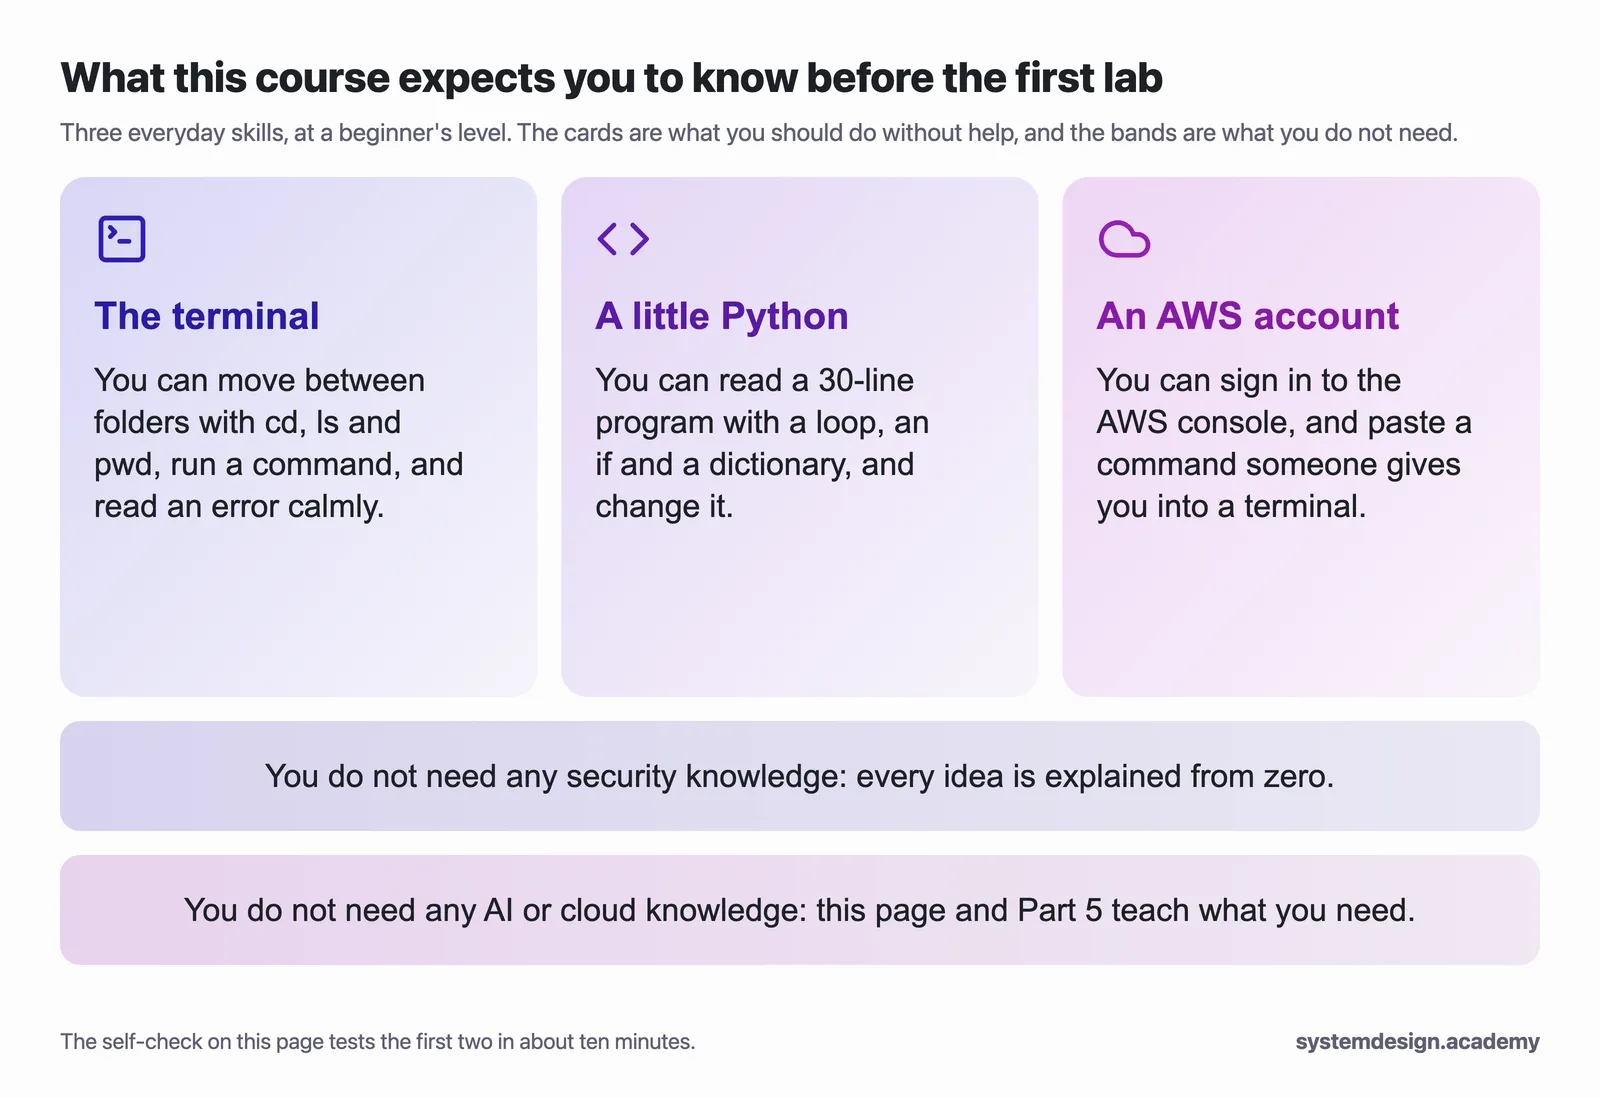
- The terminal. You can open one, move between folders with
cd, list a folder withls, see where you are withpwd, run a command, and read what it prints, errors included. - A little Python. You can read a short program with a loop, an
if, a list and a dictionary, say roughly what it will print, and change a line of it. You do not need classes, async code or any library beyond Python's own. - An AWS account. You have one, or you can create one at aws.amazon.com with an email address and a payment card. You do not need to know AWS: this page explains every part of it that the lab uses, the first time it appears.
If the terminal or Python is new to you, spend an evening on it first. Python's own tutorial at docs.python.org is free and good.
You do not need any security or AI experience. Every security idea, from what a log is to what MITRE ATT&CK is, is explained the first time it appears. AI agents are taught from zero in Part 5, after you can do the SOC job by hand.
The tools, and what each one is for
The lab runs in the cloud. Your own computer is the analyst's desk: it runs the editor, the small Python programs, and the commands that build and reach the lab. It needs no special power.
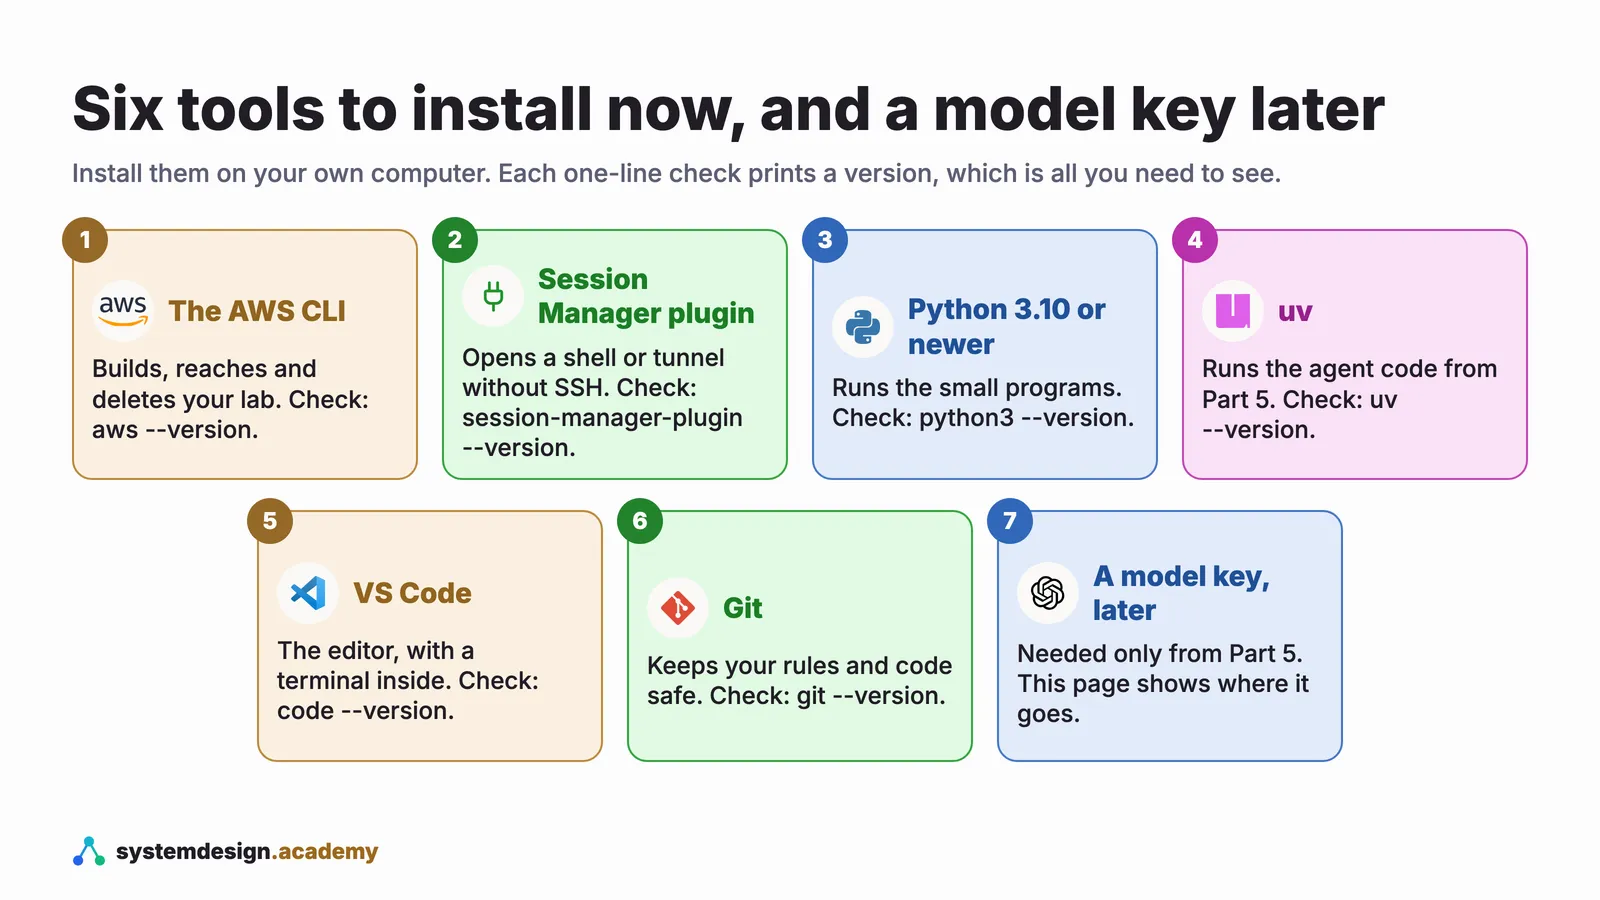
| Tool | What it is for in this course |
|---|---|
| AWS CLI, version 2 | Amazon's command-line tool. The lab's helper script uses it to build the lab, reach its machines and delete it. Install it from the AWS documentation page "Installing or updating to the latest version of the AWS CLI", then run aws configure once and give it an access key for your account and the region us-east-1. |
| Session Manager plugin | A small add-on for the AWS CLI that opens a shell or a private tunnel to a machine that has no open ports, the numbered doors a program listens on for connections from outside. Install it from the AWS page "Install the Session Manager plugin for the AWS CLI". |
| Python 3.10 or newer | Runs the small programs in Parts 1 to 4, which need nothing beyond Python itself. |
| uv | A fast tool from the company Astral that installs the right Python and the right libraries for each page's code, from Part 5 on, with one command: uv run. |
| VS Code | The editor. Its built-in terminal is where every screenshot in this course was taken. |
| Git | Keeps your rules, detections and agent code under version control. Part 3 keeps detections in Git and tests them automatically. |
On Windows 11, type every course command in Ubuntu inside WSL2, Microsoft's way of running Linux inside Windows. Open PowerShell as administrator, run wsl --install, restart, and open Ubuntu once from the Start menu to create your Linux user. Install the AWS CLI, the Session Manager plugin, uv, Python and Git inside Ubuntu, using each tool's Linux instructions, and install VS Code on Windows with its WSL extension, so that code . in Ubuntu opens the folder you are in. Keep your course folders in Ubuntu's own home folder, not on the C: drive.
A word about the access key. aws configure asks for an access key ID and a secret access key. Create them for an IAM user that you use only for this course. An IAM user is a separate login inside your AWS account with its own permissions; never use the root user, the account owner's own login, for this. And never paste the keys into a file you share. The lab needs permission to create EC2 machines (virtual servers), a private network, an IAM role (a set of permissions that a machine can use) and a CloudFormation stack (the set of pieces built from one template), and to read three more AWS services: Systems Manager, which Session Manager is part of; Service Quotas, which shows your account's limits; and Budgets, which sends the cost alerts. An administrator user in your own personal account has all of that. When you finish the course, delete that user's access key in the IAM console, so it cannot be misused later.
The model key comes later. Part 5 is where the agents start calling a language model, and the section "Your model key, for Part 5" below says where it goes.
The lab you are about to build
The lab is five small machines in your own AWS account, built from one template. Here is what each one does, and how they are allowed to talk to each other:
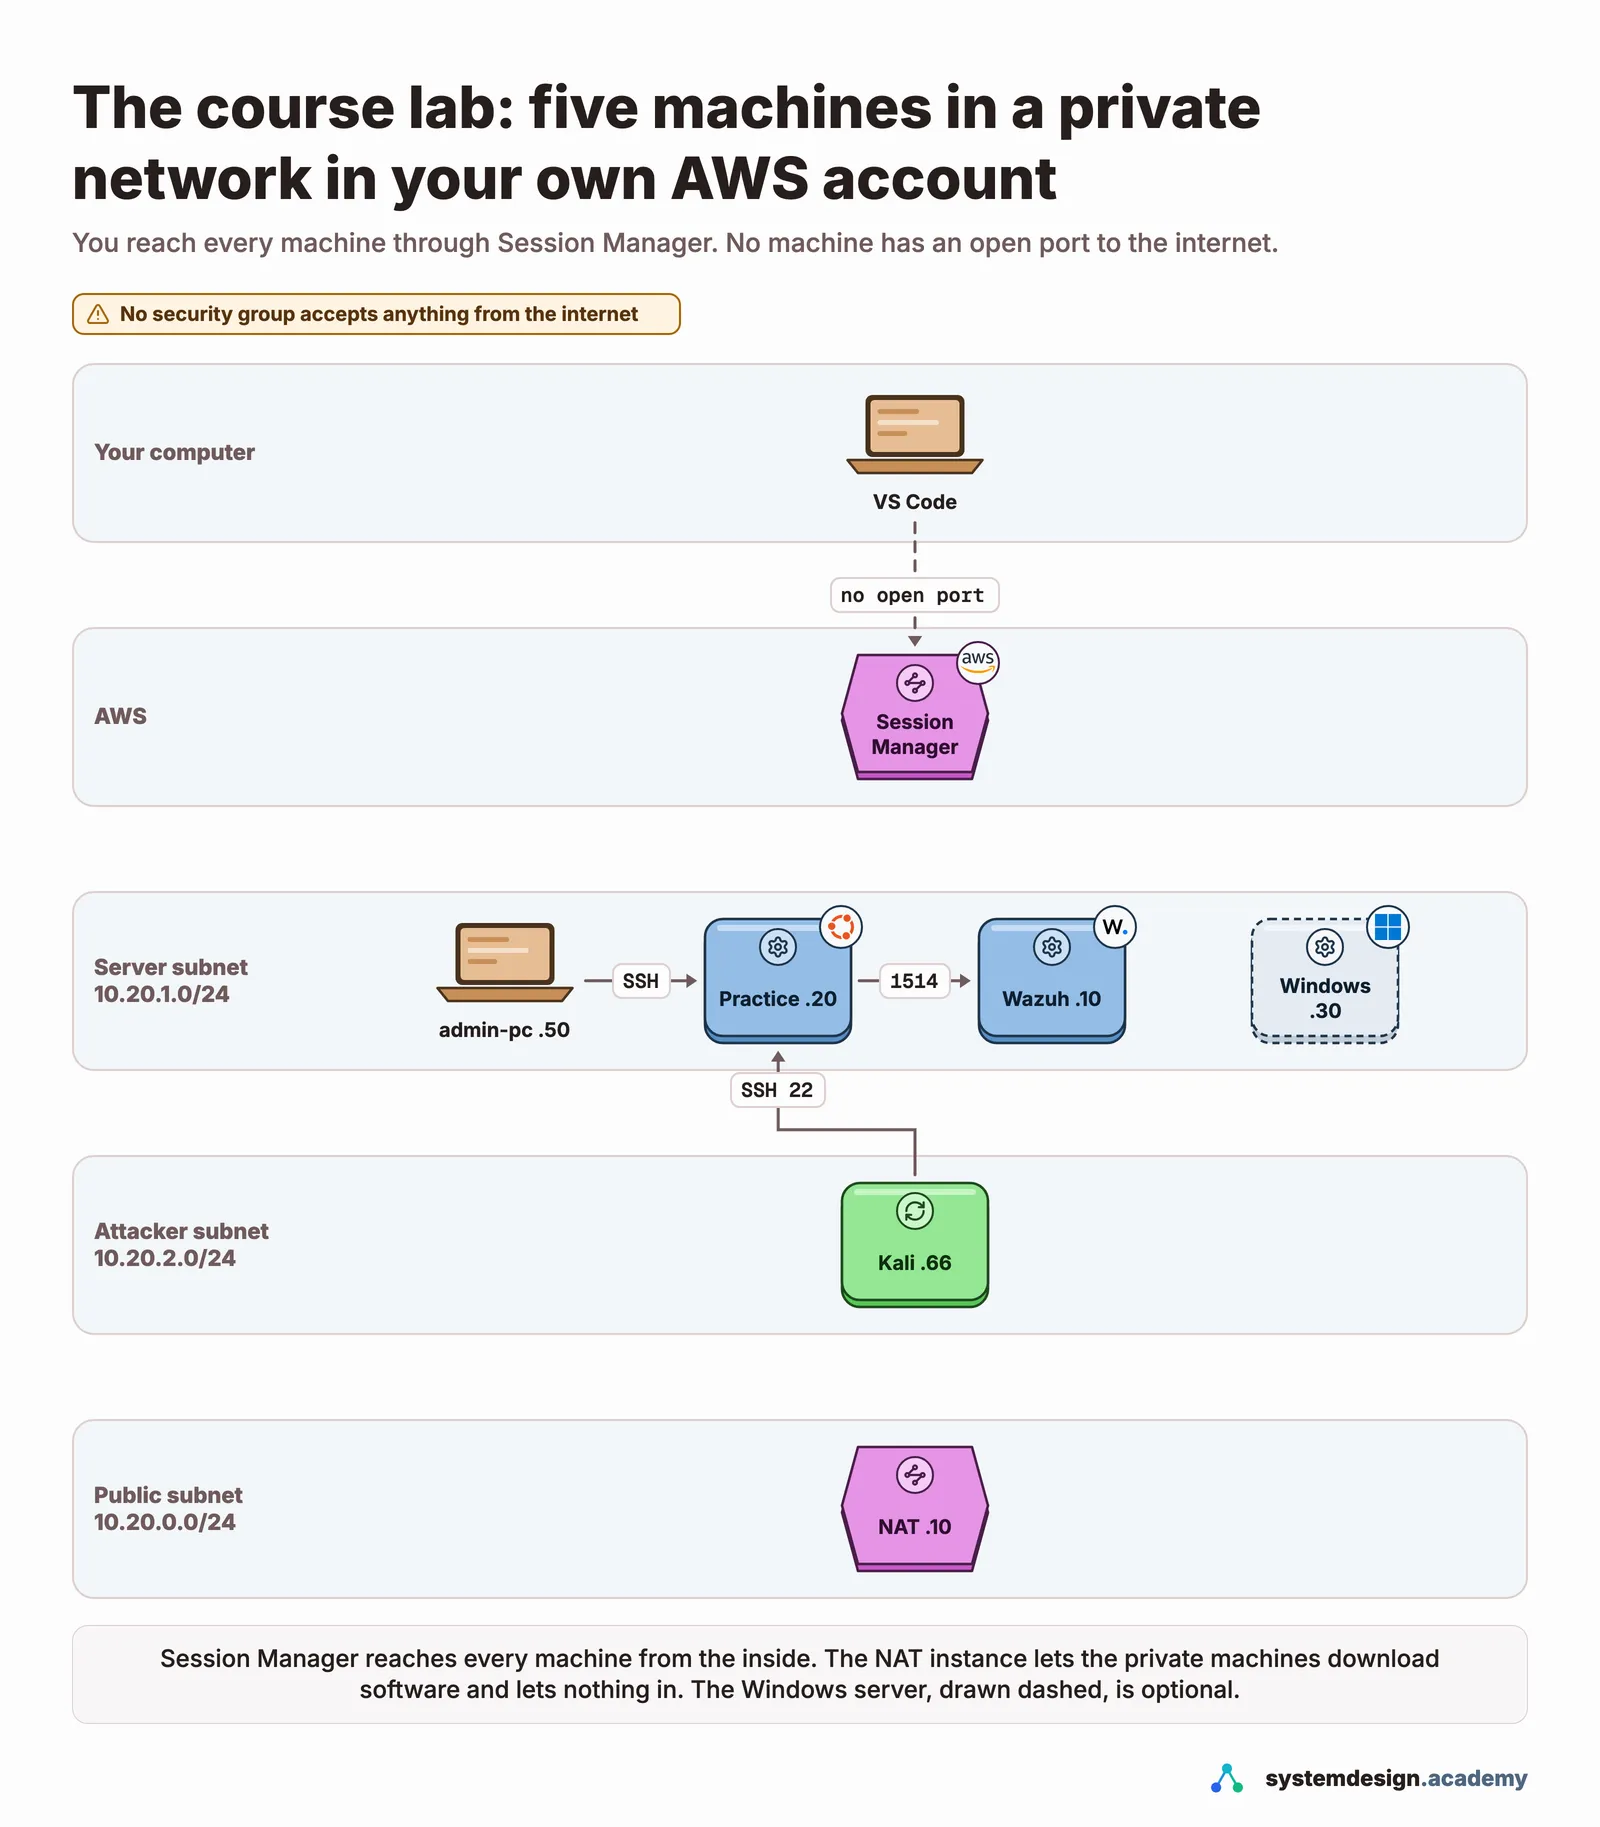
A few words first, because AWS uses its own names:
- An EC2 instance is a virtual machine that AWS runs for you, billed by the second while it runs.
- A VPC, a virtual private cloud, is your own private network inside AWS. Ours uses the addresses
10.20.0.0to10.20.255.255, which exist only inside it. - A subnet is a smaller part of that network. A private subnet has no route in from the internet at all.
- A security group is a firewall around one machine. It lists exactly which traffic may come in. Anything not on the list is dropped.
- Session Manager, part of AWS Systems Manager, opens a shell or a tunnel to a machine from the inside, through AWS's own service. So the machines need no SSH keys and no open ports.
- A NAT instance is a small machine that lets the private machines reach out to download software, and lets nothing from outside start a connection in.
- CloudFormation builds every piece from one template file,
soc-lab.yaml, and deletes every piece again with one command.
The five machines all use AWS's own Graviton processors (the t4g types), which cost less than the Intel and AMD ones for the same work. Every disk is encrypted and is deleted with its machine.
The five machines:
| Machine | Address | What it is for |
|---|---|---|
wazuh-server | 10.20.1.10 | Wazuh 4.14, all on one machine: the manager that checks every log line, the indexer that stores the alerts, and the dashboard. Wazuh's own guide asks for at least 4 virtual CPUs and 8 GB of memory, so this is a t4g.xlarge, with 4 virtual CPUs and 16 GB, the cheapest such machine in us-east-1. |
linux-server-01 | 10.20.1.20 | The practice server, the one that gets attacked. Ubuntu 24.04, a user called student with a weak password, and a Wazuh agent. A t4g.micro. |
admin-pc | 10.20.1.50 | The administrator's own computer. It logs in to the practice server the way an ordinary administrator does, so the alerts contain normal work as well as the attack. A t4g.nano. |
kali | 10.20.2.66 | The attacker, in its own subnet. It runs Kali Linux from the official kalilinux/kali-rolling image, with hydra, sshpass and nmap added. A t4g.small. |
soc-lab-nat | 10.20.0.10 | The NAT instance, the only machine with a public address, which accepts traffic only from the lab's own machines. A t4g.nano. |
If you ask for it, a sixth machine, win-server-01 at 10.20.1.30, adds Windows Server 2022 with Sysmon, Microsoft's free tool that records process starts, network connections and file changes into the Windows event log, and a Wazuh agent that reads it. The free pages do not need it, and the page "Windows event logs and Sysmon in plain words" uses it.
The rules the security groups enforce:
- The practice server accepts SSH only from the Kali machine and the administrator's computer. SSH is the standard way to log in to a Linux server from another computer, and it listens on port 22; a port is a numbered door that one program listens on.
- Wazuh accepts agent traffic, ports 1514 and 1515, only from the practice servers.
- Nothing accepts anything from the internet.
- The Kali machine may send traffic anywhere inside the lab. Outside the lab it may use only the two web ports, 80 and 443, to download software. So hydra cannot reach SSH, or Remote Desktop (the way to log in to a Windows server), on any machine on the internet. A web-attack tool could still reach a website, though, so the rule from the next section matters: point the tools only at the lab's own addresses.
This is your lab: attack only it
Everything you attack in this course is a machine that this template made in your own account. AWS allows you to run security tests against your own EC2 instances without asking first. Its penetration testing policy lists "Amazon EC2 instances" among the services you may test without prior approval. The same policy forbids denial of service, flooding a machine with traffic until it stops working, and "request flooding (login request flooding, API request flooding)", which is why the course's attacks are small: ten wrong passwords, tried one at a time. Never point any of these tools at a machine you do not own, at work, at a friend's server or on the internet. Doing that is illegal in most countries, whatever your reason.
What it costs, and how to keep it cheap
These are AWS's on-demand prices for the region us-east-1, read from the AWS Price List on 13 November 2026. Check them on the day you start, because AWS changes them.
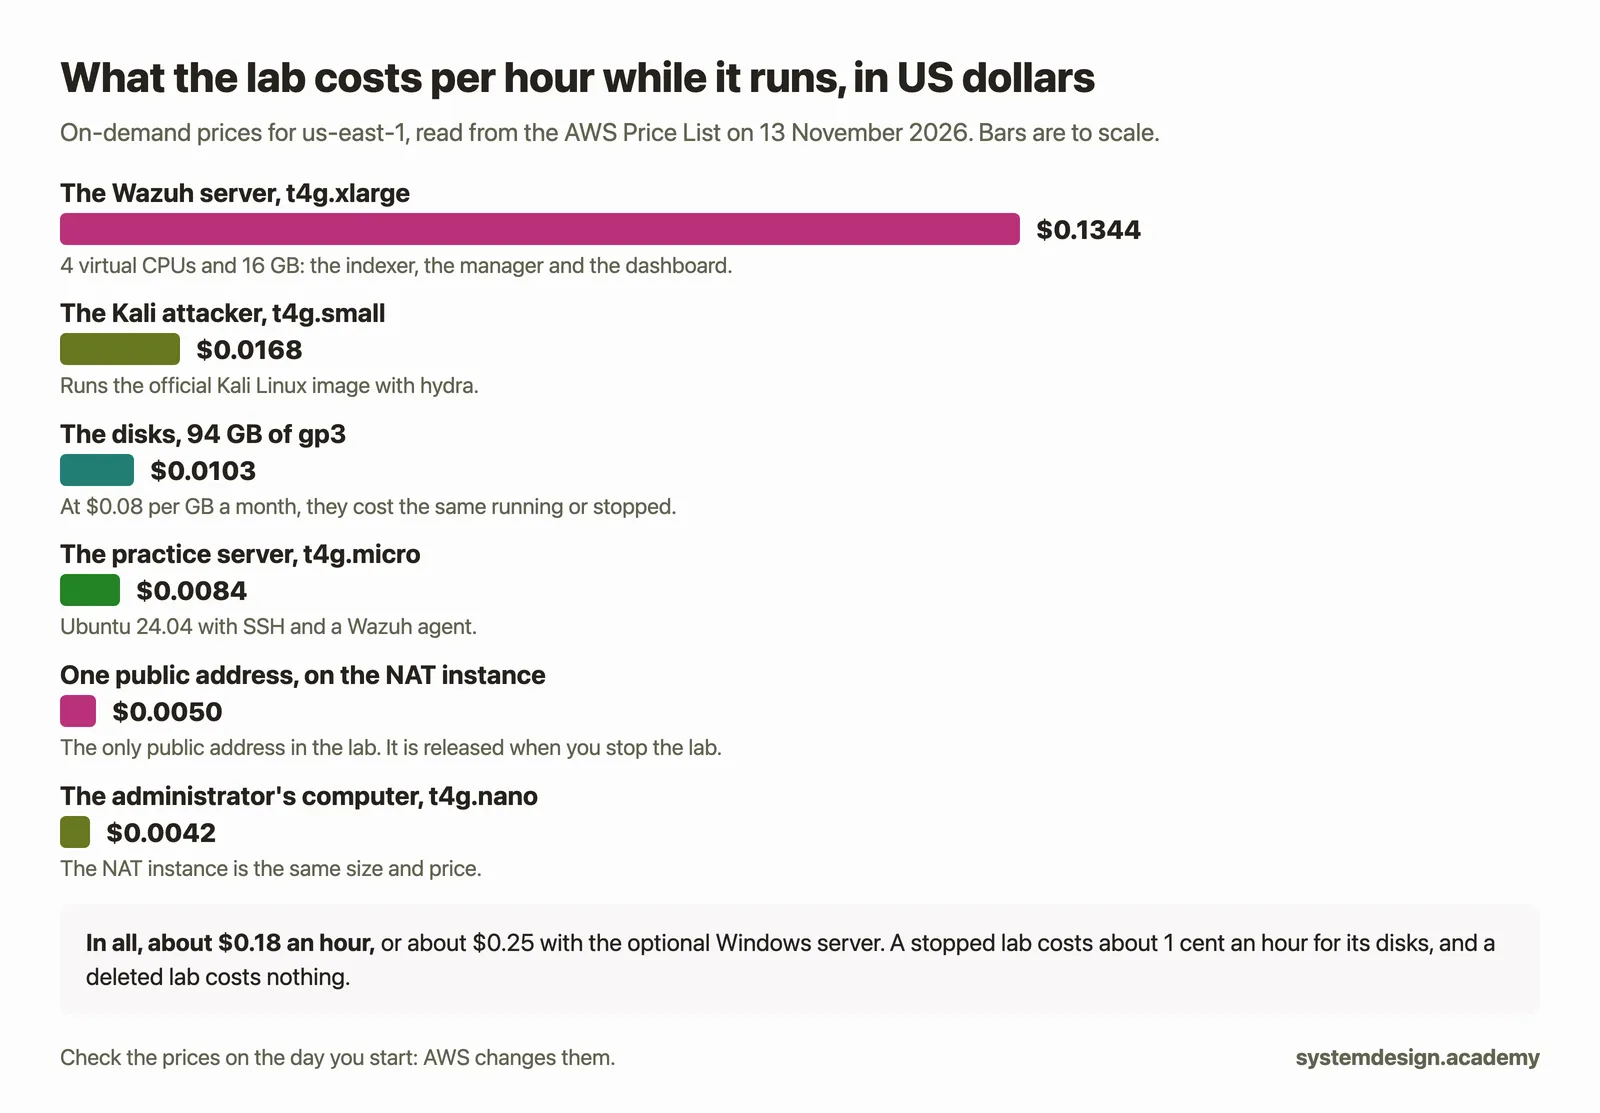
- While it runs: about $0.18 an hour, so a two-hour evening costs about 37 cents. With the Windows server, about $0.25 an hour.
- While it is stopped: about 1 cent an hour for the disks, or about $7.50 a month. The public address is released when the NAT instance stops, so it costs nothing then.
- Forgotten and left running: about $134 a month, or about $180 with the Windows server. That is why the budget alert comes first.
- The whole course: roughly 25 to 35 hours of running lab, so about $5 to $7.
Session Manager itself costs nothing. The t4g and t3 types can borrow extra processor time when they are busy, and by default AWS bills for that. The template turns it off ("standard" CPU credits) on every machine except the Wazuh server, so a busy machine slows down a little instead of adding charges. The Wazuh server keeps AWS's default, so that its heavy first install is not slowed down; borrowed time costs $0.04 per virtual CPU per hour, so the install adds a cent or two.
Hands-on, part 1: check your computer
What you need
- The six tools from above, installed, and
aws configuredone once. - The zip from the top of this page, unpacked.
Get the files ready
Unpack lesson-before.zip, open a terminal in VS Code (in the menu, Terminal, then New Terminal), and go into the lab folder inside it:
cd ~/Downloads/lesson-before/lab
It holds six files:
| File | What it is |
|---|---|
soc-lab.yaml | the CloudFormation template that builds every part of the lab |
lab.sh | the helper script: one short command for each step on this page |
check_setup.py | checks your computer's tools and your AWS sign-in, and changes nothing |
count_failures.py | the self-check: counts failed and successful logins per address in a real log |
auth-sample.log | 60 real lines from the login log of our lab's practice server, 13 November 2026 |
README.md | the same steps, in short |
In your terminal, on macOS, Linux or Ubuntu inside WSL2, make the helper script runnable once with chmod +x lab.sh.
Step 1: check each tool's version
Run these one at a time. Each prints a version and nothing else:
aws --version
aws-cli/2.36.26 Python/3.14.6 Darwin/24.6.0 exe/arm64
session-manager-plugin --version
1.2.896.0
python3 --version
Python 3.13.15
uv --version
uv 0.12.5 (Homebrew 2026-08-14 aarch64-apple-darwin)
git --version
git version 2.39.5 (Apple Git-154)
code --version
1.146.0
69047191fc427f2f92828279aae1d90d8eeda7ab
arm64
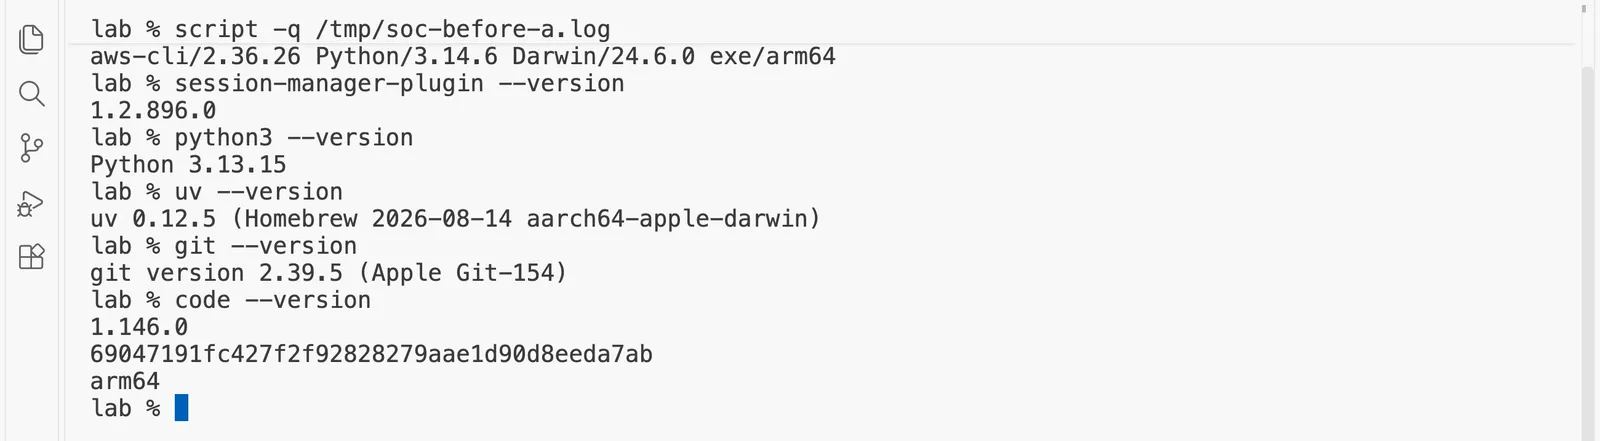
Your versions will differ from ours, and that is fine. Our analyst's desk was an Apple computer, so some of our lines name darwin or Apple; yours will name your own system. What matters is that each command prints a version, not command not found. code --version prints three lines: the version, the build's commit ID, and the processor type.
Step 2: check that your computer can reach your AWS account
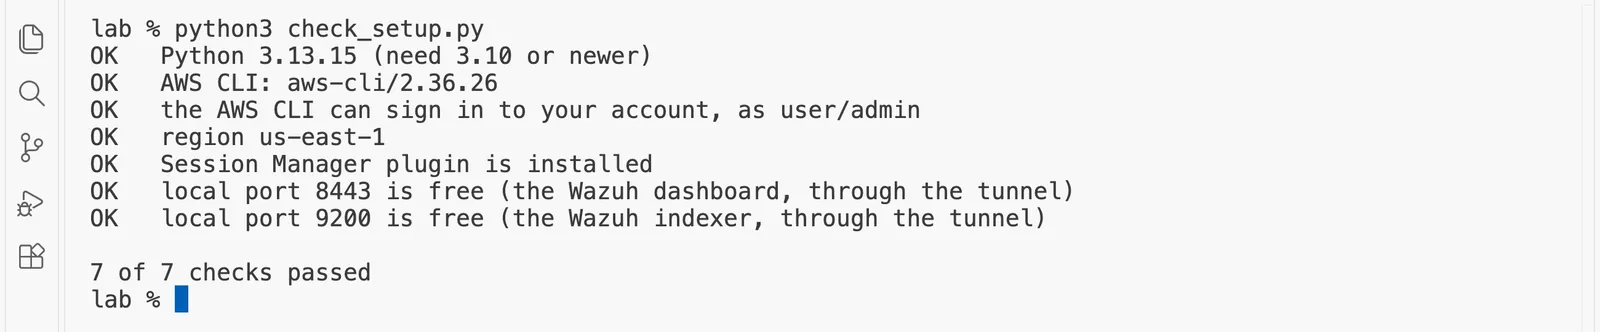
python3 check_setup.py
OK   Python 3.13.15 (need 3.10 or newer)
OK   AWS CLI: aws-cli/2.36.26
OK   the AWS CLI can sign in to your account, as user/admin
OK   region us-east-1
OK   Session Manager plugin is installed
OK   local port 8443 is free (the Wazuh dashboard, through the tunnel)
OK   local port 9200 is free (the Wazuh indexer, through the tunnel)

7 of 7 checks passed
What just happened. The program made seven checks and changed nothing:
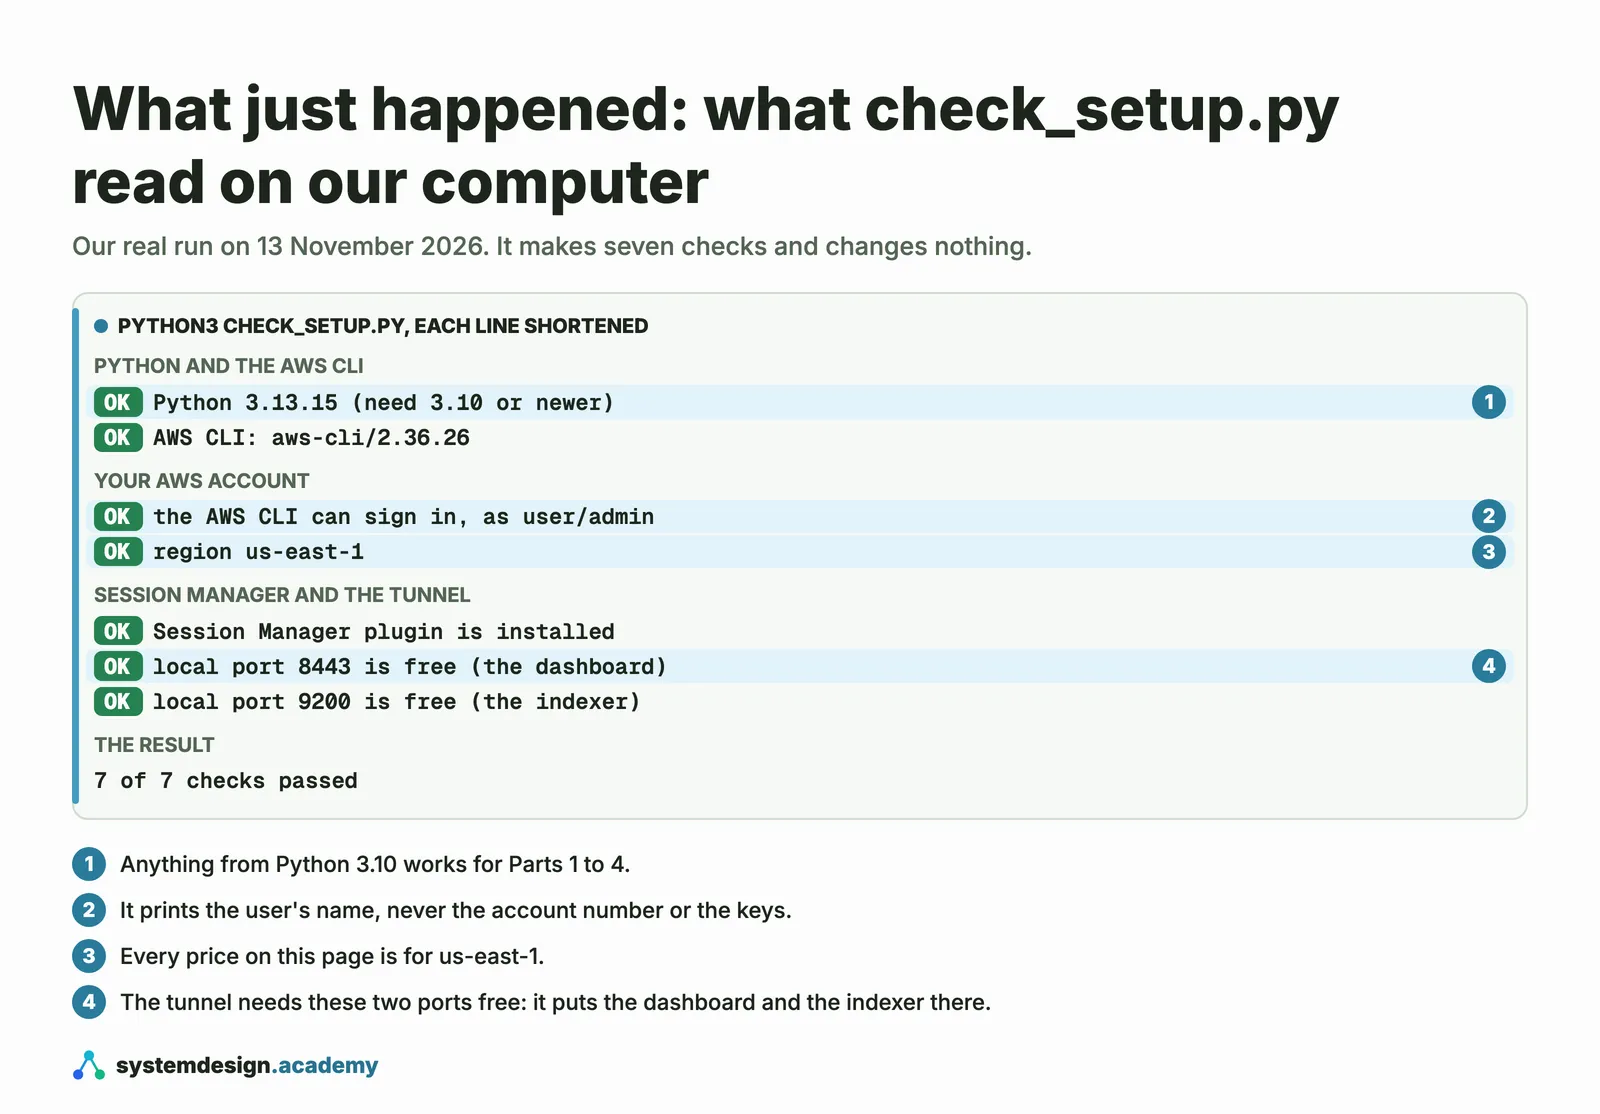
- Python must be 3.10 or newer, because the course's programs use its newer type hints.
- The AWS CLI and your sign-in. It asks AWS who you are, with
aws sts get-caller-identity, and prints only your user's name. If this line says FIX, runaws configureagain with a working access key. - The region decides where the lab is built. The course uses
us-east-1, and every price on this page is for it. - The two local ports are where the tunnel will put the Wazuh dashboard (8443) and the Wazuh indexer (9200) on your own computer. If something else already uses one, close it.
If any line says FIX, the troubleshooting table below says what to do.
Hands-on, part 2: build the lab, step by step
Step 3: check your account's machine limit
Every AWS account has a limit on how many virtual CPUs of ordinary EC2 machines it may run at once in each region. The lab needs 12, or 14 with the Windows server. New accounts are sometimes given less. Check yours:
./lab.sh quota
your limit for standard EC2 machines in us-east-1: 1 vCPUs
the lab needs 12 vCPUs, or 14 with Windows
not enough yet. Ask AWS to raise it to 16, then wait for the email that says it is done:
  aws service-quotas request-service-quota-increase --region us-east-1 --service-code ec2 --quota-code L-1216C47A --desired-value 16

Our own account said 1. We had asked AWS to raise it six days earlier, and the request was still open on the day we built this lab. If yours says less than 14, run the command it prints. It is free, and AWS answers by email, often within a day. Wait for the answer before you go on.
What we did, honestly. We could not wait, so we built the same template with every Linux machine changed to a g5g.xlarge, a larger Graviton type that also carries a graphics card the lab does not use, and that counts against a different limit on our account, the Windows server to a g4dn.xlarge, and the NAT instance to a t2.micro with the matching Amazon Linux image. Those are larger and cost more per hour, and they are the reason our screenshots below show them. The Linux machines ran the same Ubuntu 24.04 Graviton image that the template uses by default, the same software, the same network and the same addresses, and the size of a machine does not change which alerts Wazuh raises. You do not need to do any of this: use the defaults, which are the cheapest sizes that meet Wazuh's documented minimum. For the builds on this page, that meant typing this one line before ./lab.sh up, which lab.sh passes on to CloudFormation. Use it only if AWS has not raised your limit and your account has room in the separate limit for G instances (check it with aws service-quotas get-service-quota --service-code ec2 --quota-code L-DB2E81BA --query Quota.Value), and expect each hour to cost about $1.70 instead of $0.18:
export LAB_OVERRIDES="WazuhType=g5g.xlarge LinuxVictimType=g5g.xlarge KaliType=g5g.xlarge AdminType=g5g.xlarge NatType=t2.micro NatAmi=/aws/service/ami-amazon-linux-latest/al2023-ami-kernel-default-x86_64"
What we have not tested, so that you know. Because of our account's limit, no build so far has used the default machine sizes, the t4g types, so we cannot show you their exact timings; they run the same Graviton images as our builds, only with less power, so expect Wazuh's install to take longer than our eight minutes. We also have not built the template's Windows block from scratch since we corrected it: we ran its script by hand on our first build, where Sysmon and the agent came up and raised alerts. We have not used Kali's own Marketplace image, and we have not built the "Kali at home" variant described below. If anything on this page does not match what you see, the troubleshooting table is the first place to look.
Step 4: set the budget alert, before anything else
./lab.sh budget you@example.com
Use your own email address. The script creates a monthly cost budget of $10 called soc-course-lab with AWS Budgets. AWS emails you when your actual spending passes $5 and $10 in a month, and when its forecast says you will pass $10. It printed this for us:
budget soc-course-lab: $10 a month, emails at 50% and 100% spent, and when the forecast passes $10
If you run the command a second time, it prints the budget soc-course-lab already exists: nothing to do and changes nothing. AWS does not charge for budgets that only send alerts. Two things to know about them. An alert does not stop anything by itself: it is your reminder to run ./lab.sh stop or ./lab.sh down. And AWS updates its cost figures a few times a day, so an alert can arrive several hours after you crossed the line; the forecast alert needs some spending history before it works at all. So the habit that protects you is ./lab.sh stop at the end of every session, not the alert.
Step 5: build the lab
./lab.sh up
This hands soc-lab.yaml to CloudFormation, which creates the network, the security groups, a role that lets Session Manager reach the machines, and the machines themselves, all tagged Project=soc-course-lab. It printed this for us, about four minutes later:
Waiting for changeset to be created..
Waiting for stack create/update to complete
Successfully created/updated stack - soc-lab
The machines are starting. Wazuh takes about 10 to 15 more minutes to install: run ./lab.sh ready

If you run ./lab.sh up again while the lab exists, it refuses, and says what to do instead:
a lab called soc-lab already exists. Use ./lab.sh start to wake it up, or ./lab.sh down to delete it first.
To add the Windows server, run ./lab.sh up-windows instead. Decide before you build: to add or remove Windows later, run ./lab.sh down and then the other command. up refuses to run over a lab that already exists, because changing a running lab can restart or replace its machines and lose your alerts.
Each machine sets itself up when it first starts:
- The Wazuh server runs Wazuh's official installation assistant,
wazuh-install.sh -a, which installs the indexer, the server and the dashboard on one machine. It then saves the admin password in a file only the root user can read. - The practice server creates the user
student, turns on SSH password logins, and installs the Wazuh agent version 4.14.10, pointed at 10.20.1.10. - The Kali machine builds its Kali image with hydra and the other tools.
Step 6: see the machines, and wait until Wazuh is ready
./lab.sh status
--------------------------------------------------------------------
|                         DescribeInstances                        |
+--------------------------+-------------+-------------+-----------+
|  soc-lab-nat             |  10.20.0.10 |  t2.micro   |  running  |
|  soc-lab-wazuh-server    |  10.20.1.10 |  g5g.xlarge |  running  |
|  soc-lab-linux-server-01 |  10.20.1.20 |  g5g.xlarge |  running  |
|  soc-lab-admin-pc        |  10.20.1.50 |  g5g.xlarge |  running  |
|  soc-lab-kali-attacker   |  10.20.2.66 |  g5g.xlarge |  running  |
+--------------------------+-------------+-------------+-----------+
------------------------------------------
|       DescribeInstanceInformation      |
+------------------------------+---------+
|  wazuh-server                |  Online |
|  linux-server-01             |  Online |
|  kali                        |  Online |
|  admin-pc                    |  Online |
|  ip-10-20-0-10.ec2.internal  |  Online |
+------------------------------+---------+
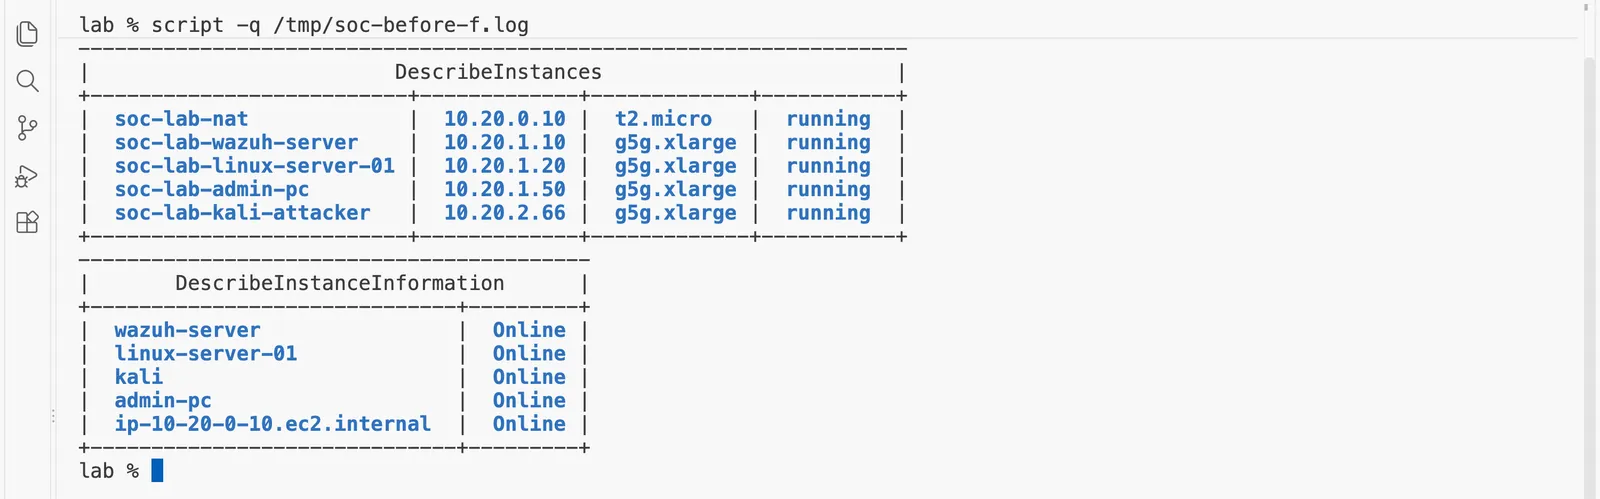
The first table is every machine with its private address. Yours will show the default sizes, and a Windows server only if you built with up-windows. The second table is every machine that Session Manager can reach. Right after up, it often lists only the NAT instance, because the others are still starting: wait a few minutes and run it again. Then wait for Wazuh:
./lab.sh ready
waiting for Wazuh to finish installing (it checks every 30 seconds)

Wazuh is installed. The agents that have joined it:
   ID: 000, Name: wazuh-server (server), IP: 127.0.0.1, Active/Local
   ID: 001, Name: linux-server-01, IP: any, Active

ready asks the Wazuh server every 30 seconds whether the installation has finished, and then lists the agents that have joined it. linux-server-01 must say Active. In our second build, Wazuh was ready about eight minutes after ./lab.sh up finished.
Step 7: open the dashboard through the tunnel
The dashboard runs on the Wazuh server, which has no public address. Session Manager can carry a connection from your computer to it, a tunnel. Open a second terminal in VS Code, go to the same lab folder, and run:
./lab.sh tunnel
dashboard: https://localhost:8443   indexer: https://localhost:9200   (press Ctrl+C to close both)
Starting session with SessionId: admin-f9zsnfdj5rso34ria4s7popd9q
Port 8443 opened for sessionId admin-f9zsnfdj5rso34ria4s7popd9q.
Waiting for connections...
Leave that terminal open: closing it, or pressing Ctrl+C in it, closes the tunnel. In the first terminal, ask for the admin password:
./lab.sh password
It prints one line, the password that the Wazuh installer chose for the user admin. We do not show ours. Then open https://localhost:8443 in your browser. The browser warns that the certificate is not trusted. A certificate is the file a website uses to prove who it is, and Wazuh made its own when it installed, so no public authority vouches for it. That is expected for this lab, which only you can reach: continue, and sign in as admin with that password.
In the menu, open Endpoints. This is what we saw, with the Windows server added:
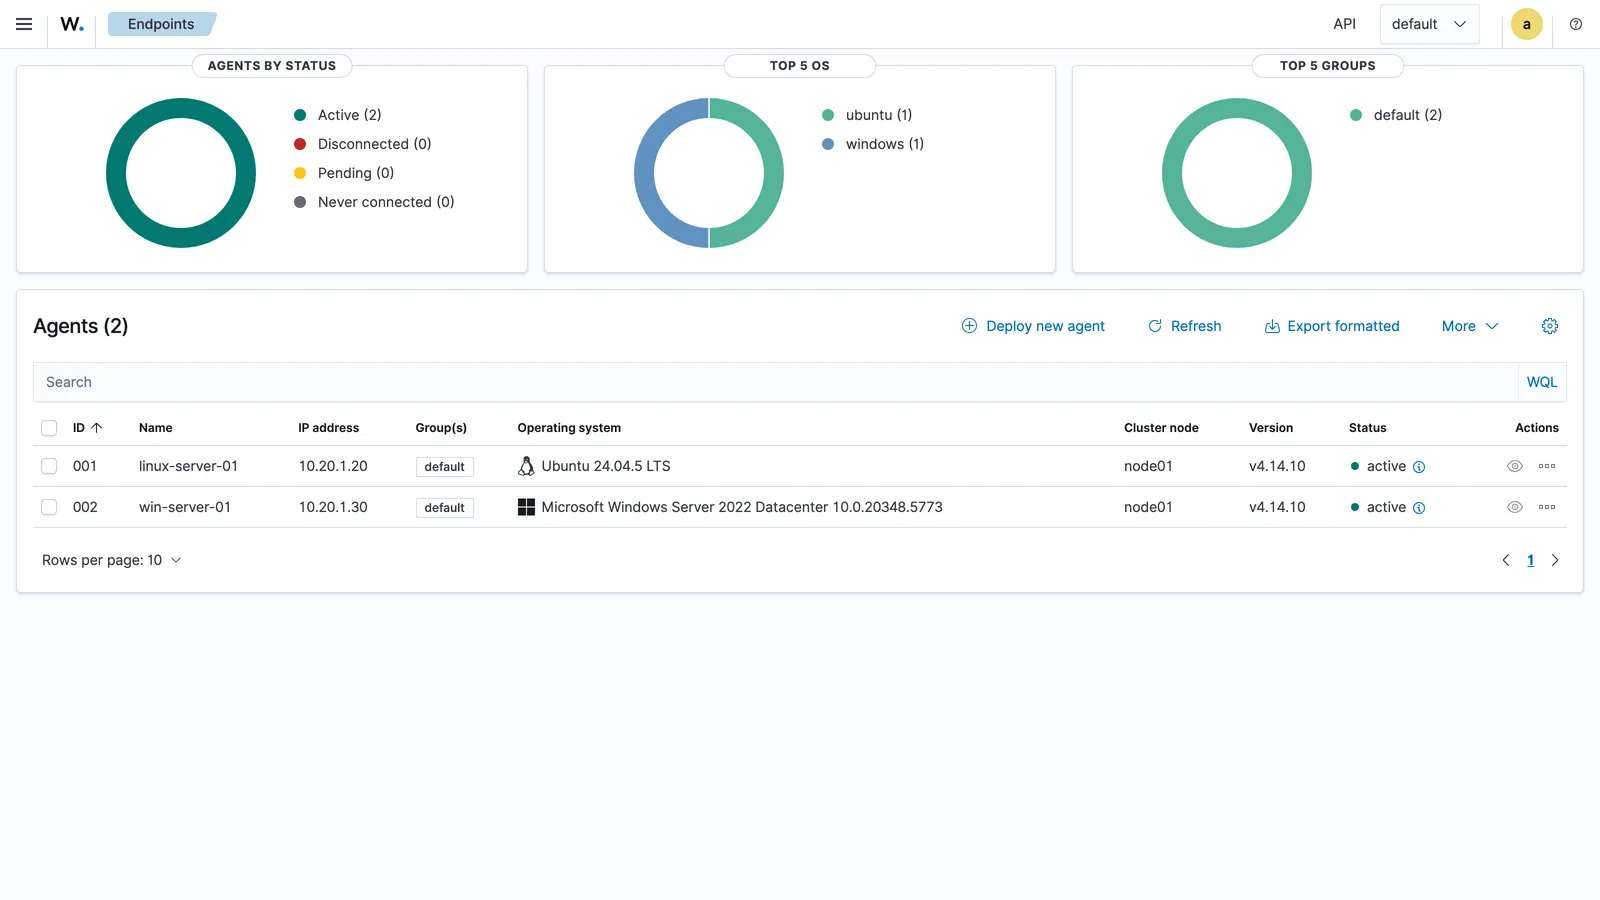
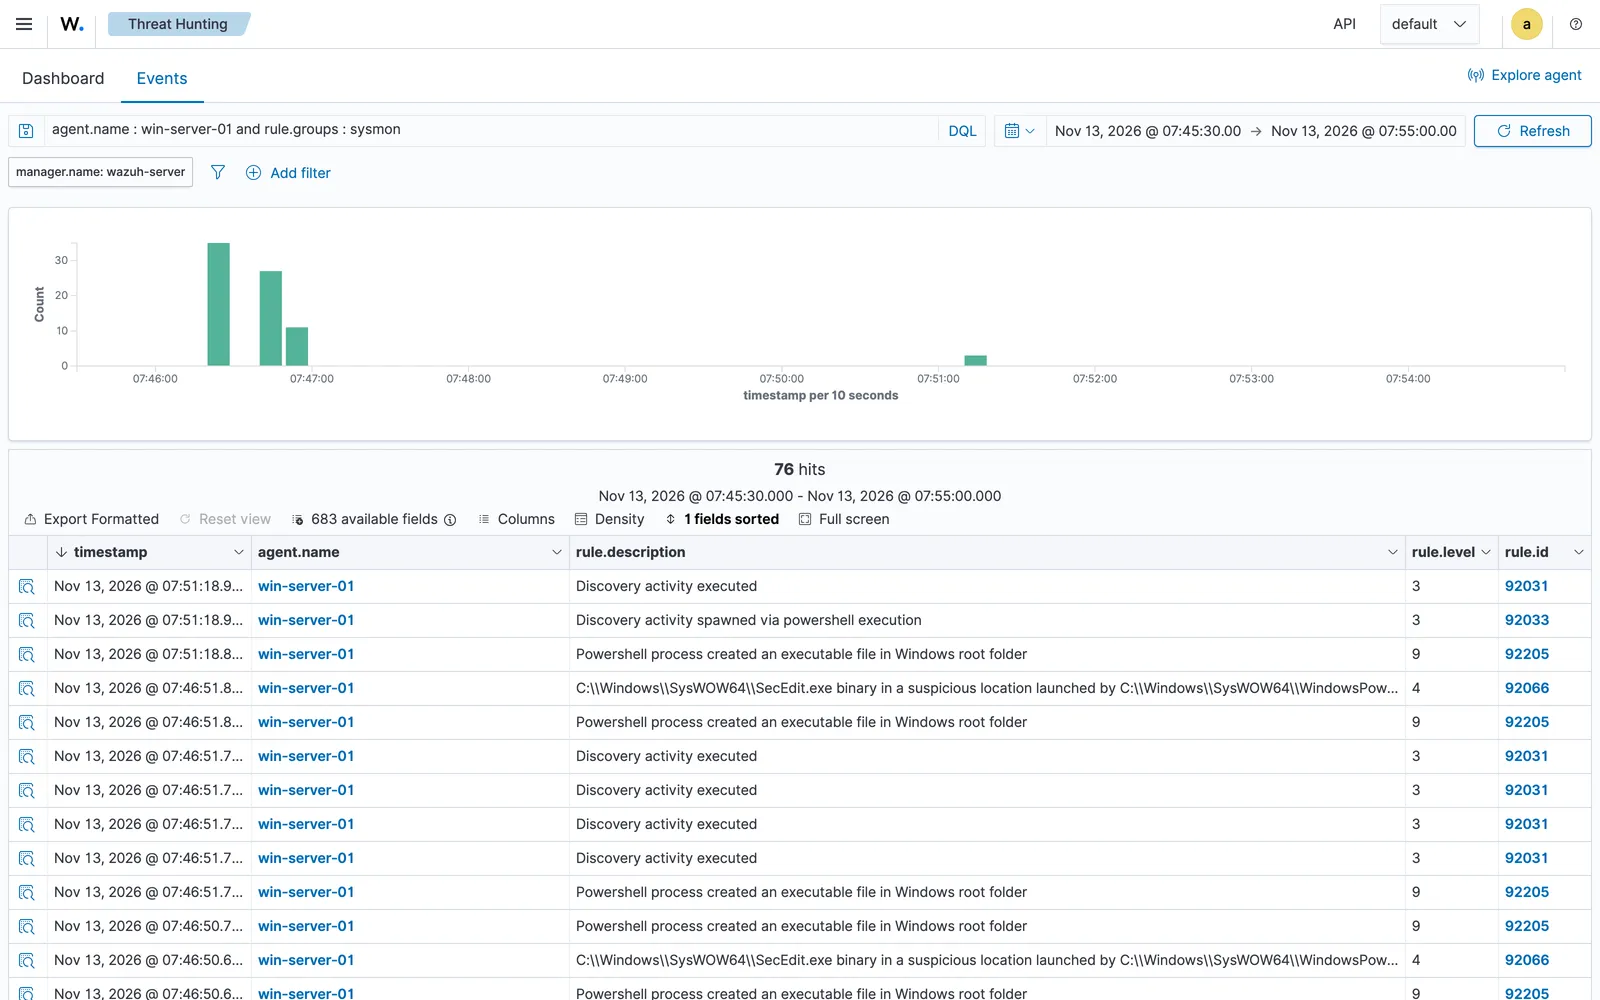
If you added the Windows server, its Sysmon events become Wazuh alerts within a minute or two. We ran two ordinary discovery commands on it, whoami /groups and net user, and Wazuh raised rule 92031, "Discovery activity executed", mapped to ATT&CK T1087, Account Discovery, the technique of listing a machine's users, along with other Sysmon rules:
Step 7b, optional: run the shift from the introduction on your own lab
This is the same short shift that every free page reads. Note the time in UTC first, with date -u, so that you can pull exactly this shift's alerts later. Then play the administrator's ordinary work:
./lab.sh everyday
1. the administrator logs in from admin-pc (10.20.1.50) with the right password and checks the disk
/dev/root       6.8G  2.4G  4.4G  35% /

2. the administrator mistypes the password once, then gets it right
Permission denied, please try again.

 02:09:45 up 19 min,  1 user,  load average: 0.00, 0.00, 0.00

3. the administrator adds a service account for backups on linux-server-01
added the user backup-svc
The "Permission denied" line is printed by the script itself, because it tells SSH to stay quiet; the mistyped password is what SSH refused. If you run everyday a second time, its last step says that backup-svc already exists. Wait about a minute, then open a Kali shell on the attacker. The prompt changes to Kali's own, (root㉿kali)-[/lab], and you are now typing on the attacker machine:
./lab.sh kali
Inside the Kali shell, run hydra with the list of ten wrong passwords, which is already in the Kali shell's /lab folder as guesses.txt, then log in with the right one, and leave with exit. If you built the lab with your own LAB_PASSWORD, use that password in the second command instead of ours:
hydra -l student -P guesses.txt -t 1 ssh://10.20.1.20
sshpass -p 'Lab-Only-Pass-91' ssh -o StrictHostKeyChecking=no -o UserKnownHostsFile=/dev/null -o LogLevel=ERROR student@10.20.1.20 'echo logged in as $(whoami) on $(hostname)'
exit
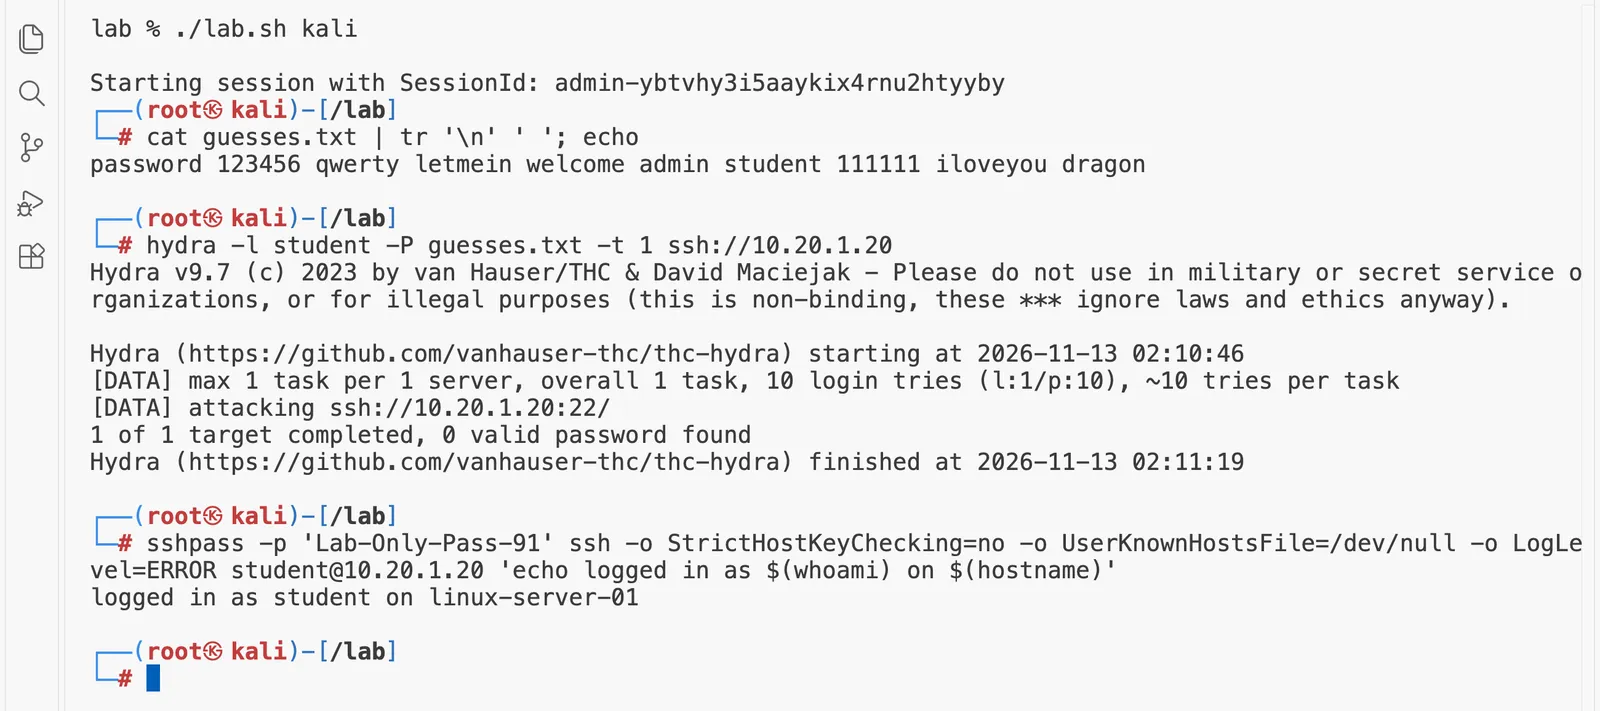
Then, back on your own computer, one more ordinary login by the administrator:
./lab.sh admin-login
the administrator logs in once more from admin-pc (10.20.1.50) and looks at the home folders
backup-svc
student
ubuntu
Wait a minute, note the time again, and the shift is done. "What a security operations centre does all day" shows how to pull its alerts with pull_alerts.py and read them.
Step 8: stop the lab between sessions, and start it again
./lab.sh stop
./lab.sh start
stop shuts down every machine and keeps its disk, so your alerts and settings are still there next time. While stopped, the lab costs about 1 cent an hour. start turns them back on, and Wazuh is ready again a few minutes later.
Step 9: delete everything, and prove that nothing is left
When you finish the course, or whenever you will not use the lab for a while, delete it:
./lab.sh down
deleting the lab (about 5 to 10 minutes)
the stack is deleted
the stack soc-lab:      deleted
machines still there: none
disks still there:    none
elastic addresses:    none
lab networks:         none
nothing is left: the lab costs nothing now

down asks CloudFormation to delete the stack, waits until it has finished, and then runs ./lab.sh check-gone. In our second build it took about six minutes, because AWS waits for each machine to shut down before it removes the network. That command asks AWS for every machine, disk, public address and network still tagged Project=soc-course-lab. It ends with "nothing is left" only when all four lists are empty. The budget from step 4 stays, because it costs nothing and keeps watching your account.
Everything is reproducible. ./lab.sh up builds the same lab again from the same template, with the same addresses, in about 15 minutes.
If you already run Kali at home
Some students already have Kali Linux in a virtual machine on their own computer and would like to attack the cloud lab from it. You can, but we recommend the attacker in the cloud, and the figure says why:
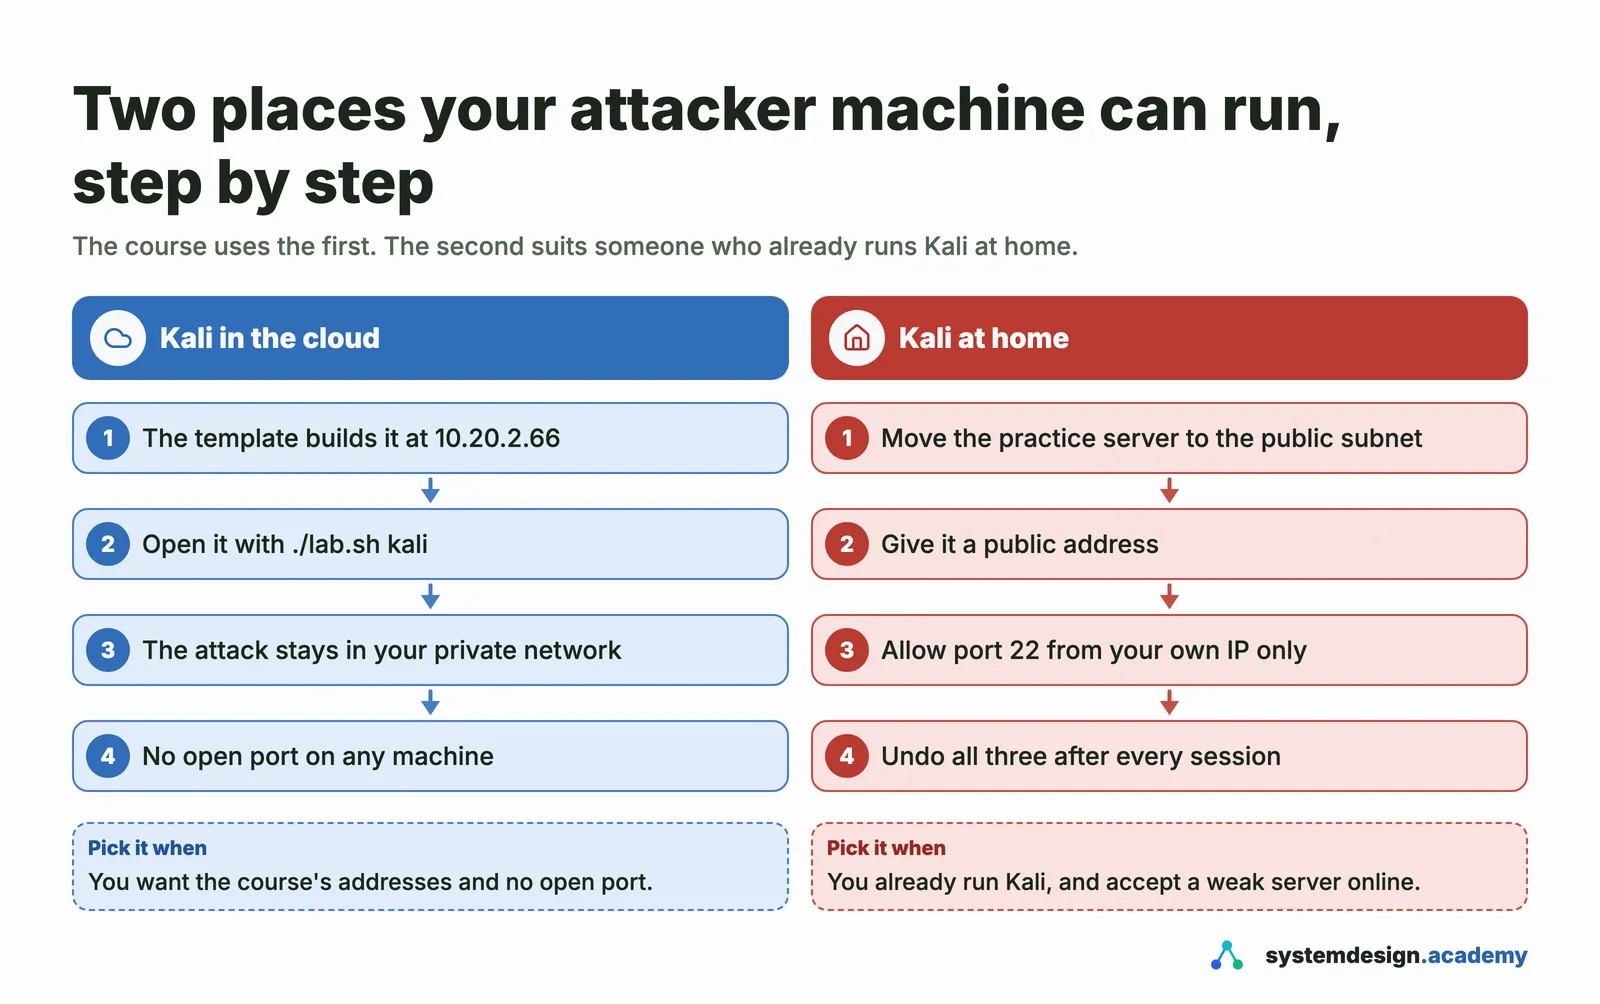
- Nothing is exposed. At home, the practice server, which has a deliberately weak password, must face the internet, guarded by a single IP rule. Home addresses change, and many are shared with other customers through the provider's own NAT, so that rule can be wrong the next day.
- Your alerts match ours. In the cloud the attacker is always
10.20.2.66, so the attacker's 17 alerts match ours rule for rule; the administrator's alerts and the session alerts can come out a few fewer, as "What a security operations centre does all day" explains. - Your own computer needs no extra power. With Kali in the cloud, your computer runs only VS Code and the AWS CLI. A Kali virtual machine at home would need 2 to 4 GB of memory and 20 GB of disk.
We did not build the home variant for any page of this course, so the pages do not show it, and the template does not include it.
The self-check, on a real log
This is the ten-minute test of the Python and terminal you need. The file auth-sample.log holds real lines from the login log of our lab's practice server, from the shift in "What a security operations centre does all day". Look at its first two lines, and count the lines that mention a failed password:
head -2 auth-sample.log
2026-11-13T02:09:30.318073+00:00 linux-server-01 sshd[6087]: Accepted password for student from 10.20.1.50 port 35648 ssh2
2026-11-13T02:09:30.319483+00:00 linux-server-01 sshd[6087]: pam_unix(sshd:session): session opened for user student(uid=1001) by student(uid=0)
grep -c 'Failed password' auth-sample.log
5

head -2 prints the first two lines of a file, and grep -c counts the lines that contain a pattern. Each log line starts with the time, in UTC, then the machine's name, then the program that wrote it with its process number in brackets, then the message.
Predict, then measure
grep counted 5 lines that say Failed password in the sample log. Is that the number of failed logins the log holds?
The measured result appears once you lock in. Only your first answer counts toward your progress.
grep found 5 lines. But the attacker in our shift tried ten wrong passwords, and the server logged eleven failures, because it hung up after six and the tool tried one password again. The difference is a habit of the program that writes this log: when the same message arrives several times in a row, it writes it once and then writes "message repeated 5 times" instead of five copies. Now read count_failures.py below, before you run it, and write down what you think it will print: which addresses, and how many failed and accepted logins for each.
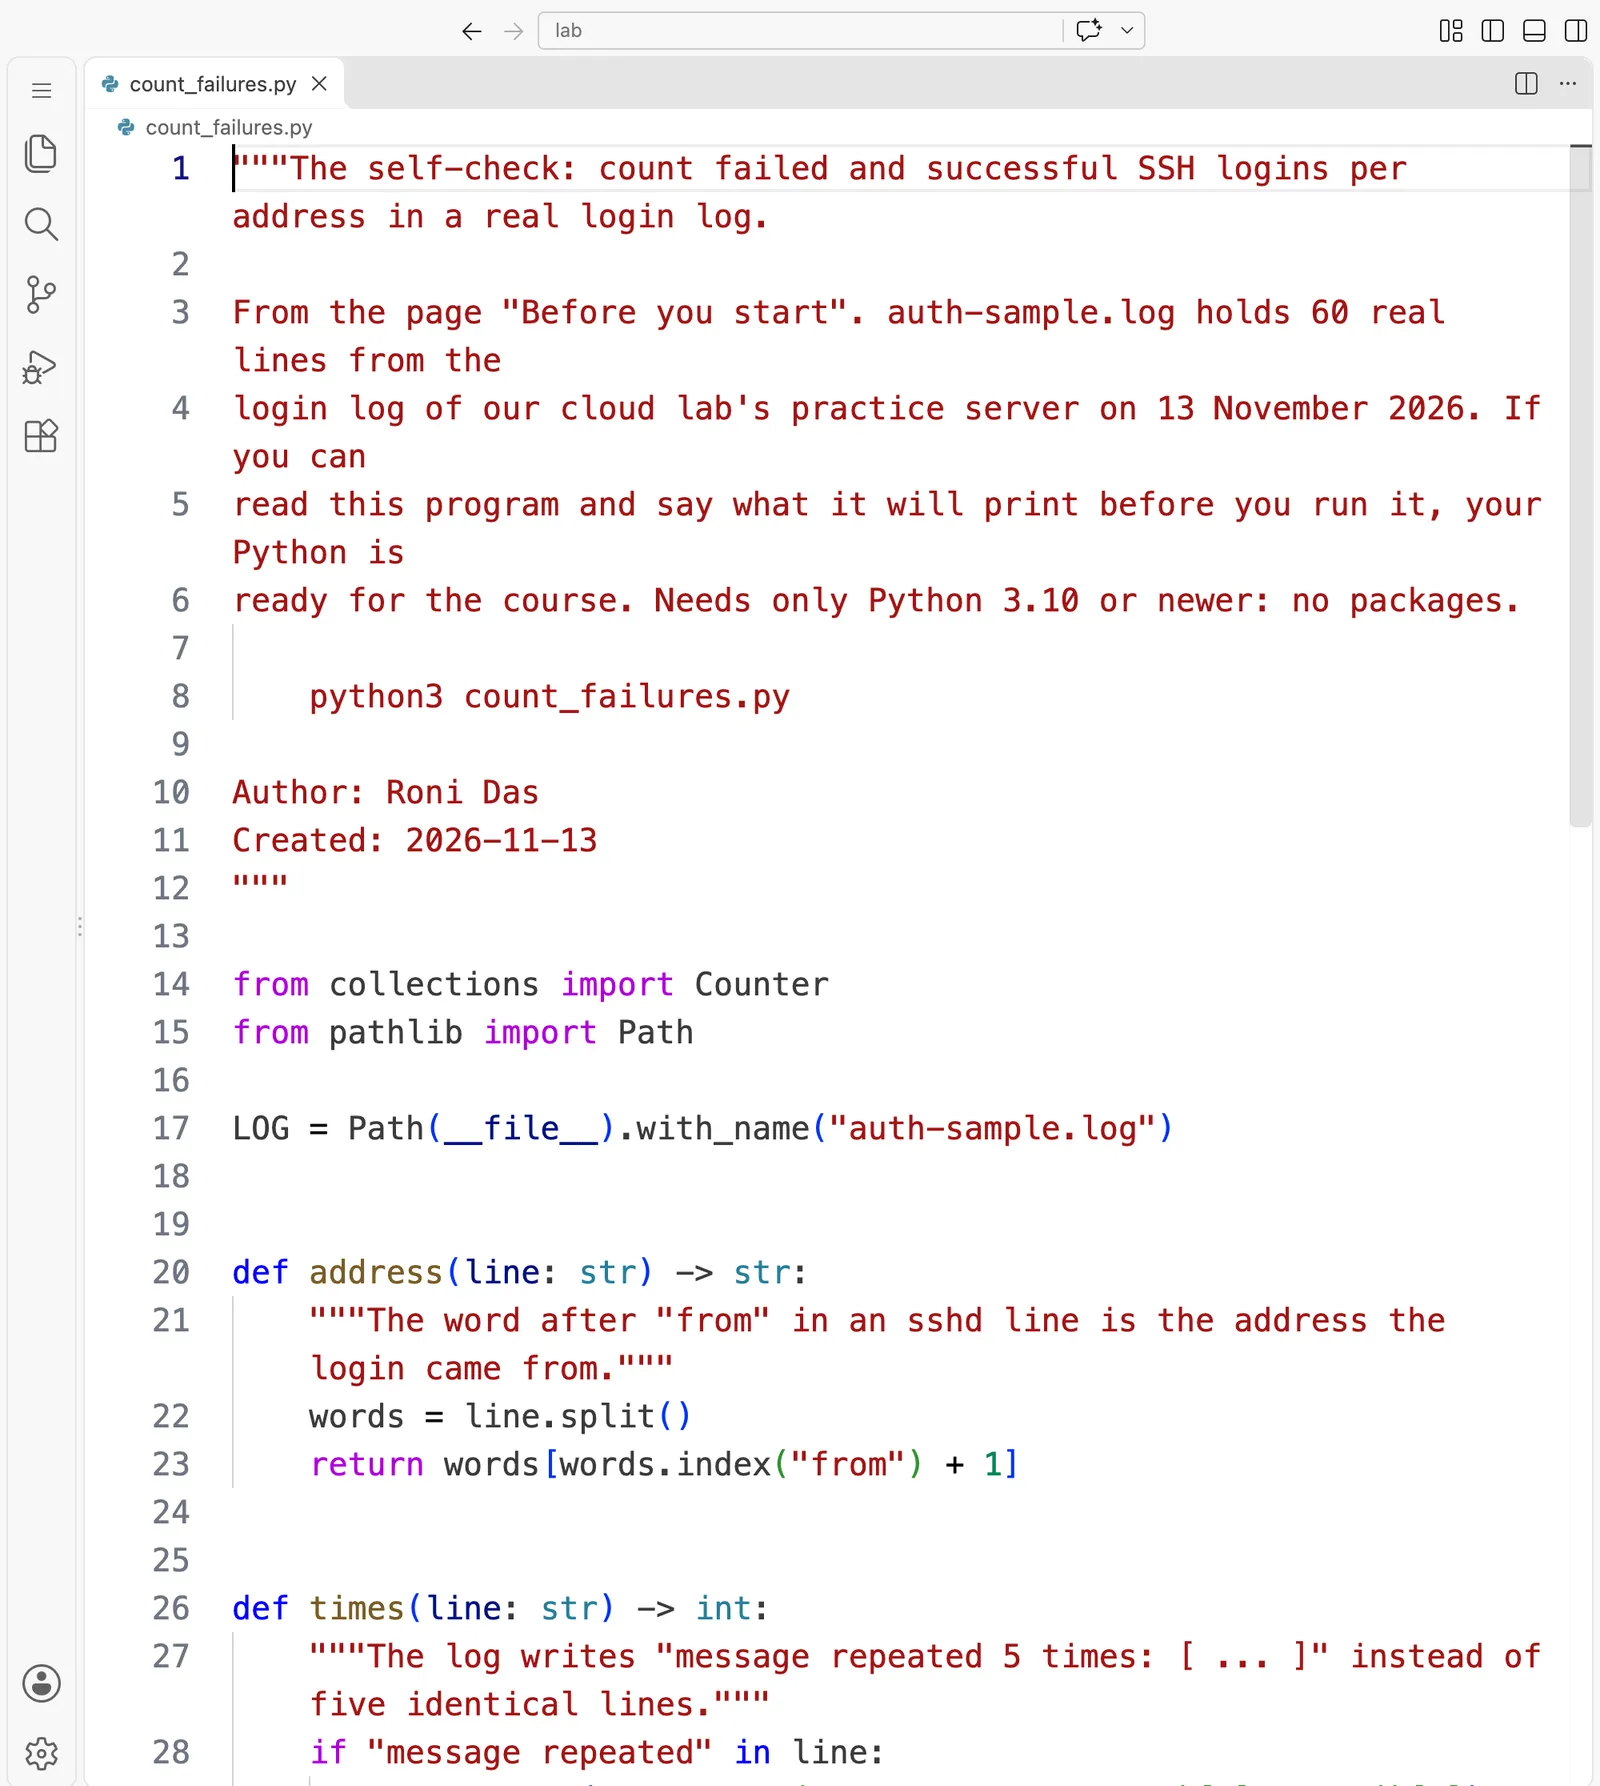
"""The self-check: count failed and successful SSH logins per address in a real login log.

From the page "Before you start". auth-sample.log holds 60 real lines from the
login log of our cloud lab's practice server on 13 November 2026. If you can
read this program and say what it will print before you run it, your Python is
ready for the course. Needs only Python 3.10 or newer: no packages.

    python3 count_failures.py

Author: Roni Das
Created: 2026-11-13
"""

from collections import Counter
from pathlib import Path

LOG = Path(__file__).with_name("auth-sample.log")


def address(line: str) -> str:
    """The word after "from" in an sshd line is the address the login came from."""
    words = line.split()
    return words[words.index("from") + 1]


def times(line: str) -> int:
    """The log writes "message repeated 5 times: [ ... ]" instead of five identical lines."""
    if "message repeated" in line:
        return int(line.split("message repeated ")[1].split()[0])
    return 1


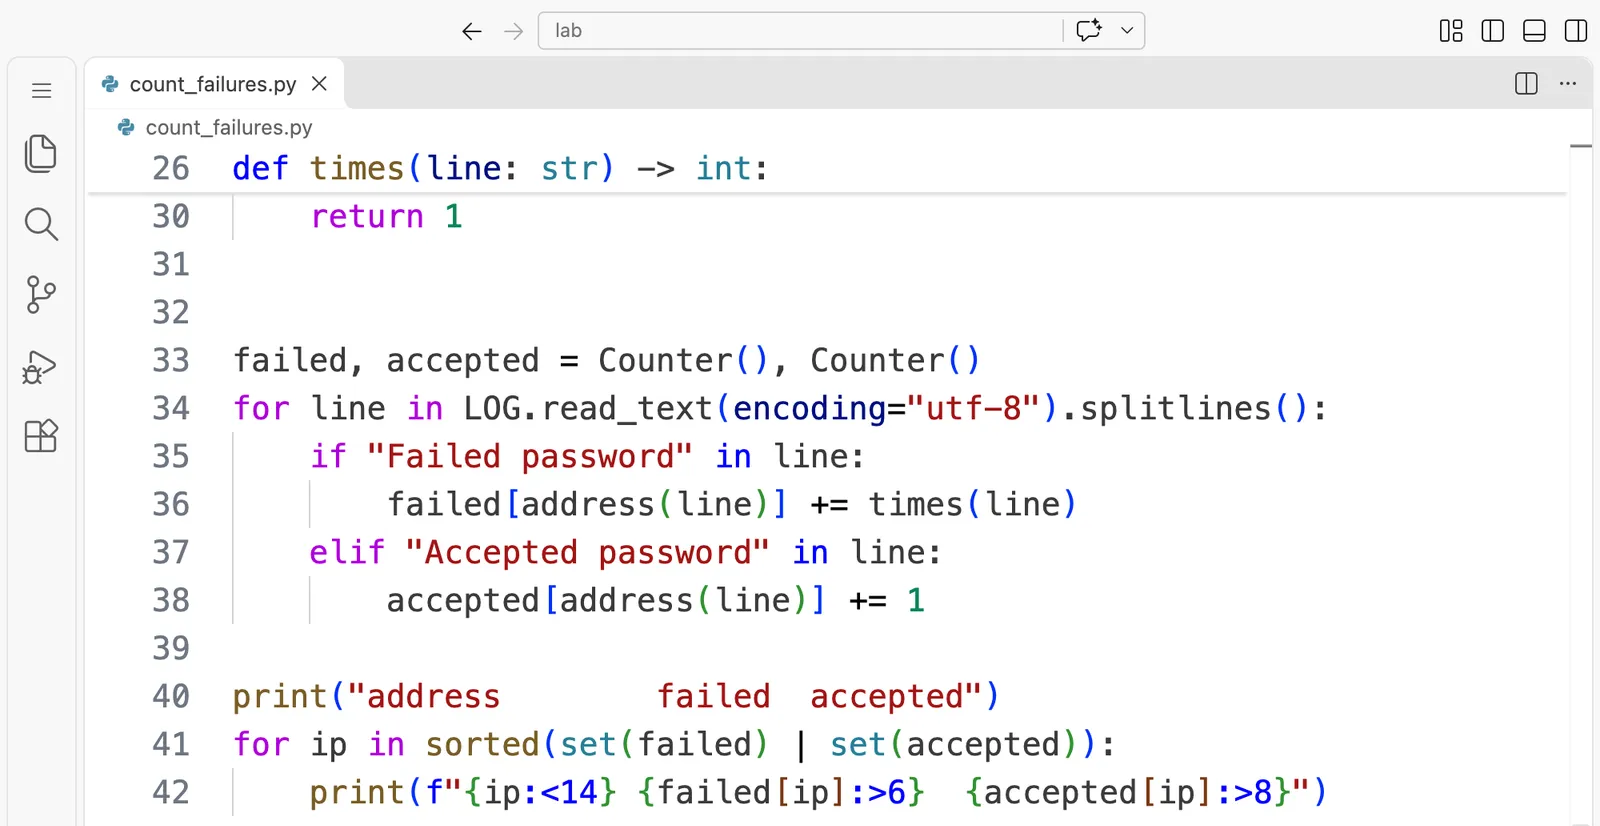
failed, accepted = Counter(), Counter()
for line in LOG.read_text(encoding="utf-8").splitlines():
    if "Failed password" in line:
        failed[address(line)] += times(line)
    elif "Accepted password" in line:
        accepted[address(line)] += 1

print("address        failed  accepted")
for ip in sorted(set(failed) | set(accepted)):
    print(f"{ip:<14} {failed[ip]:>6}  {accepted[ip]:>8}")
address        failed  accepted
10.20.1.50          1         3
10.20.2.66         11         1

What just happened. The program read the log line by line and kept two counts per address:
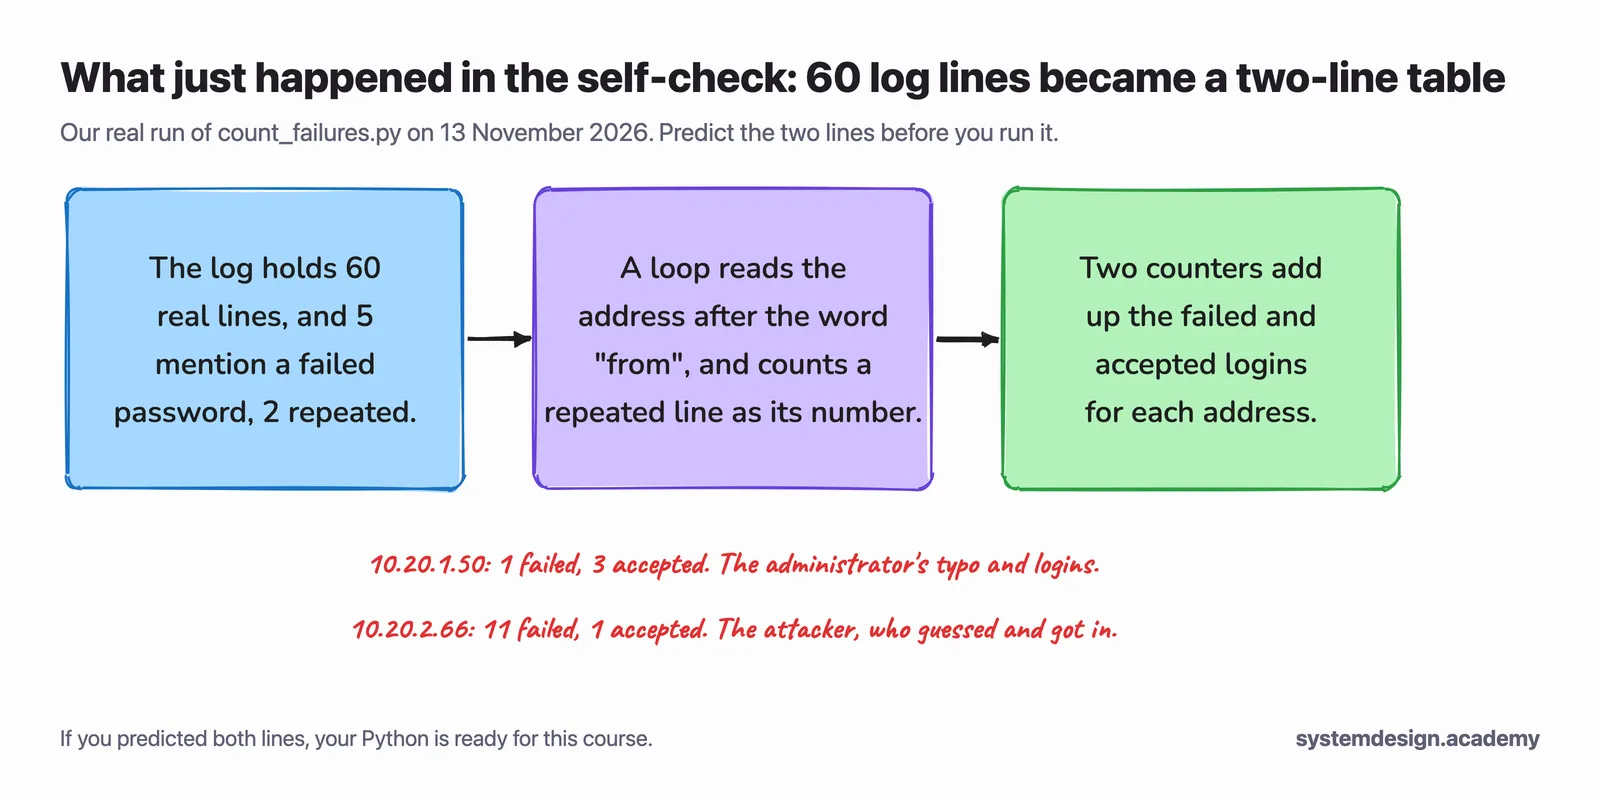
If you predicted both lines, your Python is ready for this course. If the times() function or the two Counter objects were new to you, read Python's tutorial pages on functions and on the collections module, and try again. And notice what this tiny program already did: it found the attacker in a log by hand, and it did not trust a count that the log had squeezed. That is exactly what you do properly in "Reading a Linux login log by hand".
Your model key, for Part 5
From Part 5, the agents send alerts to a language model, and that needs an API key: a secret that lets your program use a paid model service and bills your account. The course's code uses OpenAI's models, and it measures what every run costs. On a small model, one triage costs a fraction of a cent.
You do not need the key yet. When you do:
- Create an account on the provider's platform, add the smallest prepaid credit it allows, and set a monthly spending limit.
- Create a key, and copy it once.
- In each page's
labfolder, make a file called.envwith one line,OPENAI_API_KEY=followed by your key. The course's programs read the key from that file. - Never print, commit, paste or share that file. Every page's zip has a
.gitignorethat keeps.envout of Git.
If your key ever appears somewhere public, delete it on the provider's site at once and make a new one. The same rule holds for your AWS access key.
Troubleshooting
| What you see | Why, and what to do |
|---|---|
command not found: aws | The AWS CLI is not installed, or not on your PATH. Install version 2 from the AWS page named above, then open a new terminal. |
FIX the AWS CLI cannot sign in | No access key yet, or the key was deleted. Run aws configure and give it a working access key and the region us-east-1. |
command not found: code | VS Code's command is not on your PATH. On macOS, open VS Code, press Cmd+Shift+P, type "shell command" and choose "Shell Command: Install 'code' command in PATH". On Windows, install VS Code with "Add to PATH" ticked, then open a new Ubuntu terminal. |
SessionManagerPlugin is not found | The Session Manager plugin is missing. Install it, open a new terminal, and run session-manager-plugin --version. |
./lab.sh quota says not enough | Run the command it prints, wait for AWS's email, and run quota again before up. |
up fails with VcpuLimitExceeded or vCPU capacity | The same limit. Run ./lab.sh down to clean up the half-built stack, then ask for the increase. |
ready keeps printing dots after 25 minutes | Look at the installer's log: ./lab.sh run wazuh "tail -20 /root/wazuh-install.log". |
linux-server-01 is missing from ready | The agent is still waiting for Wazuh. Wait two minutes and run ready again. If it is still missing, run ./lab.sh run linux "tail -5 /var/ossec/logs/ossec.log". |
| The browser cannot open https://localhost:8443 | The tunnel is not running. Run ./lab.sh tunnel in a second terminal and leave it open. |
check-gone says something is left | Run ./lab.sh down again. If a VPC is still listed, delete the stack soc-lab in the CloudFormation console and read its error. |
python3: command not found on Windows | You are in PowerShell. Open the Ubuntu terminal instead. |
Questions people ask
- How do I build a Wazuh lab on AWS?
Build one VPC with private subnets, put Wazuh's all-in-one server on a machine with at least 4 virtual CPUs and 8 GB of memory, and add the machines you want to watch, each with a Wazuh agent. This page does all of that with one CloudFormation template and
./lab.sh up. In our second build, Wazuh 4.14.10 was ready about eight minutes after the machines were created.- How much does a cloud SOC lab cost on AWS?
Our lab costs about $0.18 an hour in us-east-1 while it runs, about $0.25 with a Windows server, and about 1 cent an hour while it is stopped. The whole course needs roughly 25 to 35 hours of running lab, so about $5 to $7. A $10 monthly budget alert, set before anything else, warns you if you forget to stop it.
- Is it legal to run hydra or Kali Linux against my own AWS servers?
AWS's penetration testing policy allows you to test your own EC2 instances without asking first, and forbids denial of service and login flooding. The course's attack is ten wrong passwords, eleven tries in all, against a server you built, so it fits that policy. Attacking any machine you do not own is a different matter and is illegal in most countries.
- Why does the course lab use AWS Session Manager instead of SSH?
Session Manager reaches each machine from the inside, through AWS's own service, so no machine needs an open port or an SSH key. In this lab no security group accepts anything from the internet at all. You still get a shell on any machine with
./lab.sh shell linux, and a private tunnel to the dashboard with./lab.sh tunnel.- Why did my lab build fail with a vCPU limit error?
Every AWS account has a limit on how many virtual CPUs of ordinary EC2 machines it may run in each region, and new accounts sometimes start with very little. The lab needs 12, or 14 with Windows, and our own account had 1 on the day we built it.
./lab.sh quotachecks yours and prints the free request that raises it.- Do I need a powerful computer for this course?
No. The lab runs in AWS, and your own computer only runs VS Code, Python and the AWS command-line tool. Any ordinary computer with 8 GB of memory is enough.
Knowledge check
Answer all five questions before you read the answers below them.
1. ./lab.sh quota says your limit is 5 virtual CPUs. What do you do before ./lab.sh up?
- A. Nothing: AWS raises the limit by itself when the lab needs more.
- B. Run the request command it prints, wait for AWS's email, and run
quotaagain. - C. Build the lab anyway, and delete the Wazuh server if it fails.
- D. Change the region, because limits only apply to us-east-1.
2. Which of these can a person on the internet connect to in the course lab?
- A. The Wazuh dashboard on port 443.
- B. The practice server on port 22.
- C. Nothing: no security group accepts anything from the internet, and you reach the machines through Session Manager.
- D. The Kali machine, so that you can attack from home.
3. You finish an evening's work and will continue tomorrow. Which command keeps your alerts and costs the least?
- A.
./lab.sh stop, which keeps the disks, at about 1 cent an hour. - B.
./lab.sh down, which keeps the disks for tomorrow. - C. Close the tunnel, because the machines only cost money while it is open.
- D. Nothing, because the budget alert stops the lab automatically.
4. grep -c 'Failed password' auth-sample.log prints 5, but count_failures.py counts 12 failed logins in all. Why?
- A.
grepis broken on Windows. - B. The log writes "message repeated 5 times" instead of repeating a line, and
count_failures.pycounts each repeated line as the number it says. - C.
count_failures.pycounts the accepted logins too. - D. Five lines failed, and the other seven were successes.
5. Try it. In auth-sample.log, how many lines record a successful login from 10.20.2.66? Use the self-check program or grep.
- A. 0
- B. 1
- C. 3
- D. 11
Answers
1. B. The limit is a hard ceiling. The build fails if the machines need more virtual CPUs than the limit allows, and only AWS can raise it, after you ask. A is wrong: AWS never raises it by itself. C would leave a half-built stack. D is wrong: every region has its own limit, often the same low one.
2. C. The security groups accept the lab's own traffic only, and the one machine with a public address, the NAT instance, accepts traffic only from inside the VPC. The dashboard reaches you through the Session Manager tunnel, not through an open port. A and B would be open ports, which this lab does not have. D is the home variant, which the course does not use.
3. A. A stopped machine costs nothing for its computing time, only for its disk. down deletes the disks too, so B is wrong. C is wrong: the machines cost money while they run, tunnel or not. D is wrong: a budget alert sends an email and stops nothing.
4. B. The program that writes the log squeezes repeated messages, so two of the five lines stand for 5 and 4 failures. count_failures.py reads that number with times(). So it counts 1 failure from the administrator and 11 from the attacker, 12 in all. A, C and D are all wrong: the table it prints has the failures and the accepted logins in separate columns.
5. B. count_failures.py prints 10.20.2.66 with 1 accepted login, and grep 'Accepted password' auth-sample.log | grep -c 10.20.2.66 prints 1. That one line is the moment the attacker got in. D is the number of failed passwords from that address, and C is the number of accepted logins from the administrator's address, 10.20.1.50.
Going deeper, for working engineers and staff engineers
You can skip this part and lose nothing you need for the next page.
Why a NAT instance, not a NAT gateway or VPC endpoints. The private machines must download Wazuh, Ubuntu and Kali packages. A NAT gateway costs $0.045 an hour, about $33 a month if it is forgotten, plus data charges. The three interface endpoints Session Manager needs cost about $0.01 an hour each, and they do not reach the package mirrors anyway. A t4g.nano NAT instance on Amazon Linux 2023, with iptables masquerading and the source/destination check turned off, as in AWS's own NAT instance guide, costs $0.0042 an hour plus its public address. It is a single point of failure, which is fine for a lab and never for production.
Why Kali runs as a container on EC2, not from the Kali AMI. Kali publishes an official Amazon machine image in AWS Marketplace, at no software charge. It can be launched only after the account accepts its terms in the Marketplace, by hand in the console. We checked: run-instances returned OptInRequired, and the Marketplace Agreement API returned UNSUPPORTED_ACTION for this offer. A template that must work for every student with one command therefore uses the official kalilinux/kali-rolling image on Docker, with --network host, so the attacker's traffic leaves from the machine's own address, 10.20.2.66. The image has no default tool set, so the template adds hydra, sshpass, nmap and the SSH client.
Three real problems we hit, and their fixes.
- The vCPU limit. Our account's limit on ordinary machines was 1, so the first build failed with "You have requested more vCPU capacity than your current vCPU limit of 1 allows". That is why
quotais step 3. - A probe that waited forever. The Windows server's start-up script waited until
https://packages.wazuh.comanswered, and that address answers403 Forbiddenon purpose, so the script never moved on. On Linux,curl -streats any answer as success, which hid the same mistake. The template now waits for a file that exists,key/GPG-KEY-WAZUH, withcurl -sf. We then ran the corrected Windows script, and Sysmon and the agent came up. - A hostname that changed too late. The practice server is renamed
linux-server-01while it starts, after the log writer has already read the old name, so/var/log/auth.logsaidip-10-20-1-20. The template now restarts the log writer after the rename.
What the agent reads on Ubuntu 24.04. Wazuh's agent 4.14.10 reads the systemd journal on this system, not /var/log/auth.log. That is why auth-sample.log, which the log writer squeezes, shows 5 failed-password lines, while Wazuh saw all 11. In our first attempt at the shift, the journal reader also skipped one login at the moment the journal rotated, and its own log said so. Part 2 teaches how to notice a gap like that.
How the template keeps a deliberately weak server harmless. The practice server is meant to be broken into, so everything it can reach was kept small:
- Its role can only talk to Session Manager. The template uses its own short policy instead of AWS's usual
AmazonSSMManagedInstanceCore, because that one can also read Parameter Store, and an attacker on the practice server could have read those values through the machine's role. - Every machine requires IMDSv2, the version of the instance metadata service that needs a session token, which blocks the simplest ways of stealing a role's credentials from inside a machine.
- The lab password is a template parameter, and it is visible to anyone who can read EC2 settings in your account, because it is part of the practice server's start-up script. That is acceptable for a password whose whole purpose is to be guessed, and it is one more reason never to reuse it anywhere else.
./lab.sh passwordreads the Wazuh admin password through Run Command, and AWS keeps Run Command output in your account's command history for a while. In a real SOC you would keep it in Secrets Manager instead; for a lab that only you can reach and that you delete at the end, the simpler way is fine.
Pinned versions. The course is pinned to Wazuh 4.14.10. The template installs the agent at exactly 4.14.10-1 and holds it there, and it switches the Wazuh package source off after the server installs, as Wazuh's quickstart advises. Wazuh 5.0 was still a release candidate when this page was written, and it changes the alert index layout, so do not mix versions inside one lab.
Your keys are your bill. API keys and AWS access keys are billed per use, and a leaked key is spent by someone else within hours. Use a separate IAM user for the course, a spending alert on the account, and .env files kept out of Git, which every zip's .gitignore already does.
Words from this page
| Word | What it means |
|---|---|
| terminal | the window where you type commands, such as the one inside VS Code |
| AWS CLI | Amazon's command-line tool, which the helper script uses to build, reach and delete the lab |
| EC2 instance | a virtual machine that AWS runs for you, billed while it runs |
| VPC | a virtual private cloud: your own private network inside AWS |
| subnet, private subnet | a smaller part of a VPC; a private subnet has no route in from the internet |
| security group | a firewall around one machine that lists exactly which traffic may come in |
| Session Manager | the AWS service that opens a shell or a tunnel to a machine from the inside, with no open port |
| tunnel | a private connection that Session Manager carries from your computer to one port on a lab machine |
| NAT instance | a small machine that lets private machines reach out, and lets nothing in |
| CloudFormation, stack | the AWS service that builds every piece from one template, and the set of pieces it built |
| vCPU limit | how many virtual CPUs of ordinary machines your account may run at once in one region |
| Kali Linux | a free Linux toolkit for security testing |
| Sysmon | Microsoft's free tool that records process starts, network connections and file changes on Windows |
| API key | a secret that lets your program use a paid service, such as a model, and bills your account |
.env | a small file in a project folder that holds secrets such as an API key, never shared or committed |
What to keep
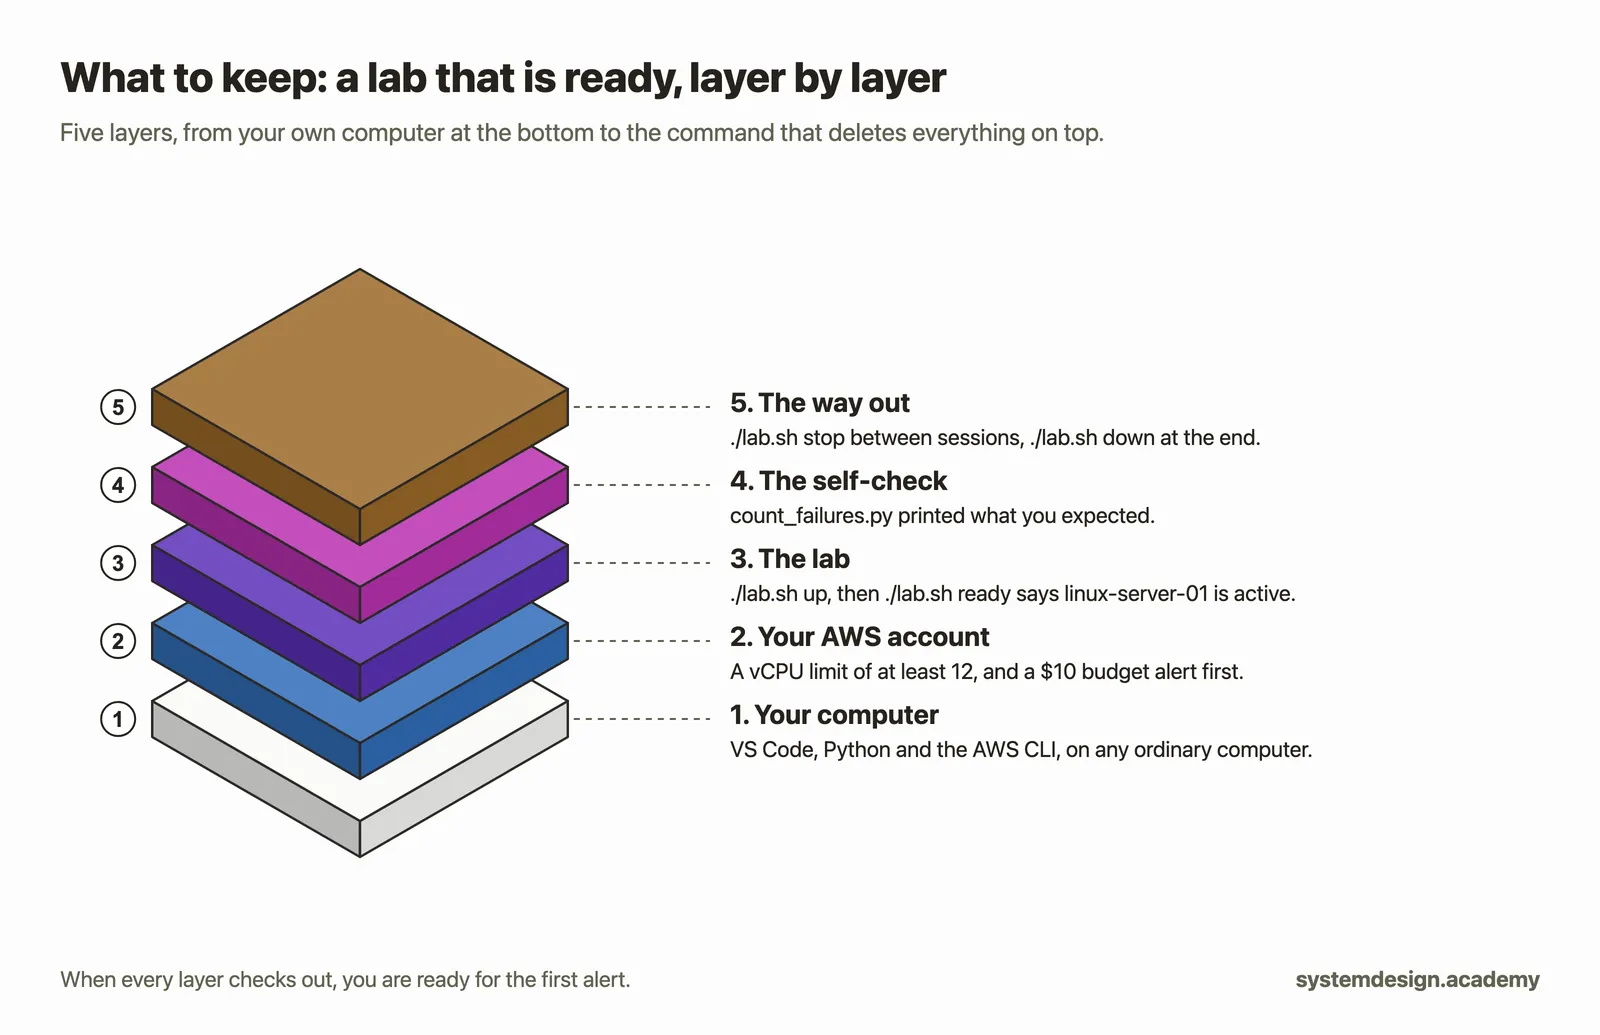
You need the terminal and a little Python, and nothing about security, AI or the cloud. Install the AWS CLI, the Session Manager plugin, Python, uv, VS Code and Git, and check each with one command. Then check your account's machine limit, set a $10 budget alert, and build the lab with ./lab.sh up: five machines in a private network that nothing on the internet can reach, for about 18 cents an hour. Stop it between sessions, and delete all of it with ./lab.sh down, which proves that nothing is left.
Download the code for this page: lesson-before.zip.
The next free page, "What a security operations centre does all day", reads the alerts of this lab's shift. The page "Your lab's first alert, checked end to end" will walk through the attack on your own lab in detail; until it is published, step 7b above runs the same attack.
The code
check_setup.py
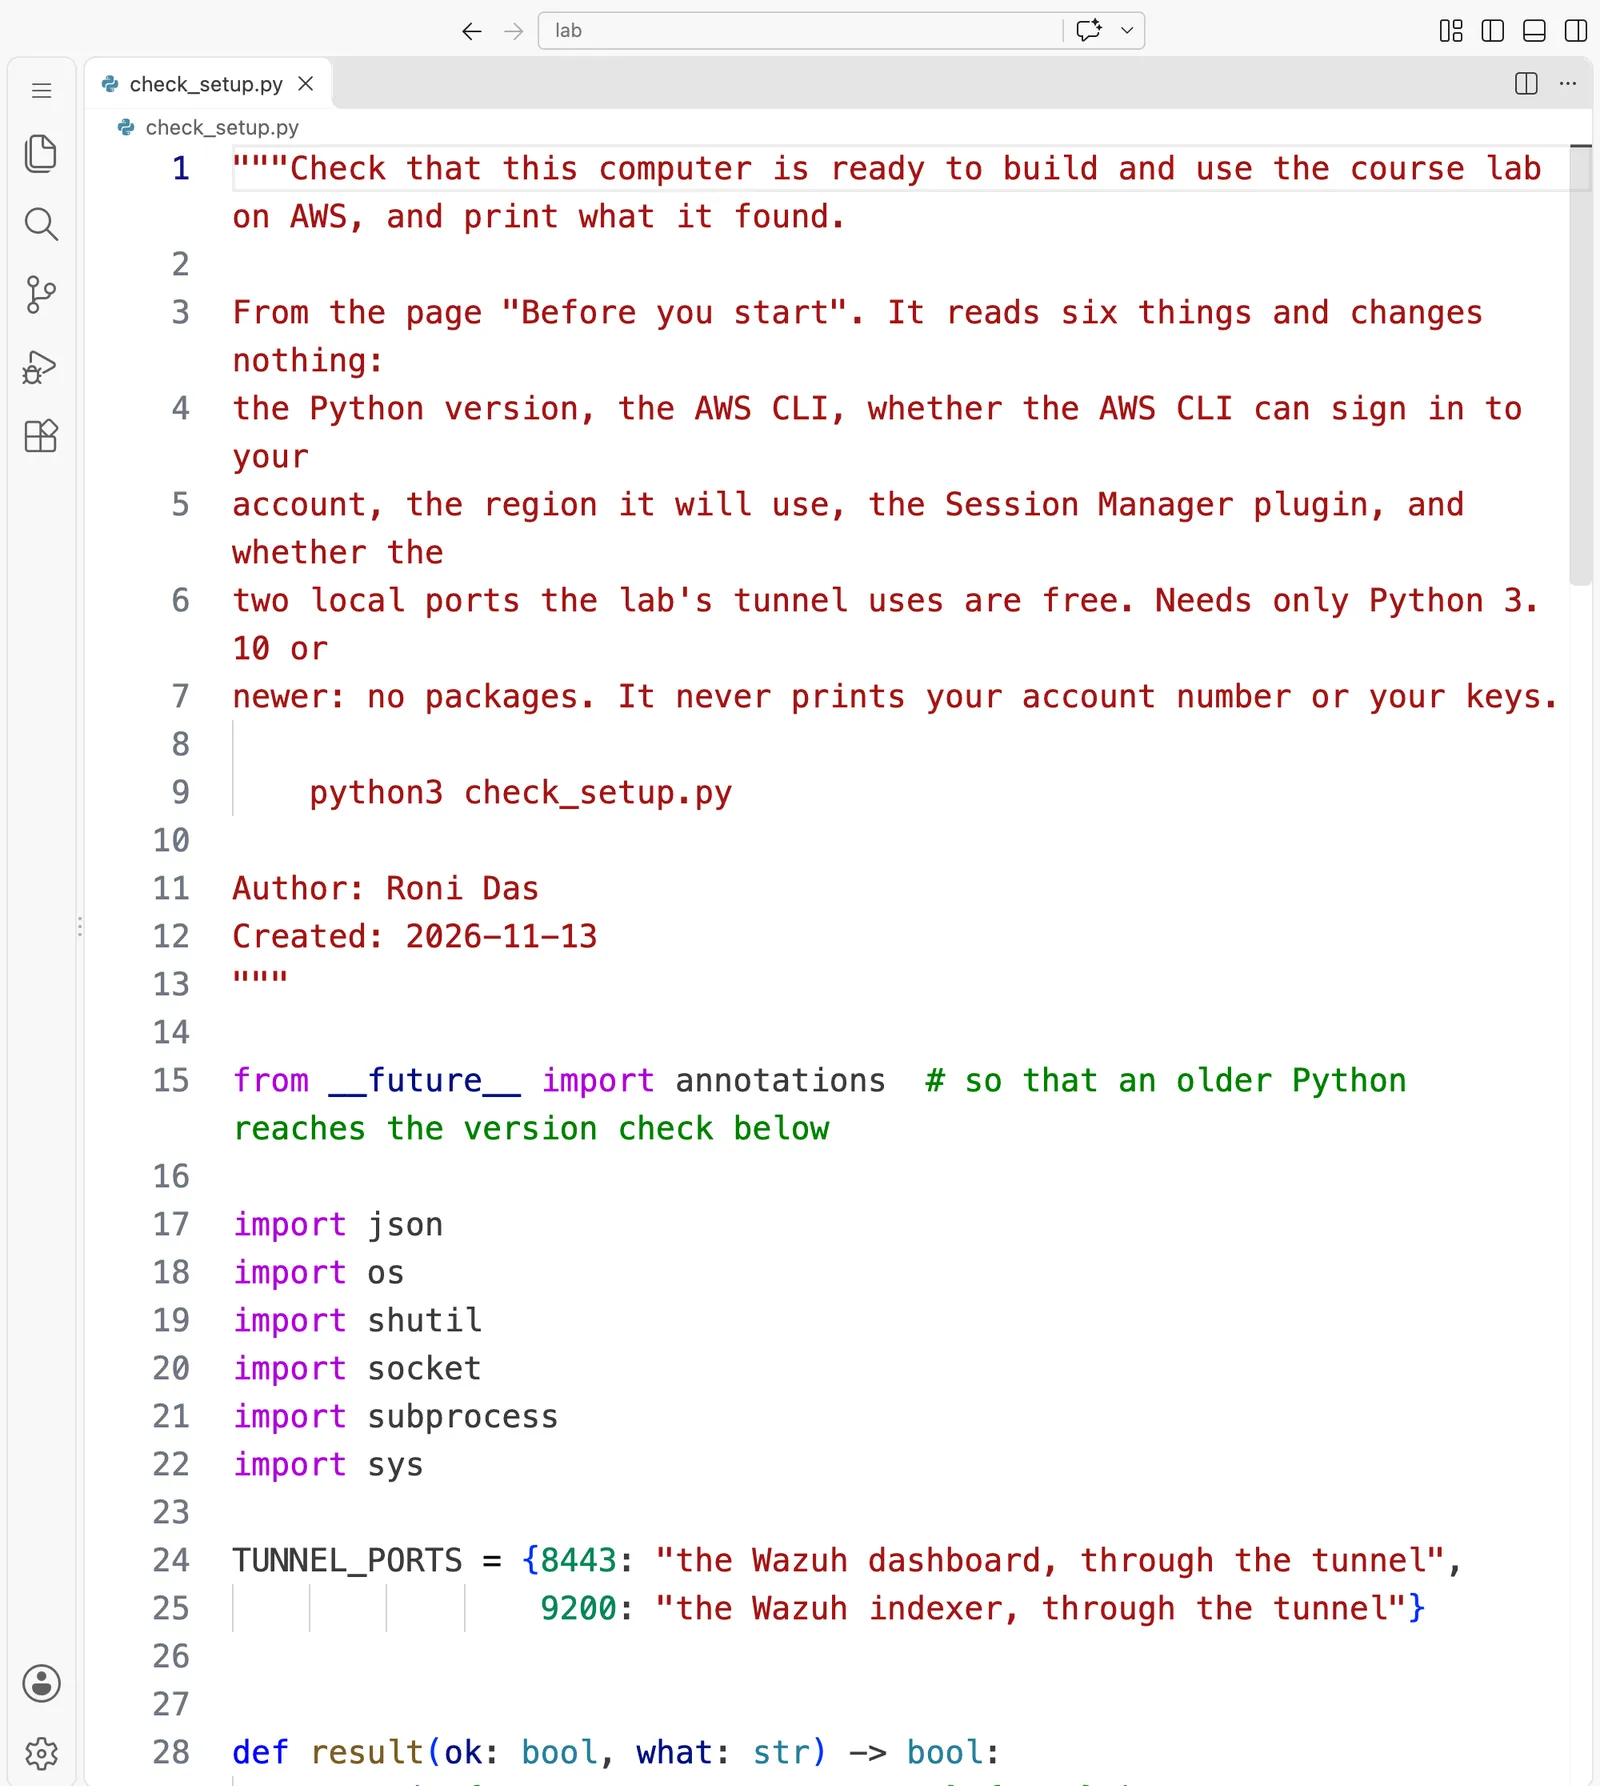
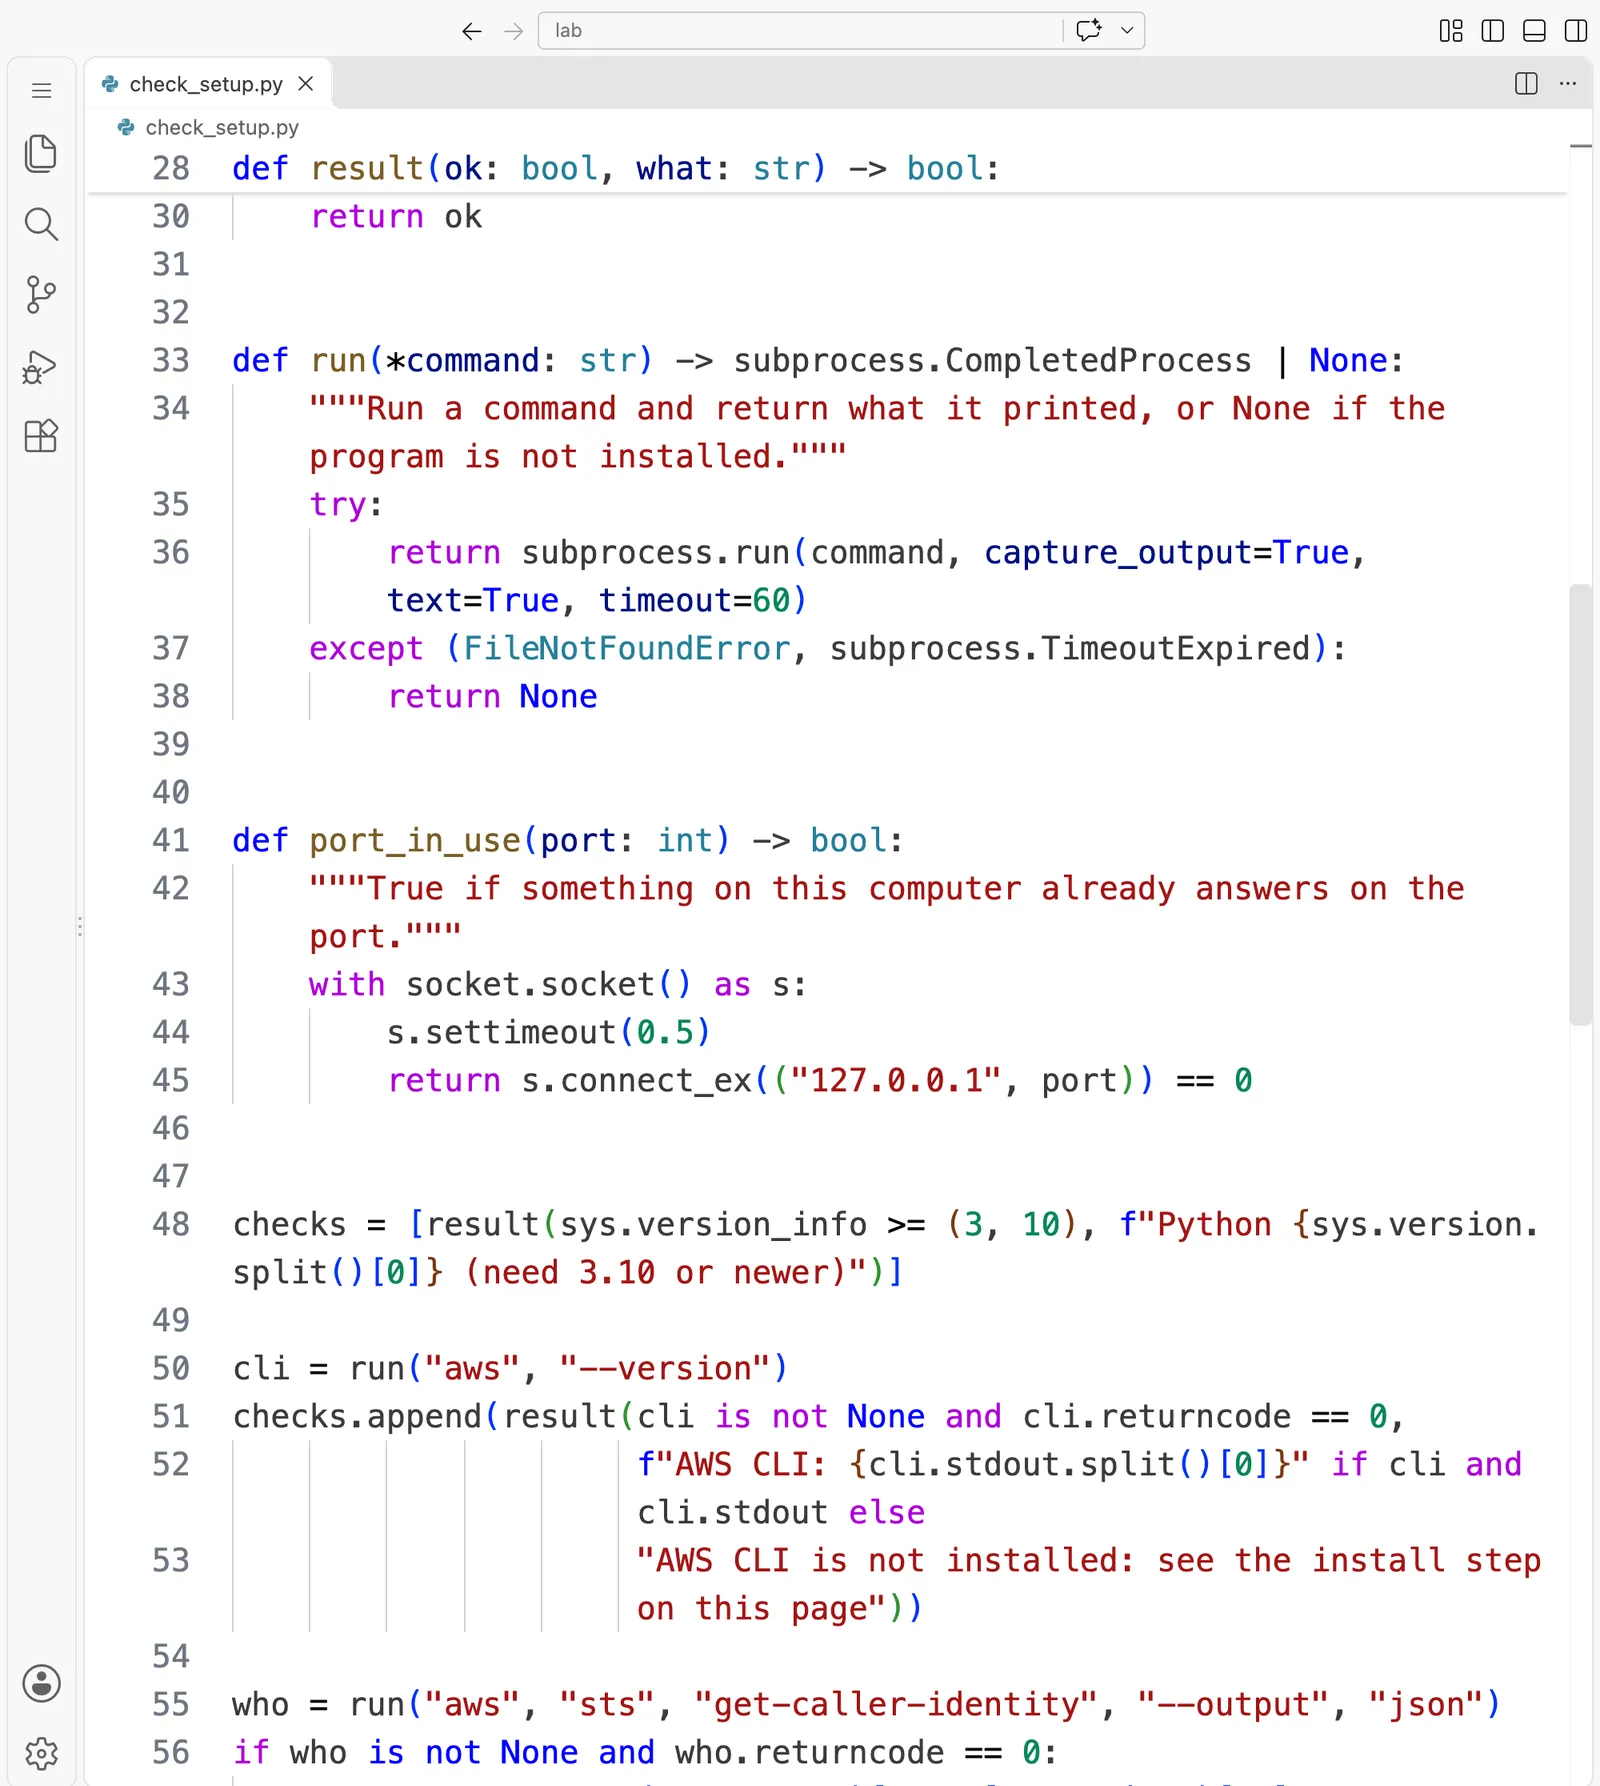
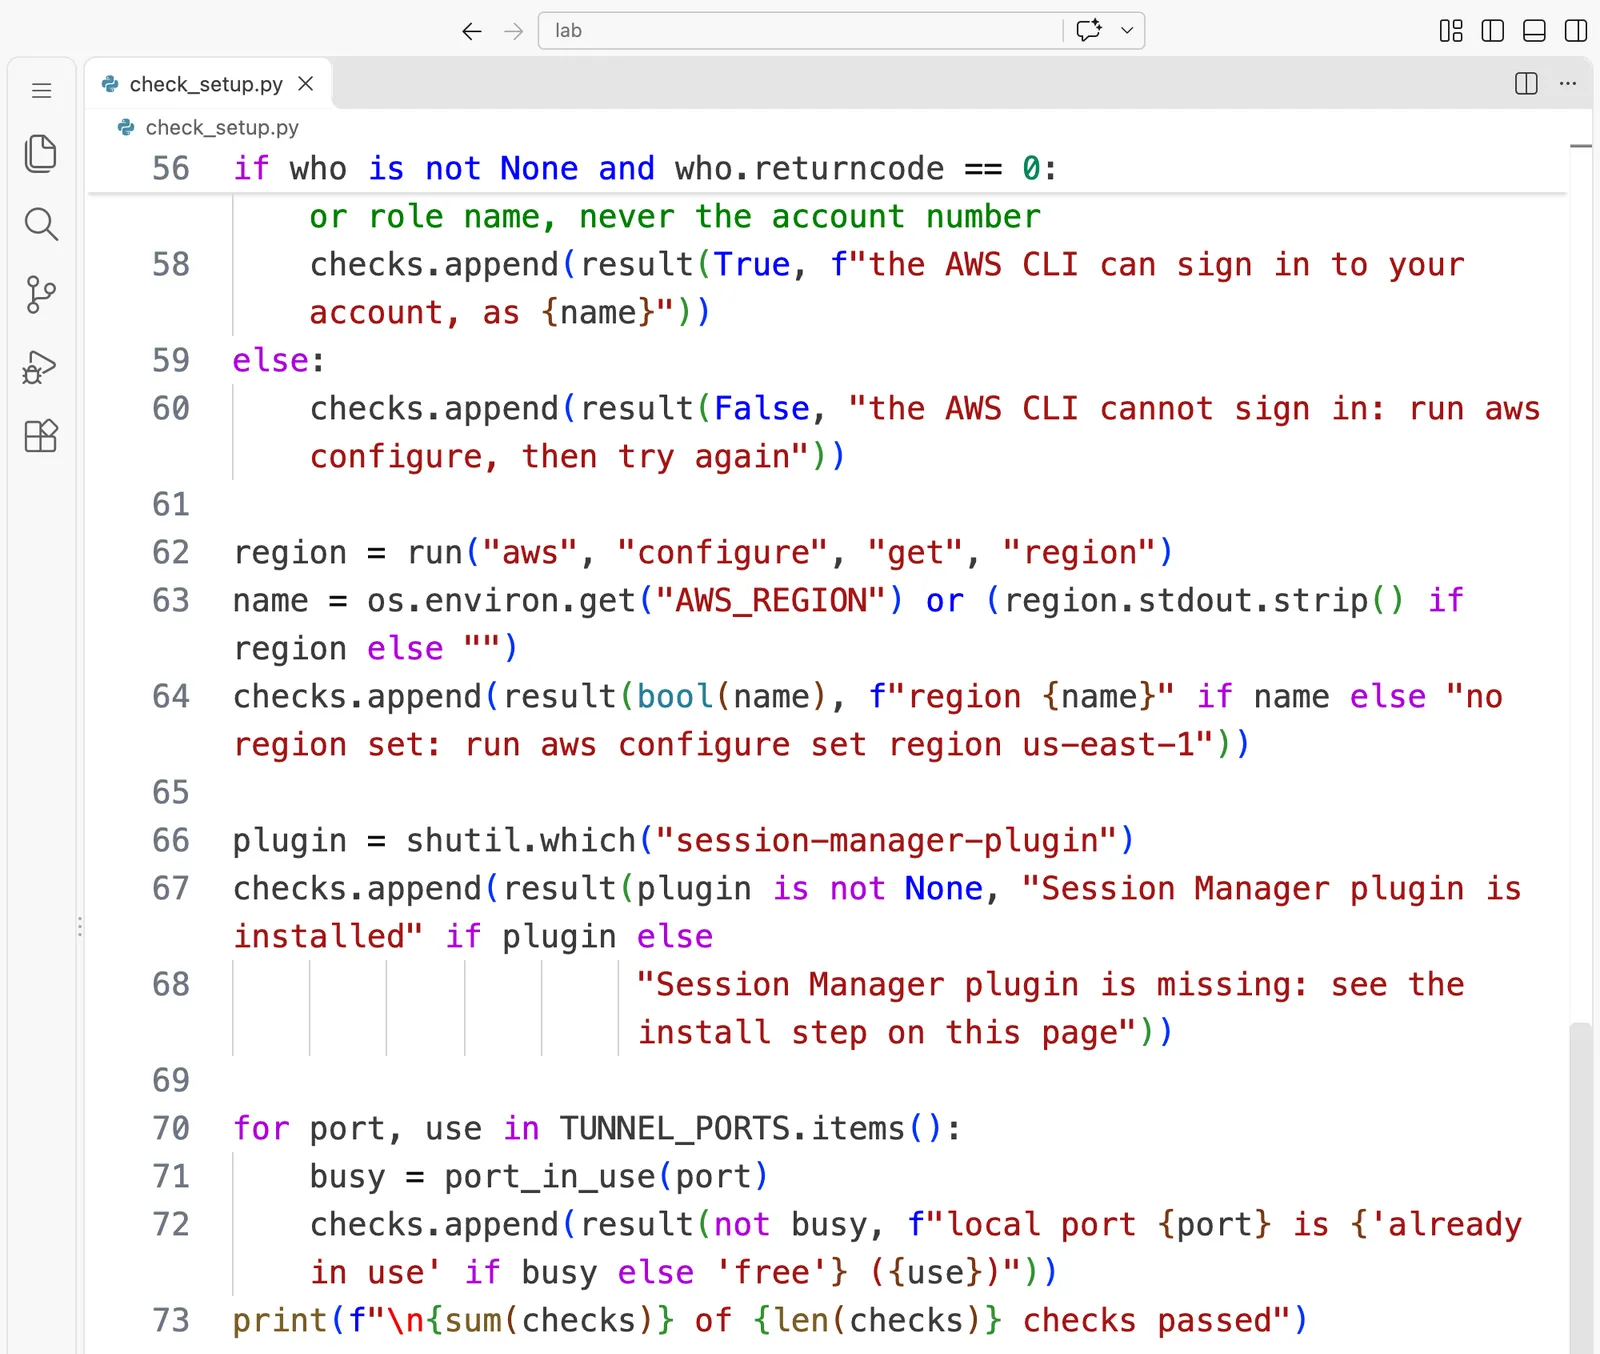
"""Check that this computer is ready to build and use the course lab on AWS, and print what it found.

From the page "Before you start". It reads six things and changes nothing:
the Python version, the AWS CLI, whether the AWS CLI can sign in to your
account, the region it will use, the Session Manager plugin, and whether the
two local ports the lab's tunnel uses are free. Needs only Python 3.10 or
newer: no packages. It never prints your account number or your keys.

    python3 check_setup.py

Author: Roni Das
Created: 2026-11-13
"""

from __future__ import annotations  # so that an older Python reaches the version check below

import json
import os
import shutil
import socket
import subprocess
import sys

TUNNEL_PORTS = {8443: "the Wazuh dashboard, through the tunnel",
                9200: "the Wazuh indexer, through the tunnel"}


def result(ok: bool, what: str) -> bool:
    print(f"{'OK  ' if ok else 'FIX '} {what}")
    return ok


def run(*command: str) -> subprocess.CompletedProcess | None:
    """Run a command and return what it printed, or None if the program is not installed."""
    try:
        return subprocess.run(command, capture_output=True, text=True, timeout=60)
    except (FileNotFoundError, subprocess.TimeoutExpired):
        return None


def port_in_use(port: int) -> bool:
    """True if something on this computer already answers on the port."""
    with socket.socket() as s:
        s.settimeout(0.5)
        return s.connect_ex(("127.0.0.1", port)) == 0


checks = [result(sys.version_info >= (3, 10), f"Python {sys.version.split()[0]} (need 3.10 or newer)")]

cli = run("aws", "--version")
checks.append(result(cli is not None and cli.returncode == 0,
                     f"AWS CLI: {cli.stdout.split()[0]}" if cli and cli.stdout else
                     "AWS CLI is not installed: see the install step on this page"))

who = run("aws", "sts", "get-caller-identity", "--output", "json")
if who is not None and who.returncode == 0:
    name = json.loads(who.stdout)["Arn"].split(":")[-1]  # the user or role name, never the account number
    checks.append(result(True, f"the AWS CLI can sign in to your account, as {name}"))
else:
    checks.append(result(False, "the AWS CLI cannot sign in: run aws configure, then try again"))

region = run("aws", "configure", "get", "region")
name = os.environ.get("AWS_REGION") or (region.stdout.strip() if region else "")
checks.append(result(bool(name), f"region {name}" if name else "no region set: run aws configure set region us-east-1"))

plugin = shutil.which("session-manager-plugin")
checks.append(result(plugin is not None, "Session Manager plugin is installed" if plugin else
                     "Session Manager plugin is missing: see the install step on this page"))

for port, use in TUNNEL_PORTS.items():
    busy = port_in_use(port)
    checks.append(result(not busy, f"local port {port} is {'already in use' if busy else 'free'} ({use})"))
print(f"\n{sum(checks)} of {len(checks)} checks passed")
lab.sh
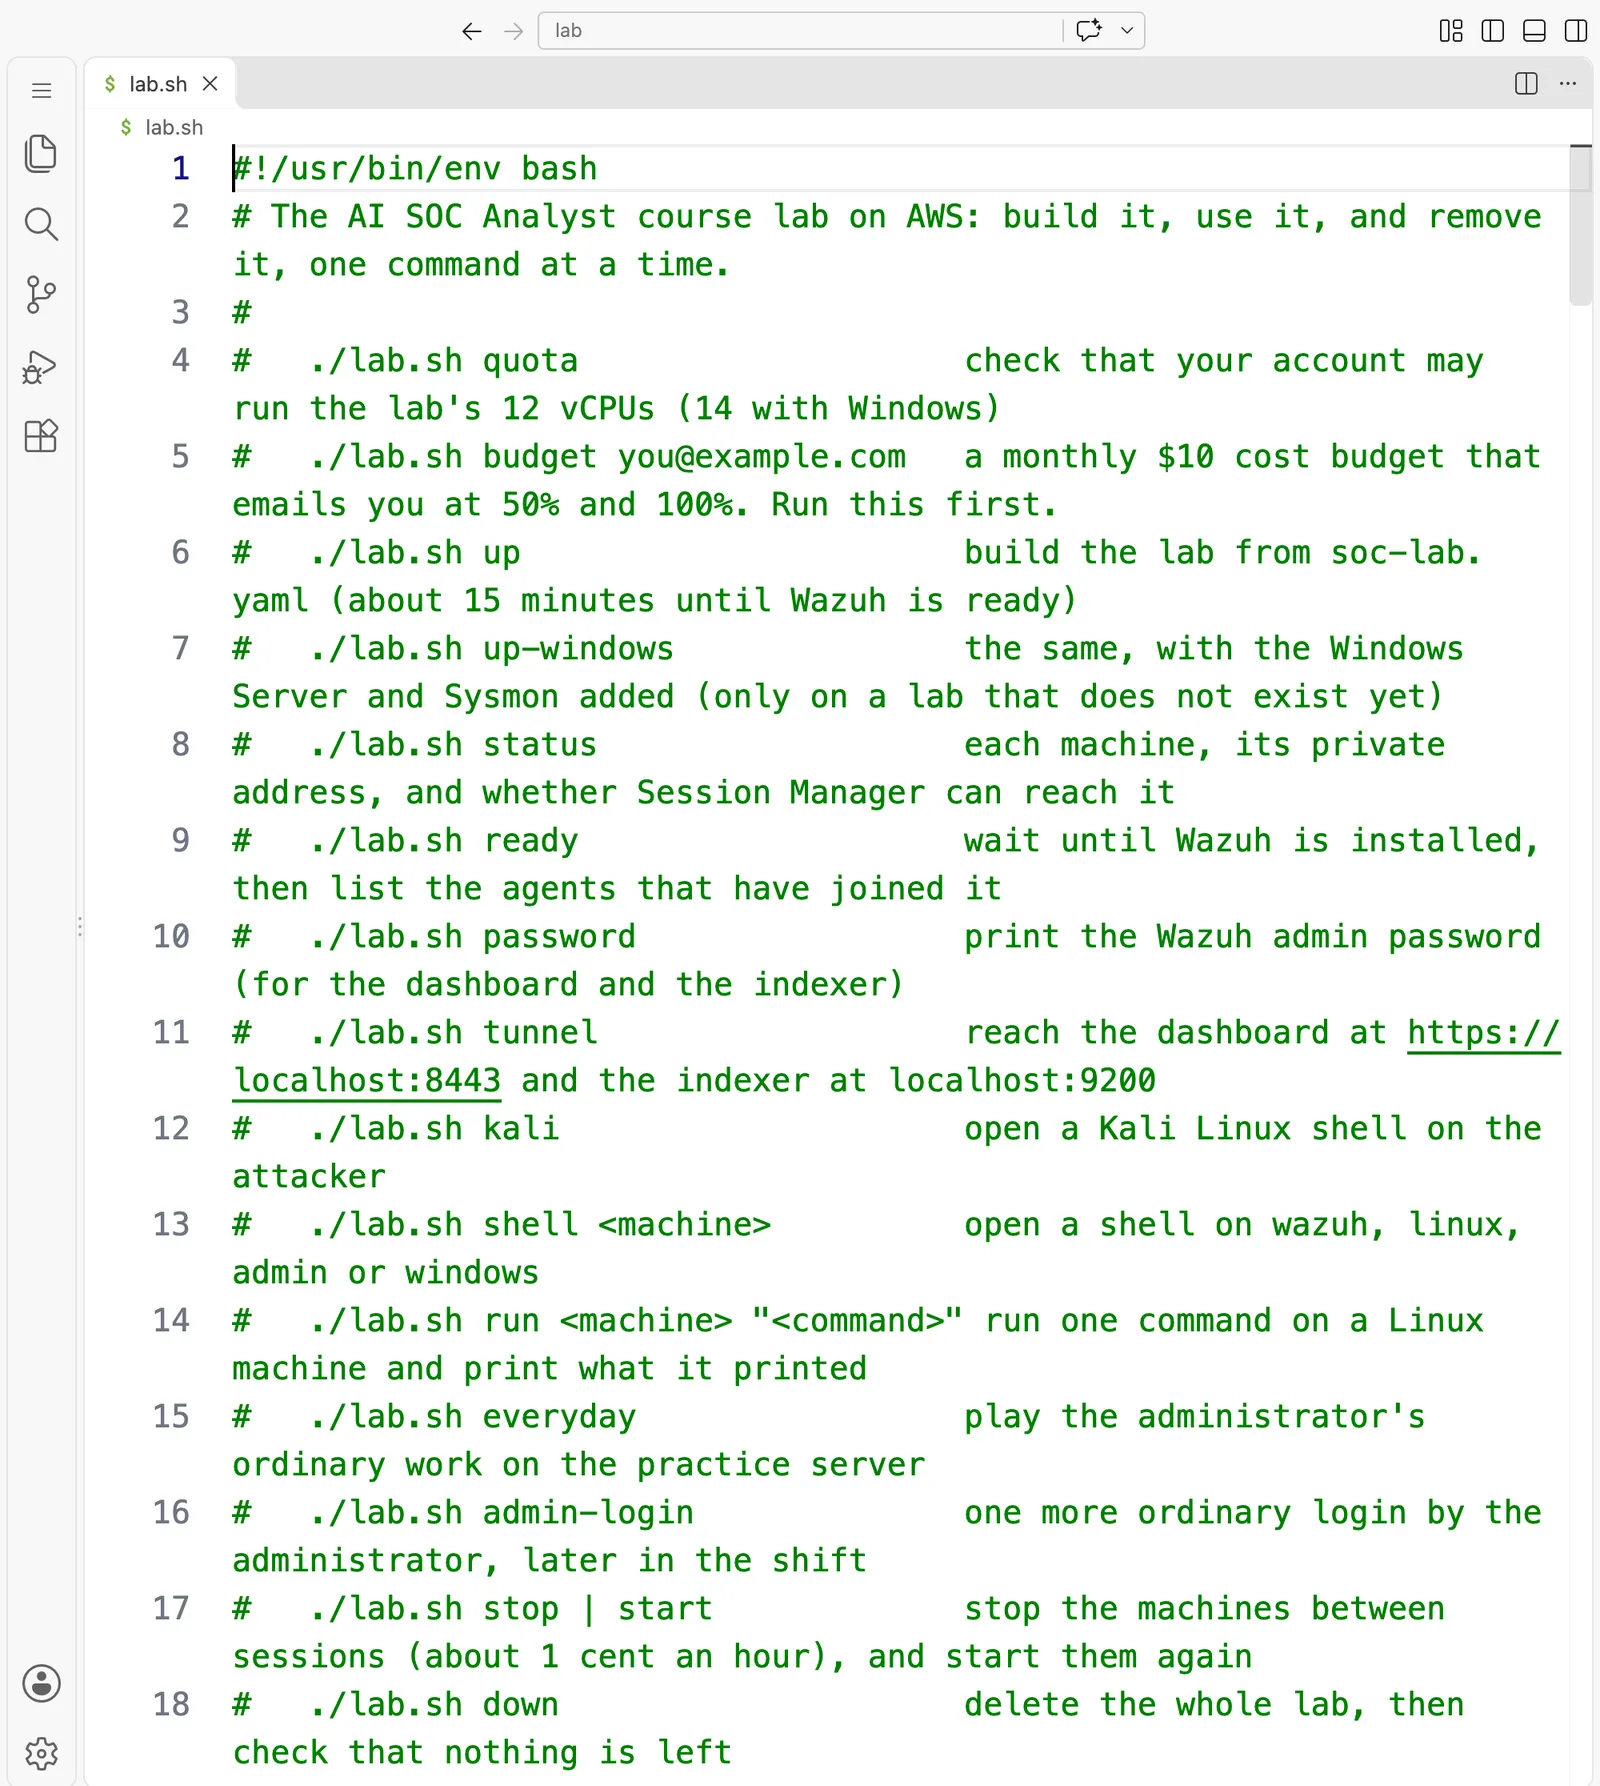
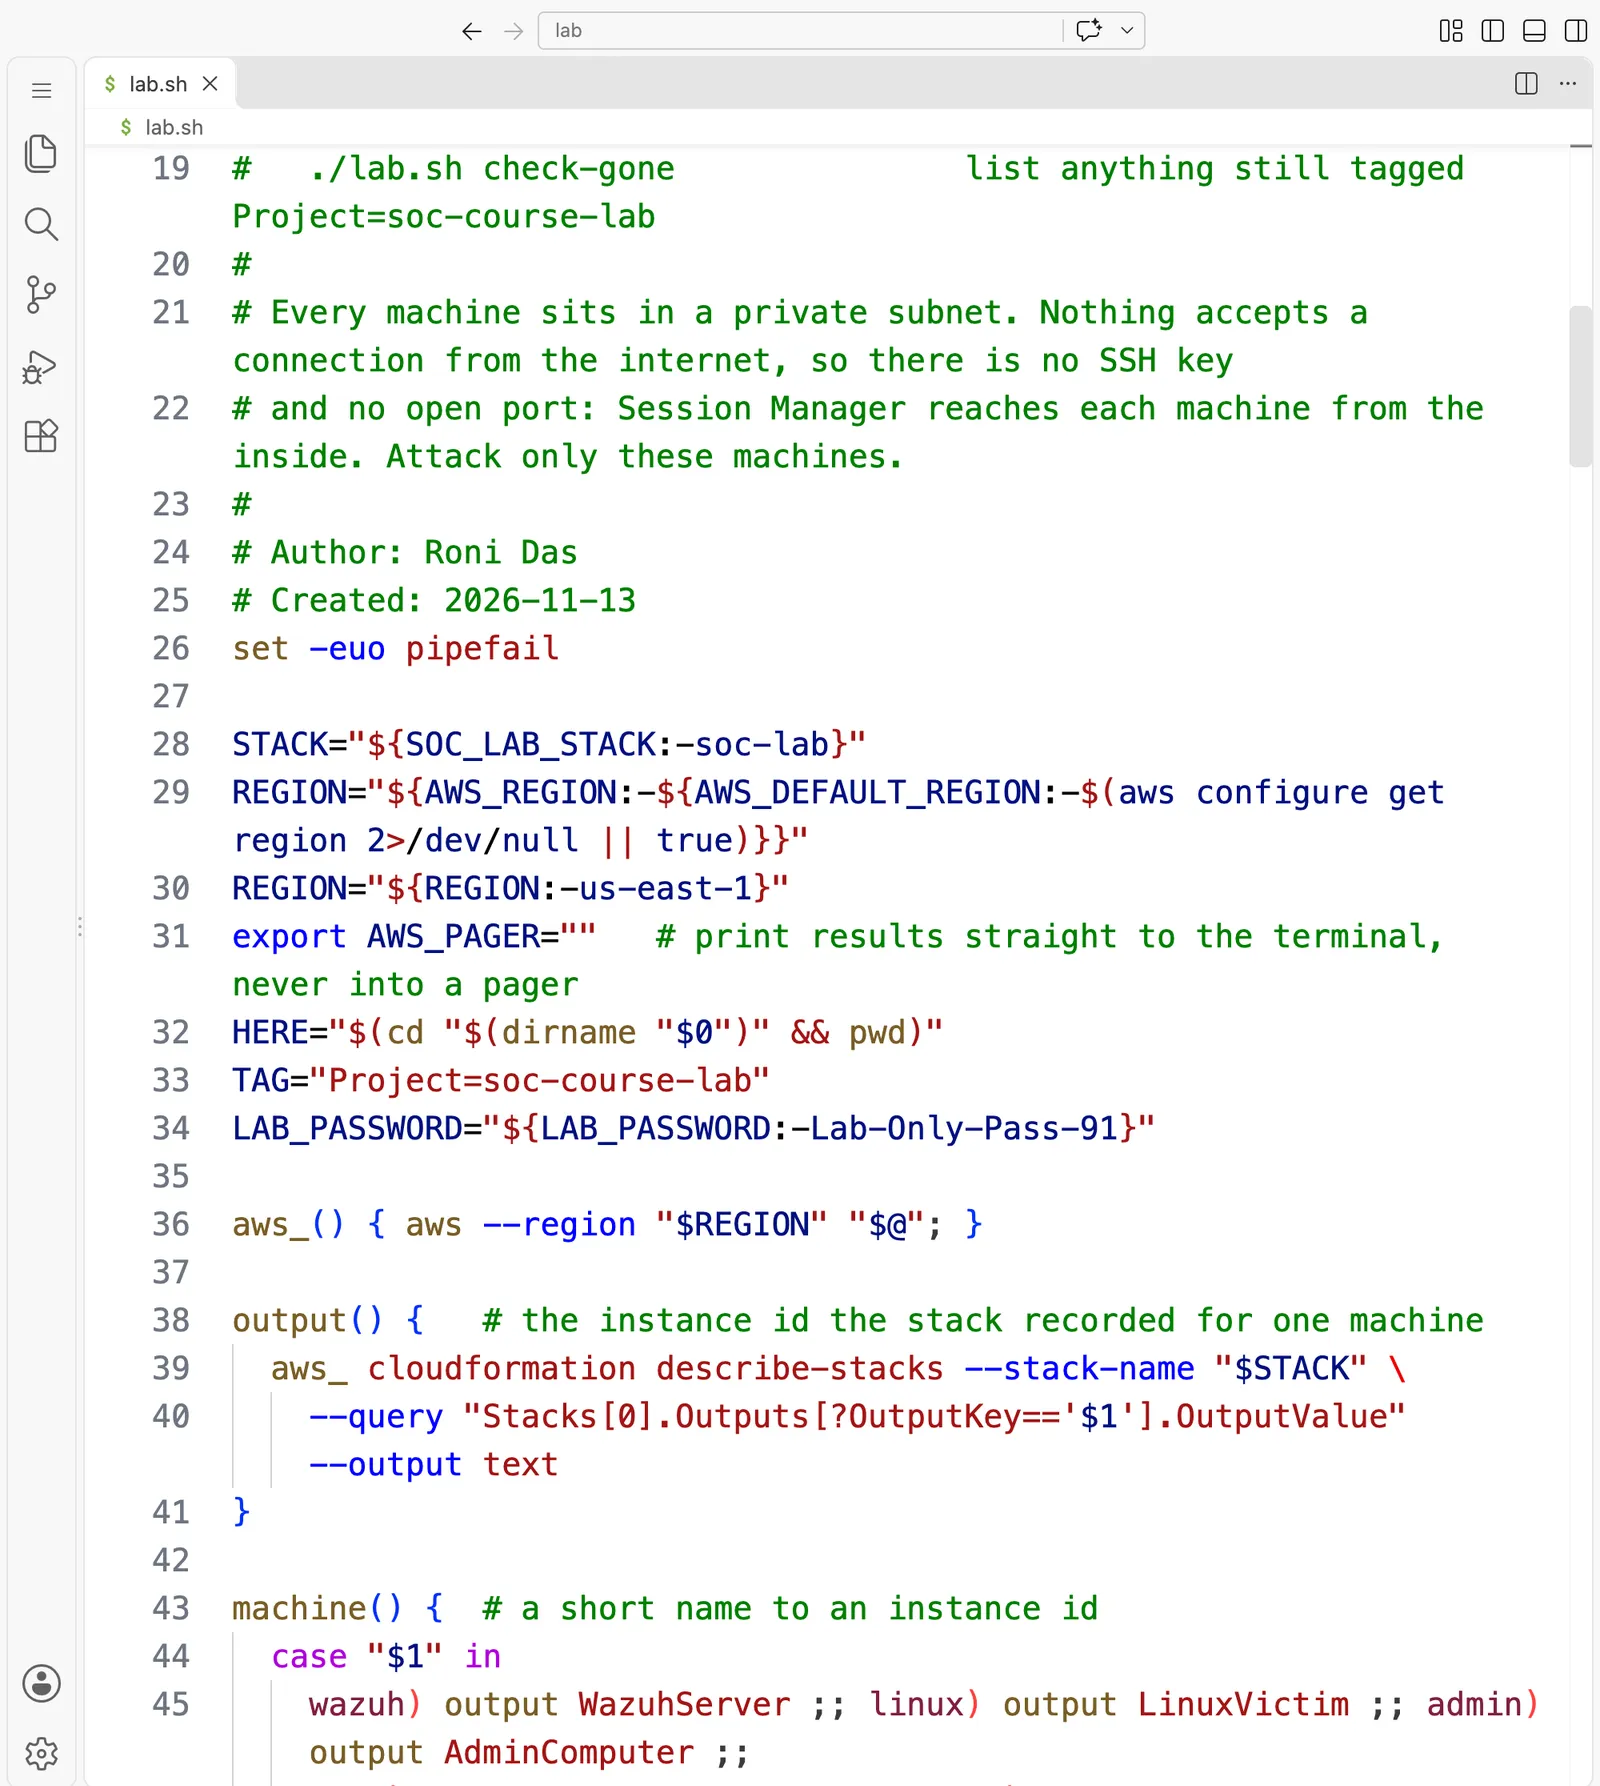
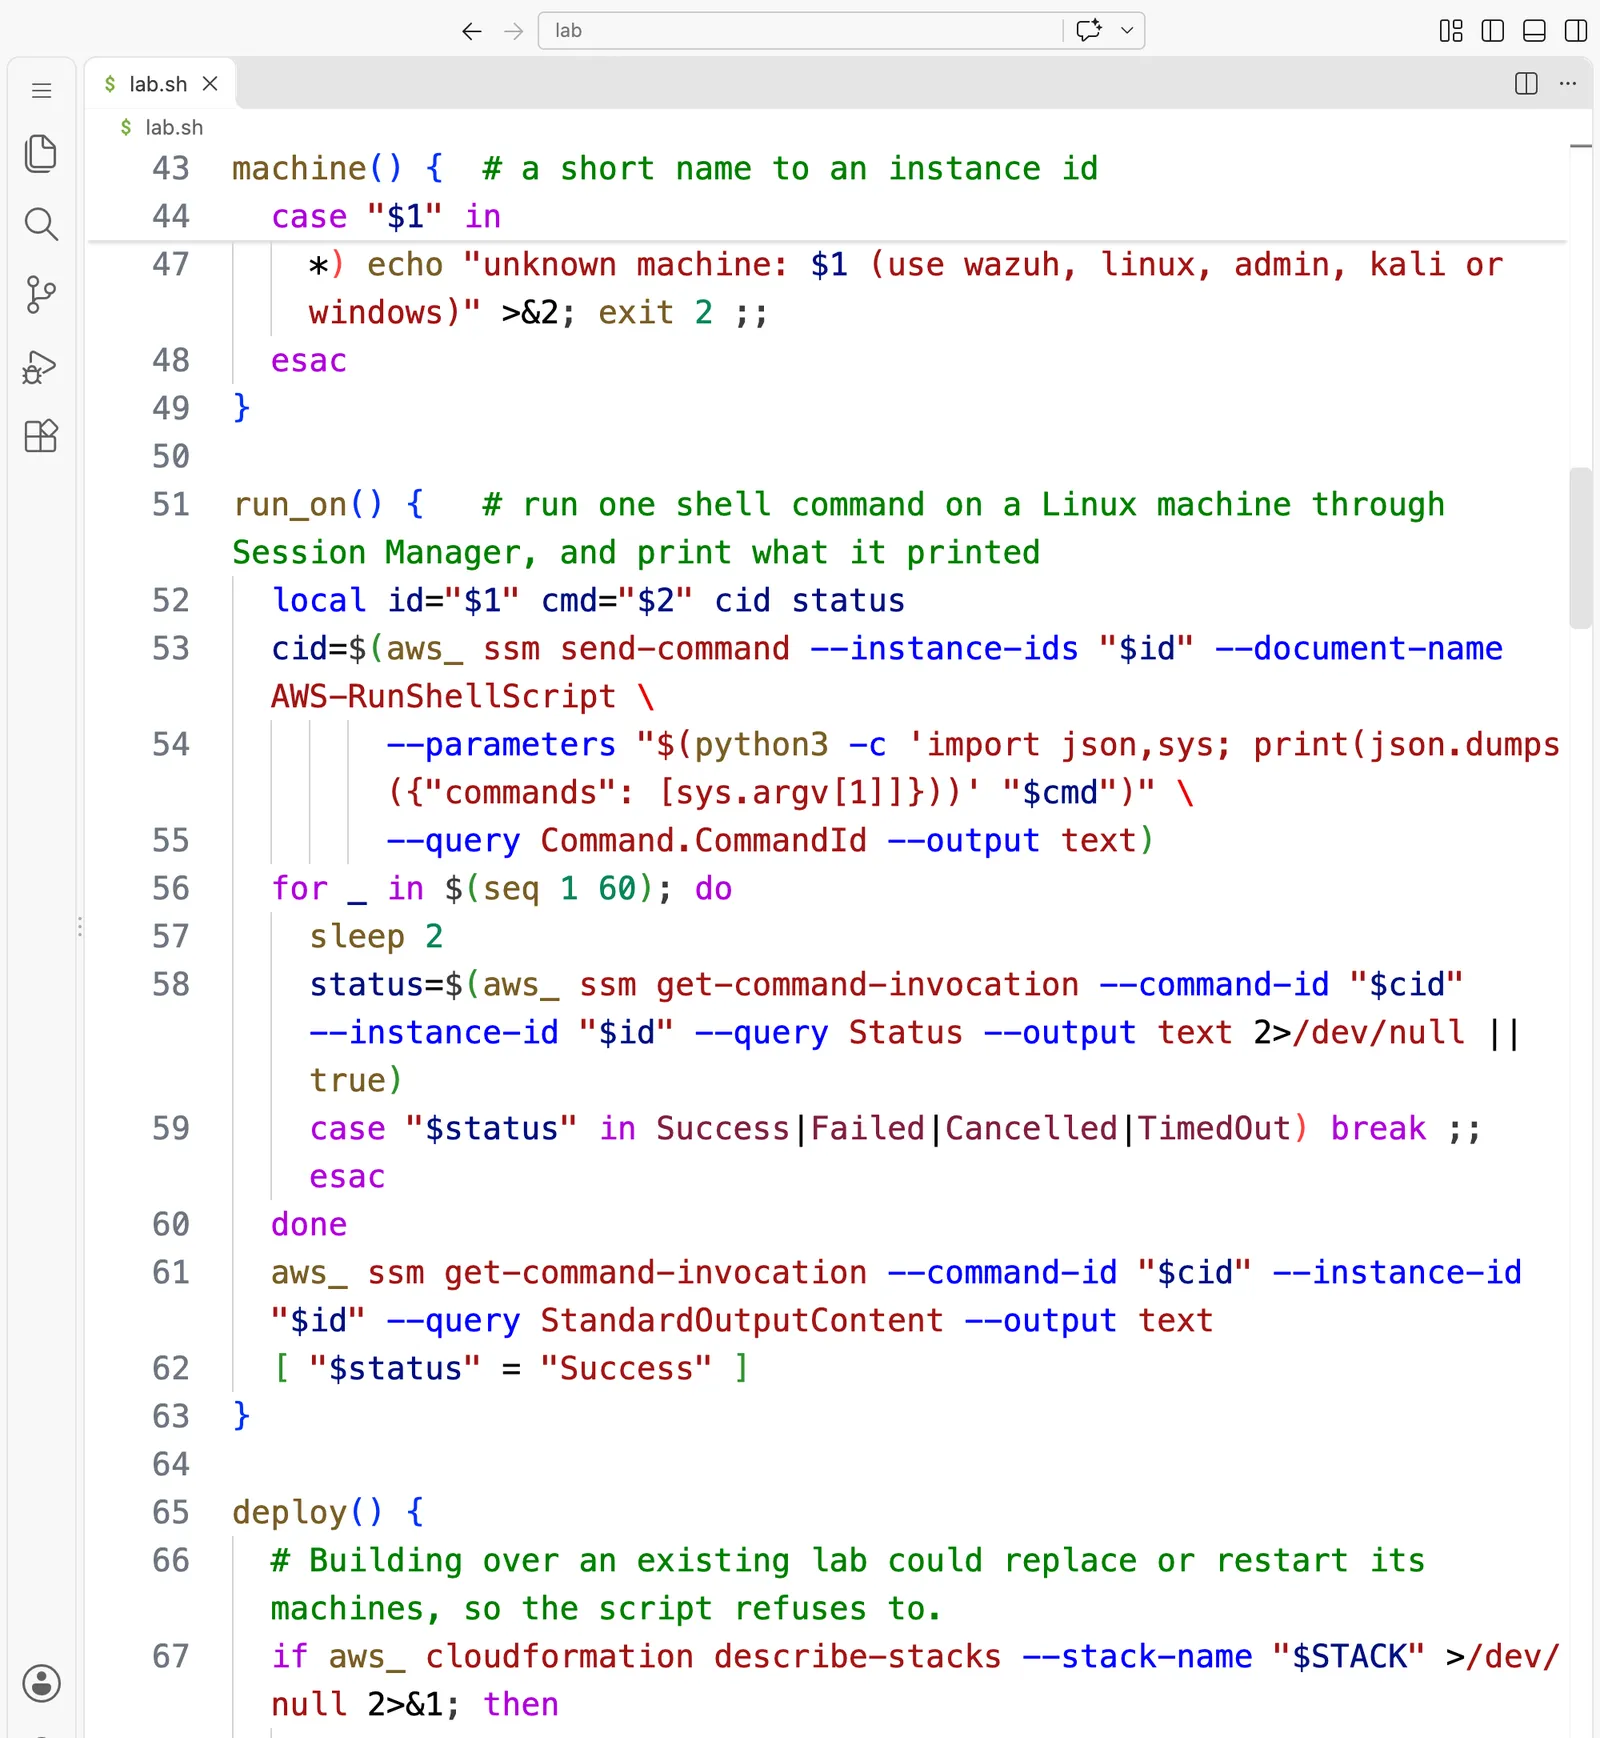
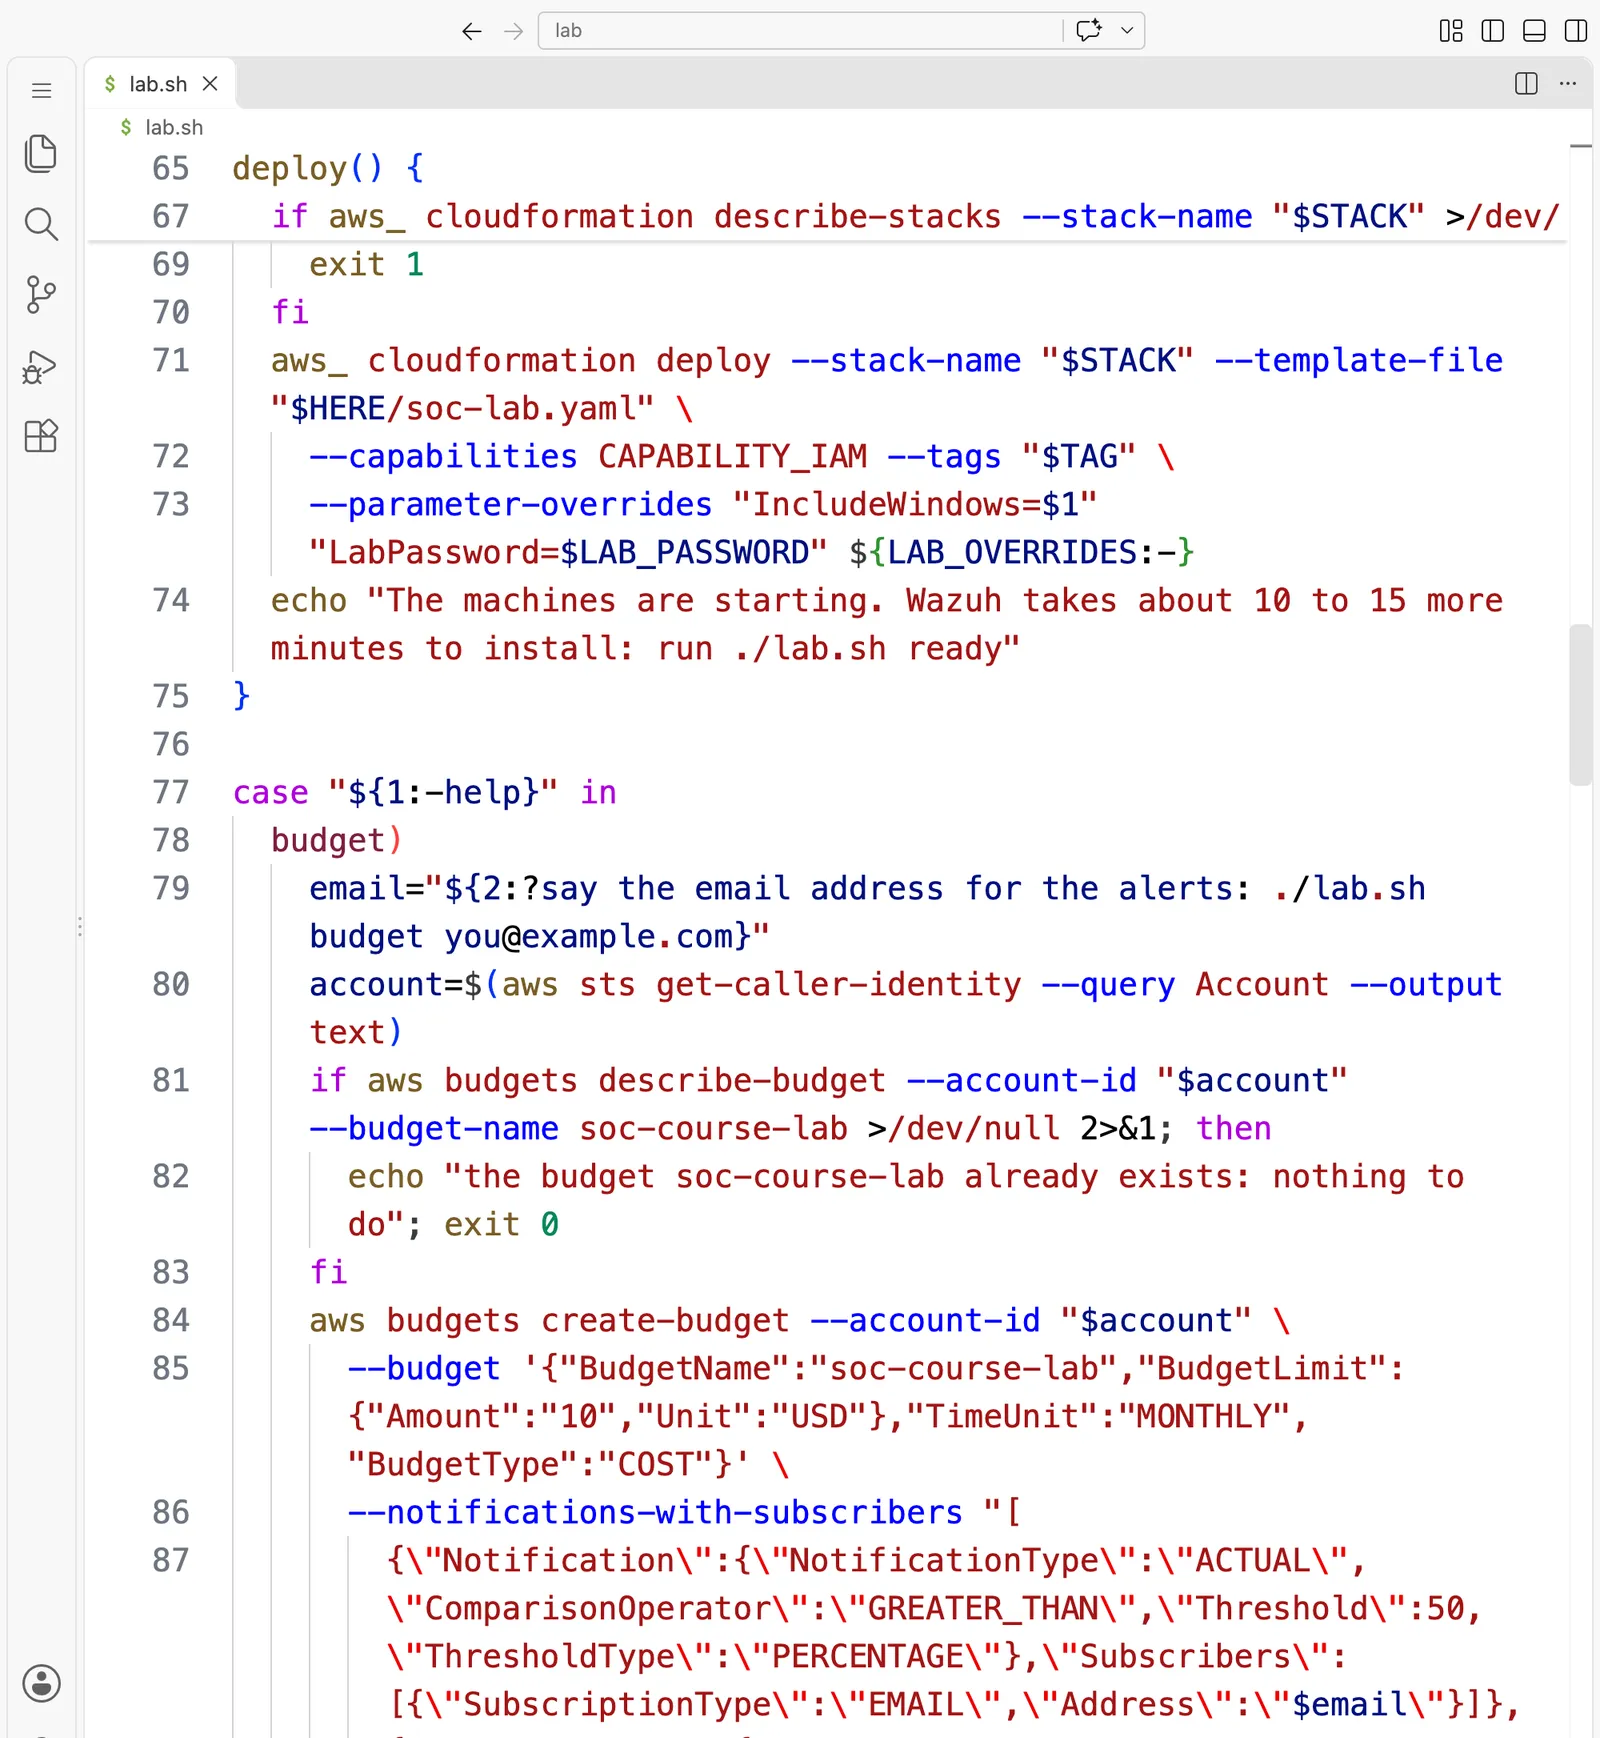
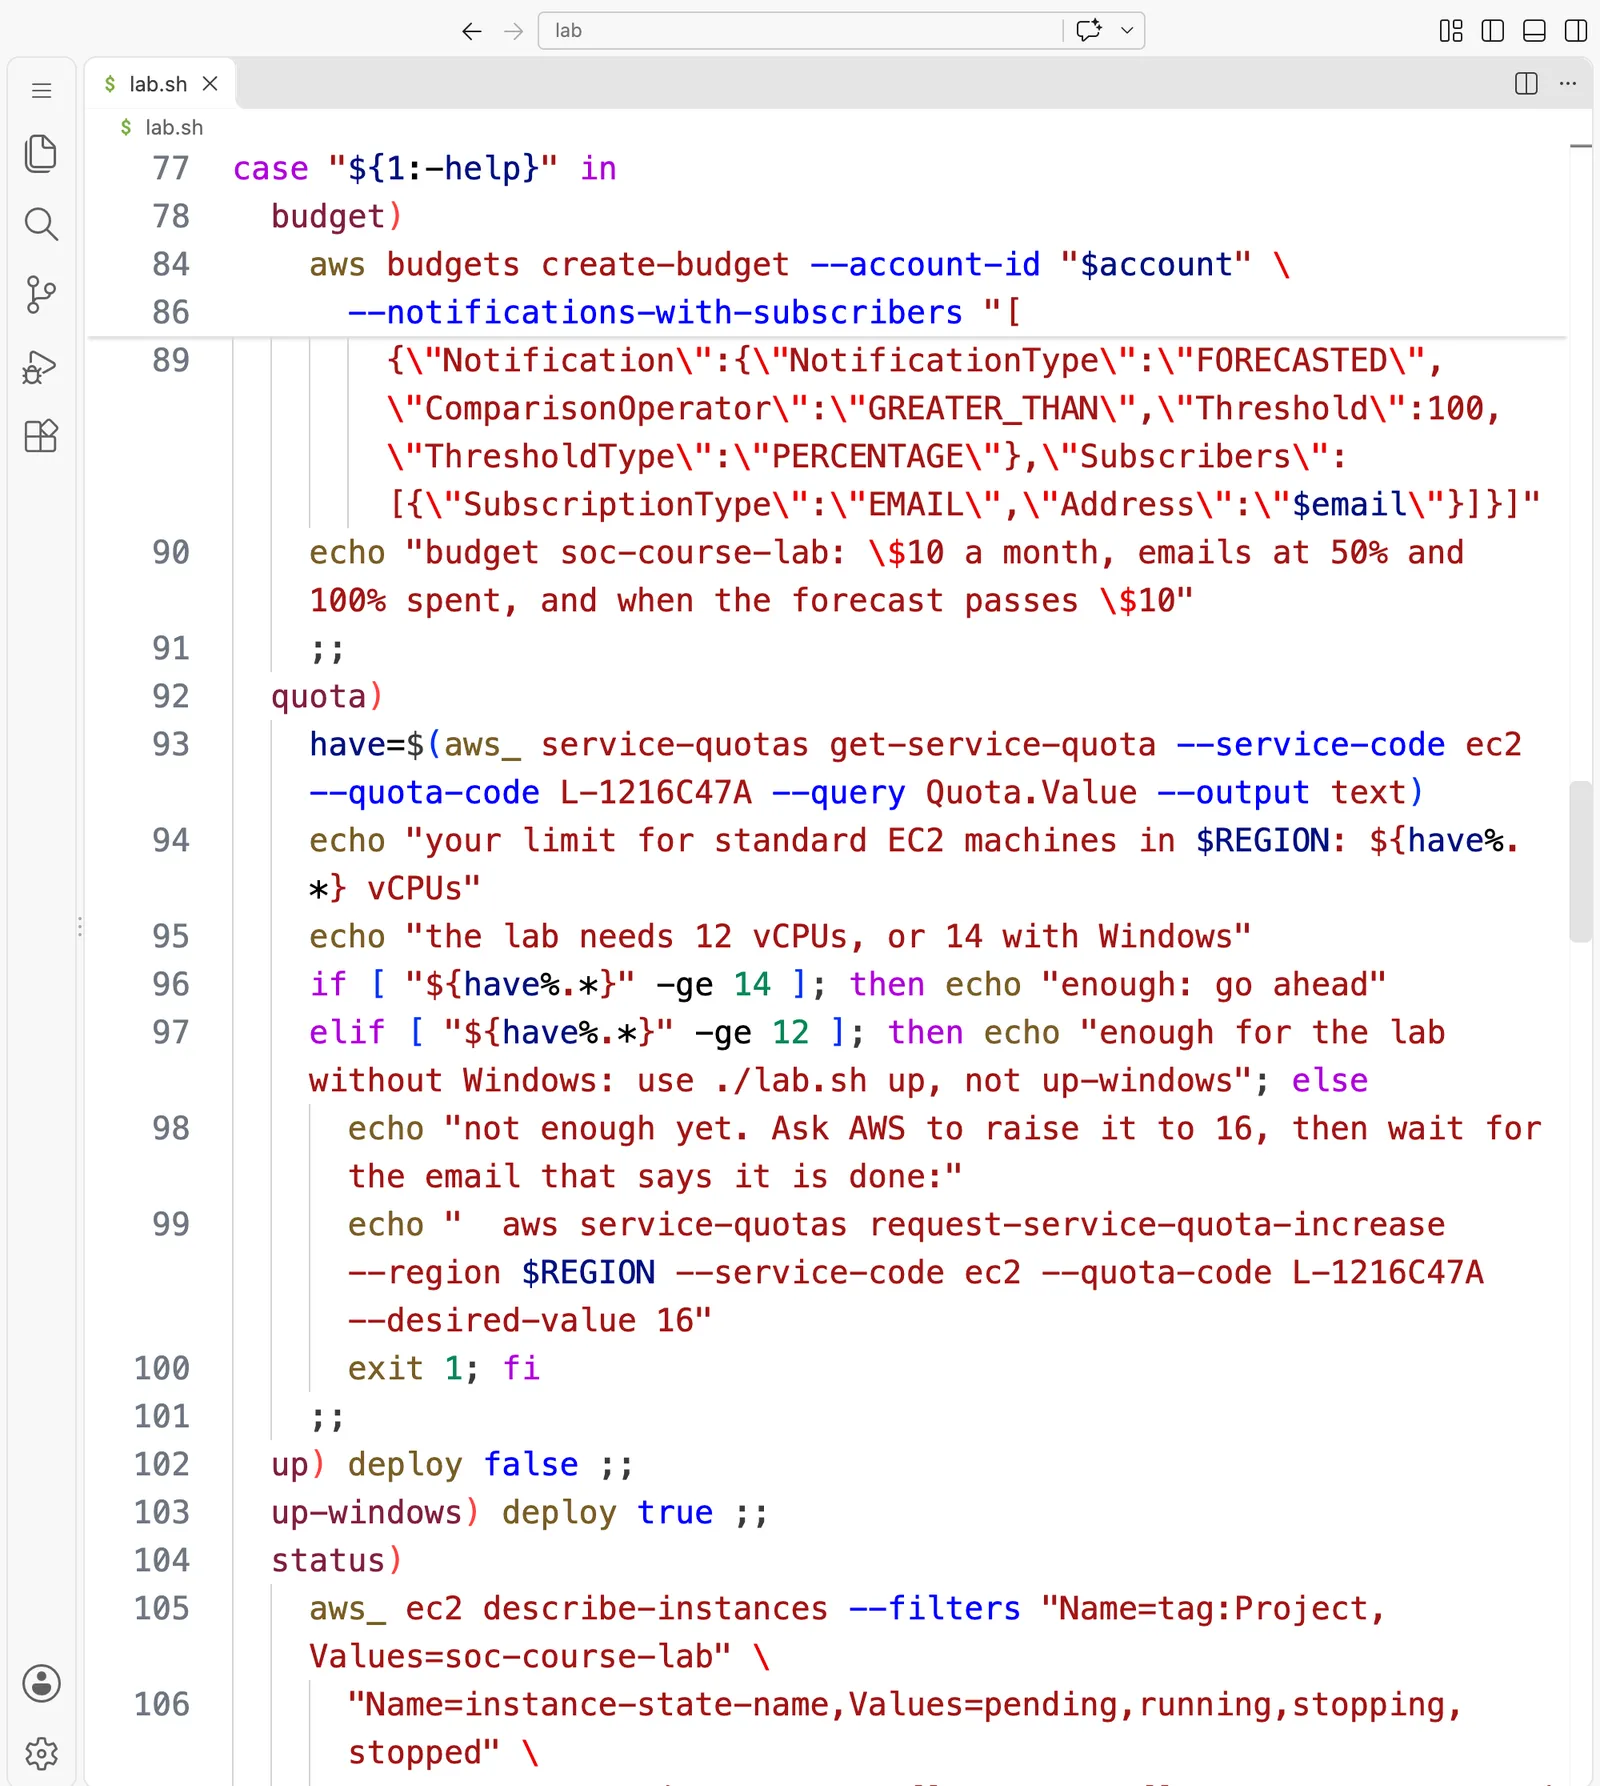
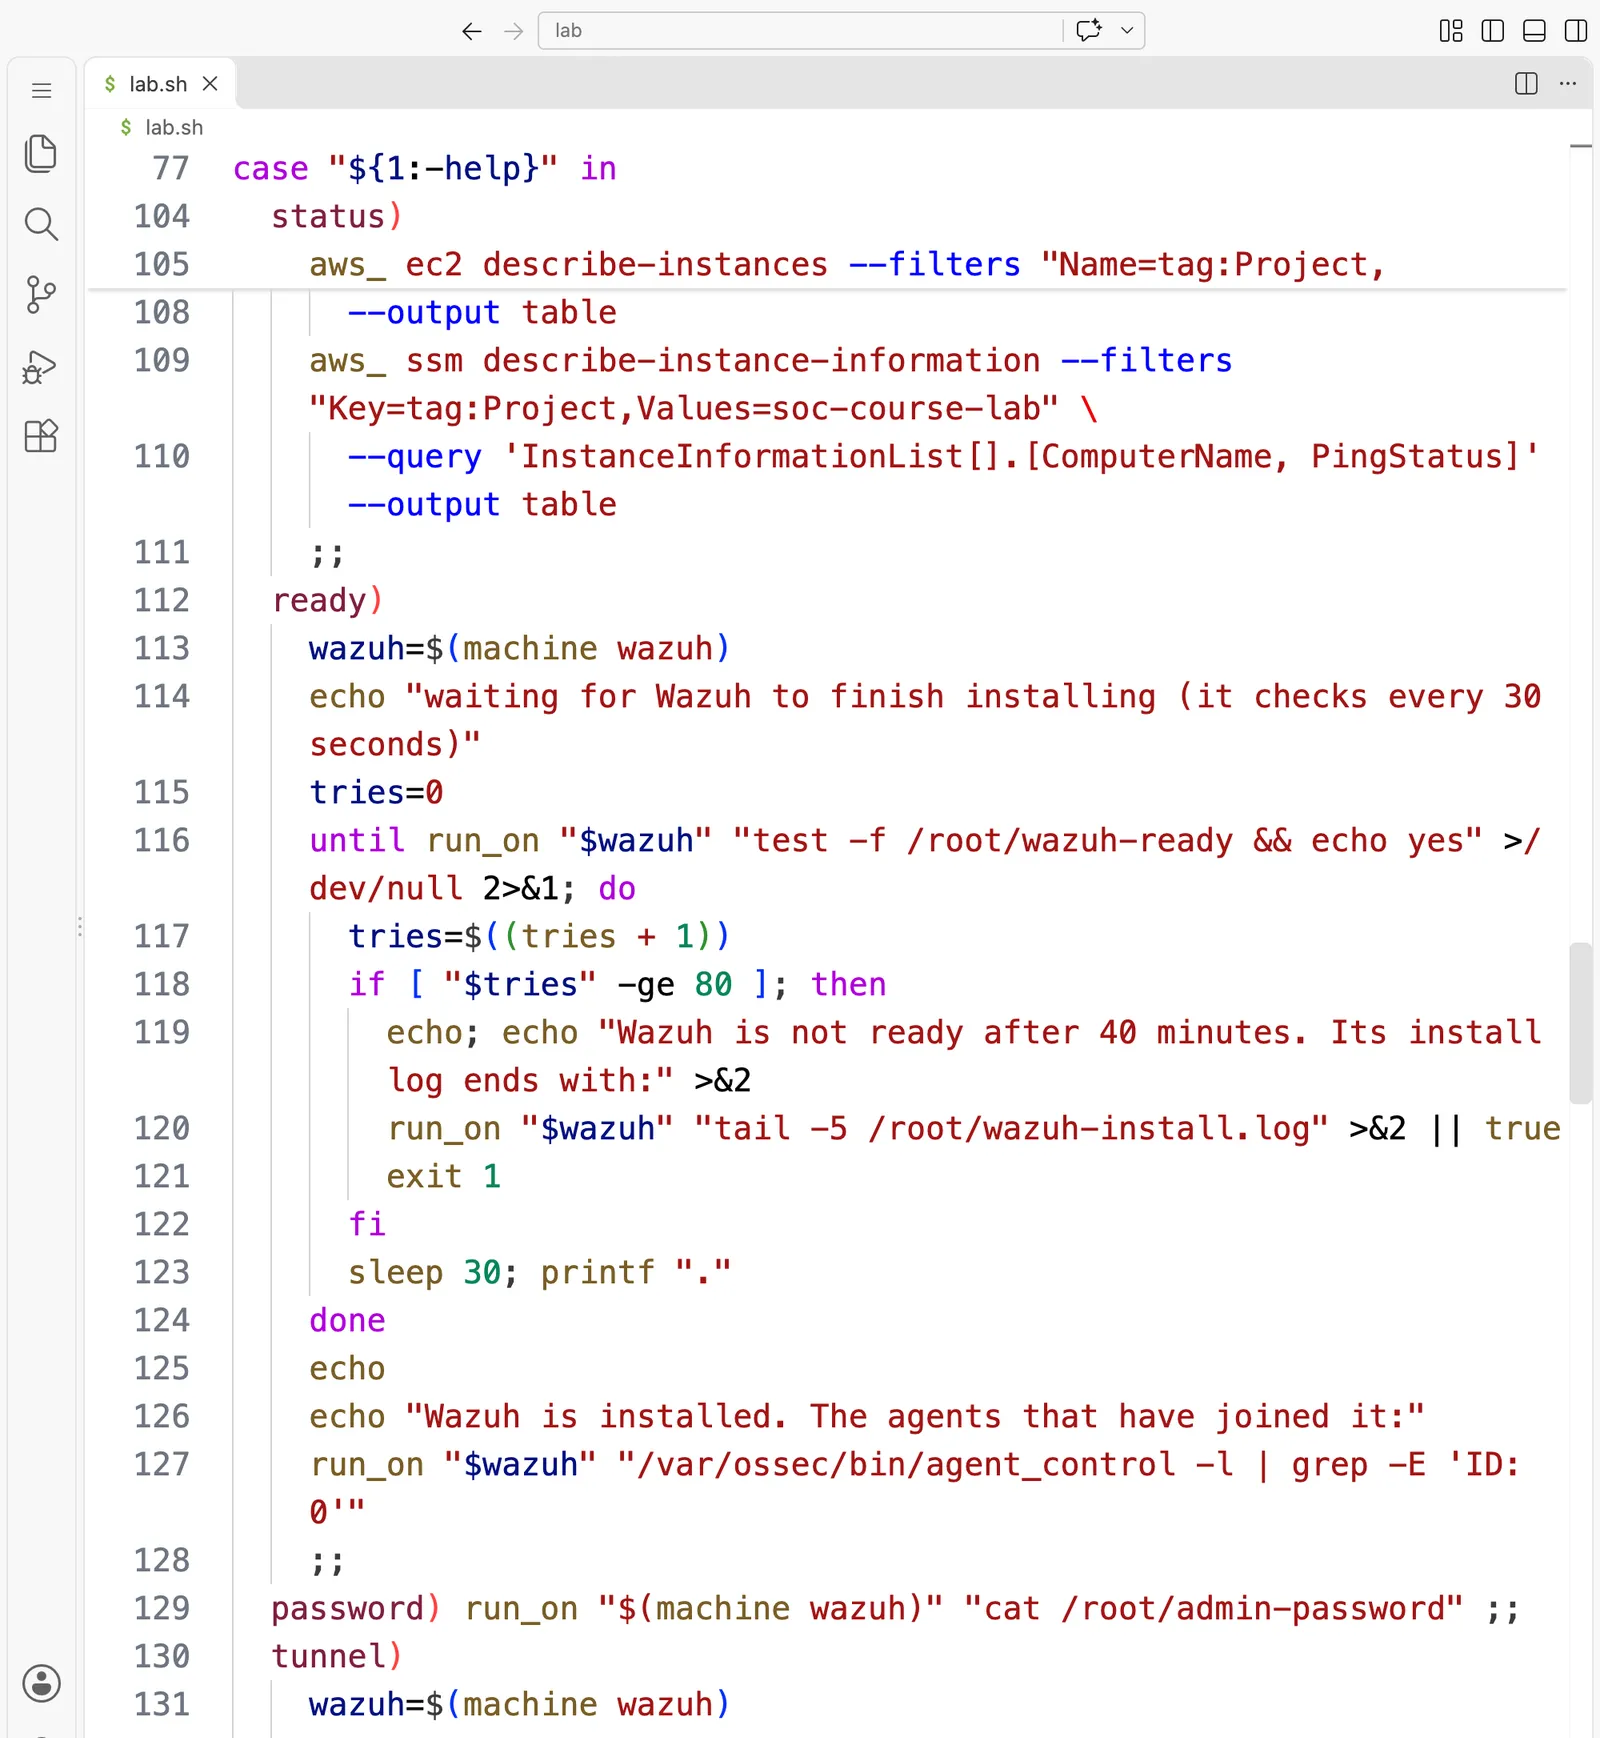
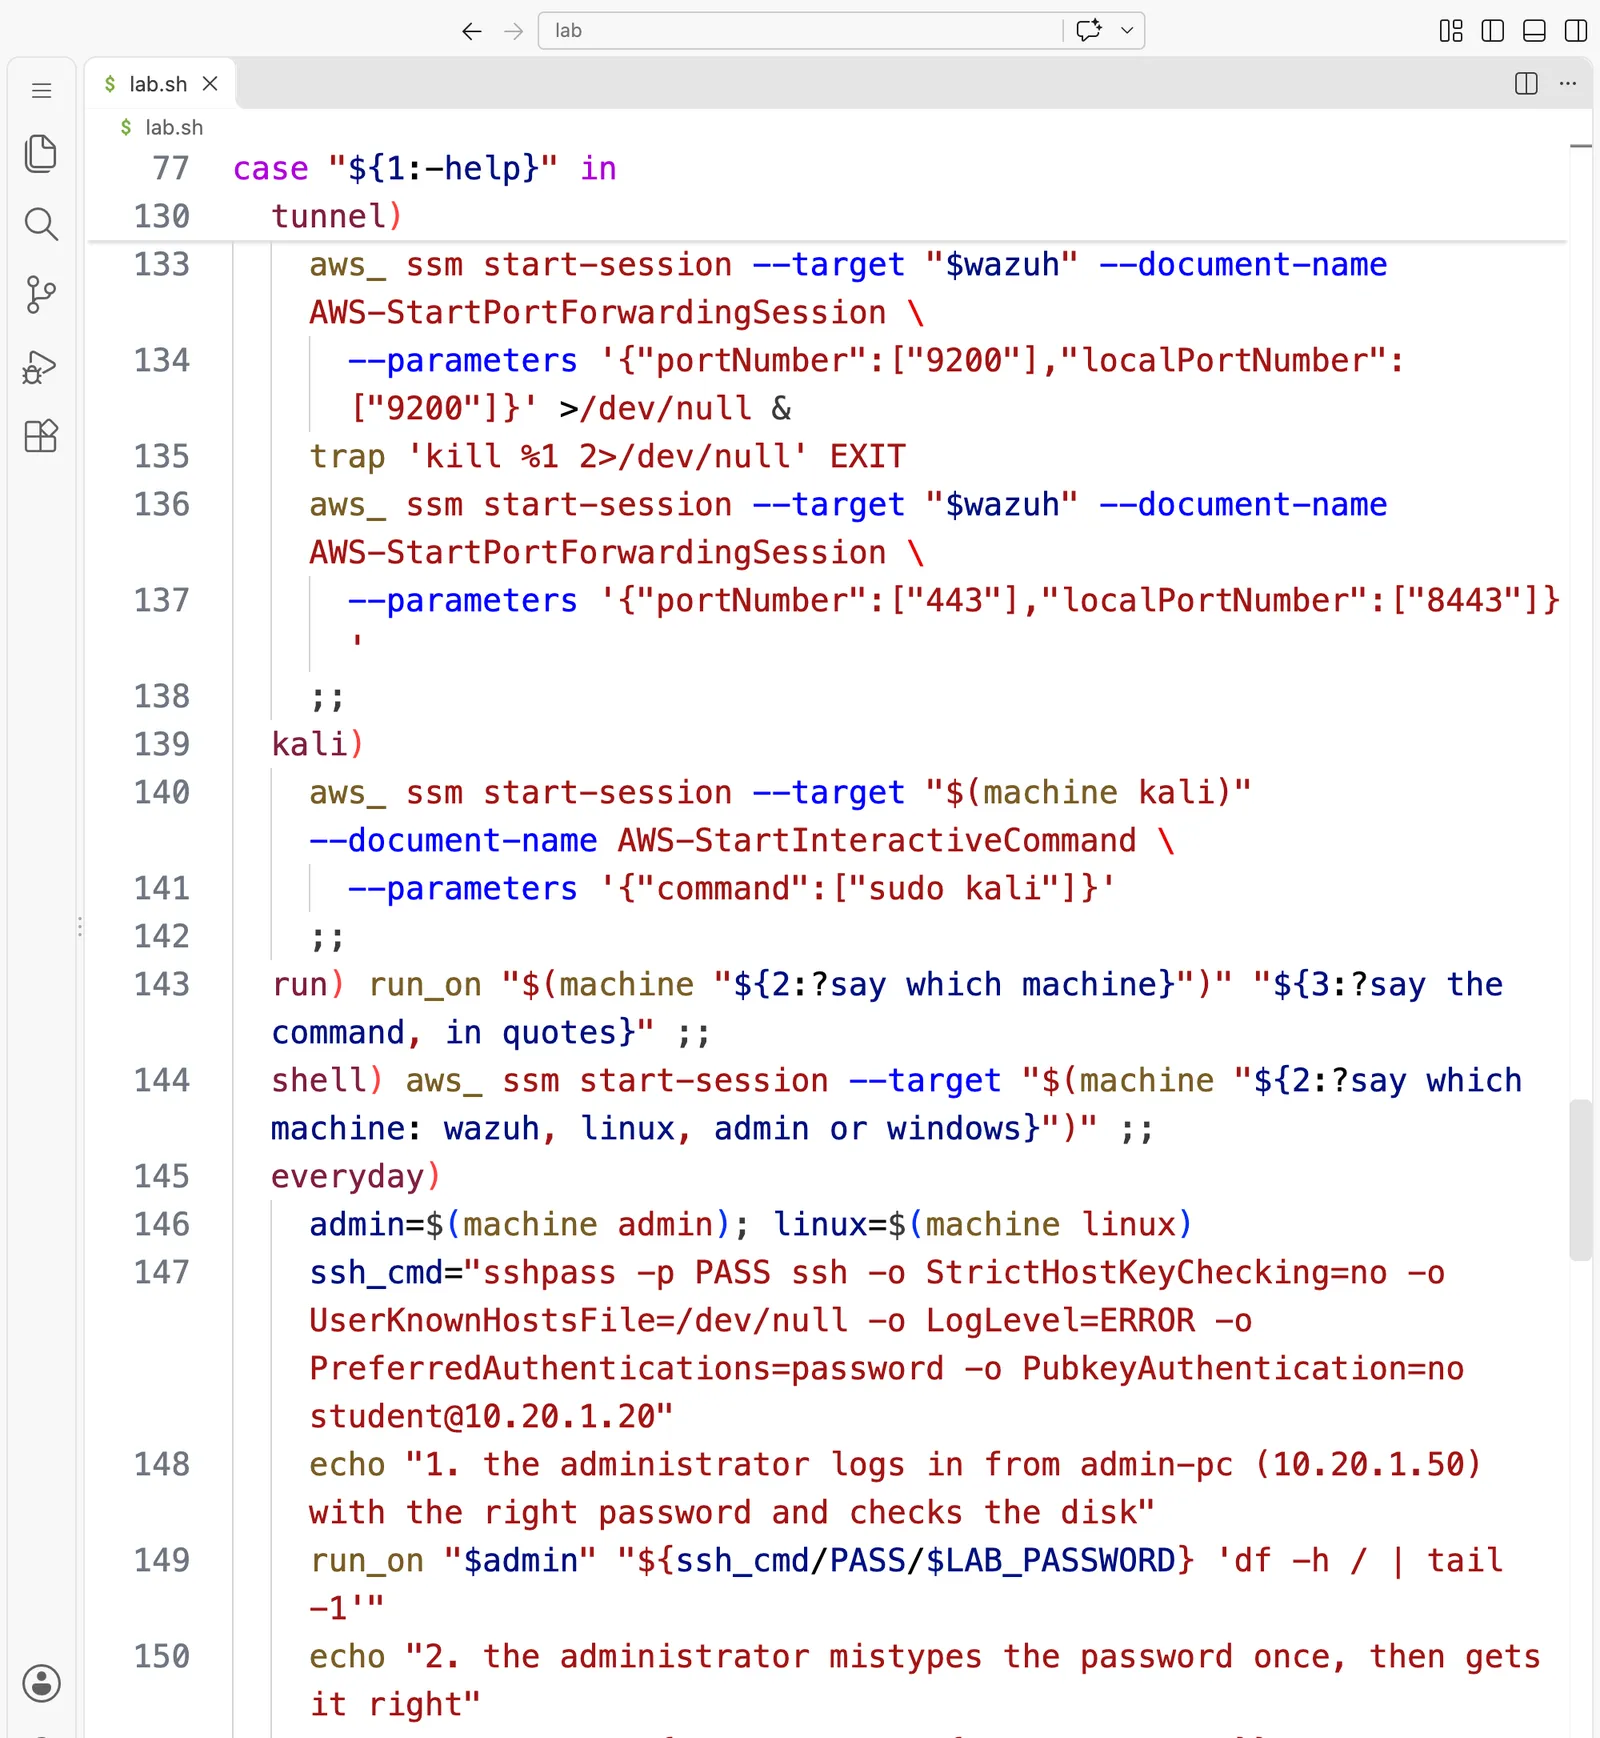
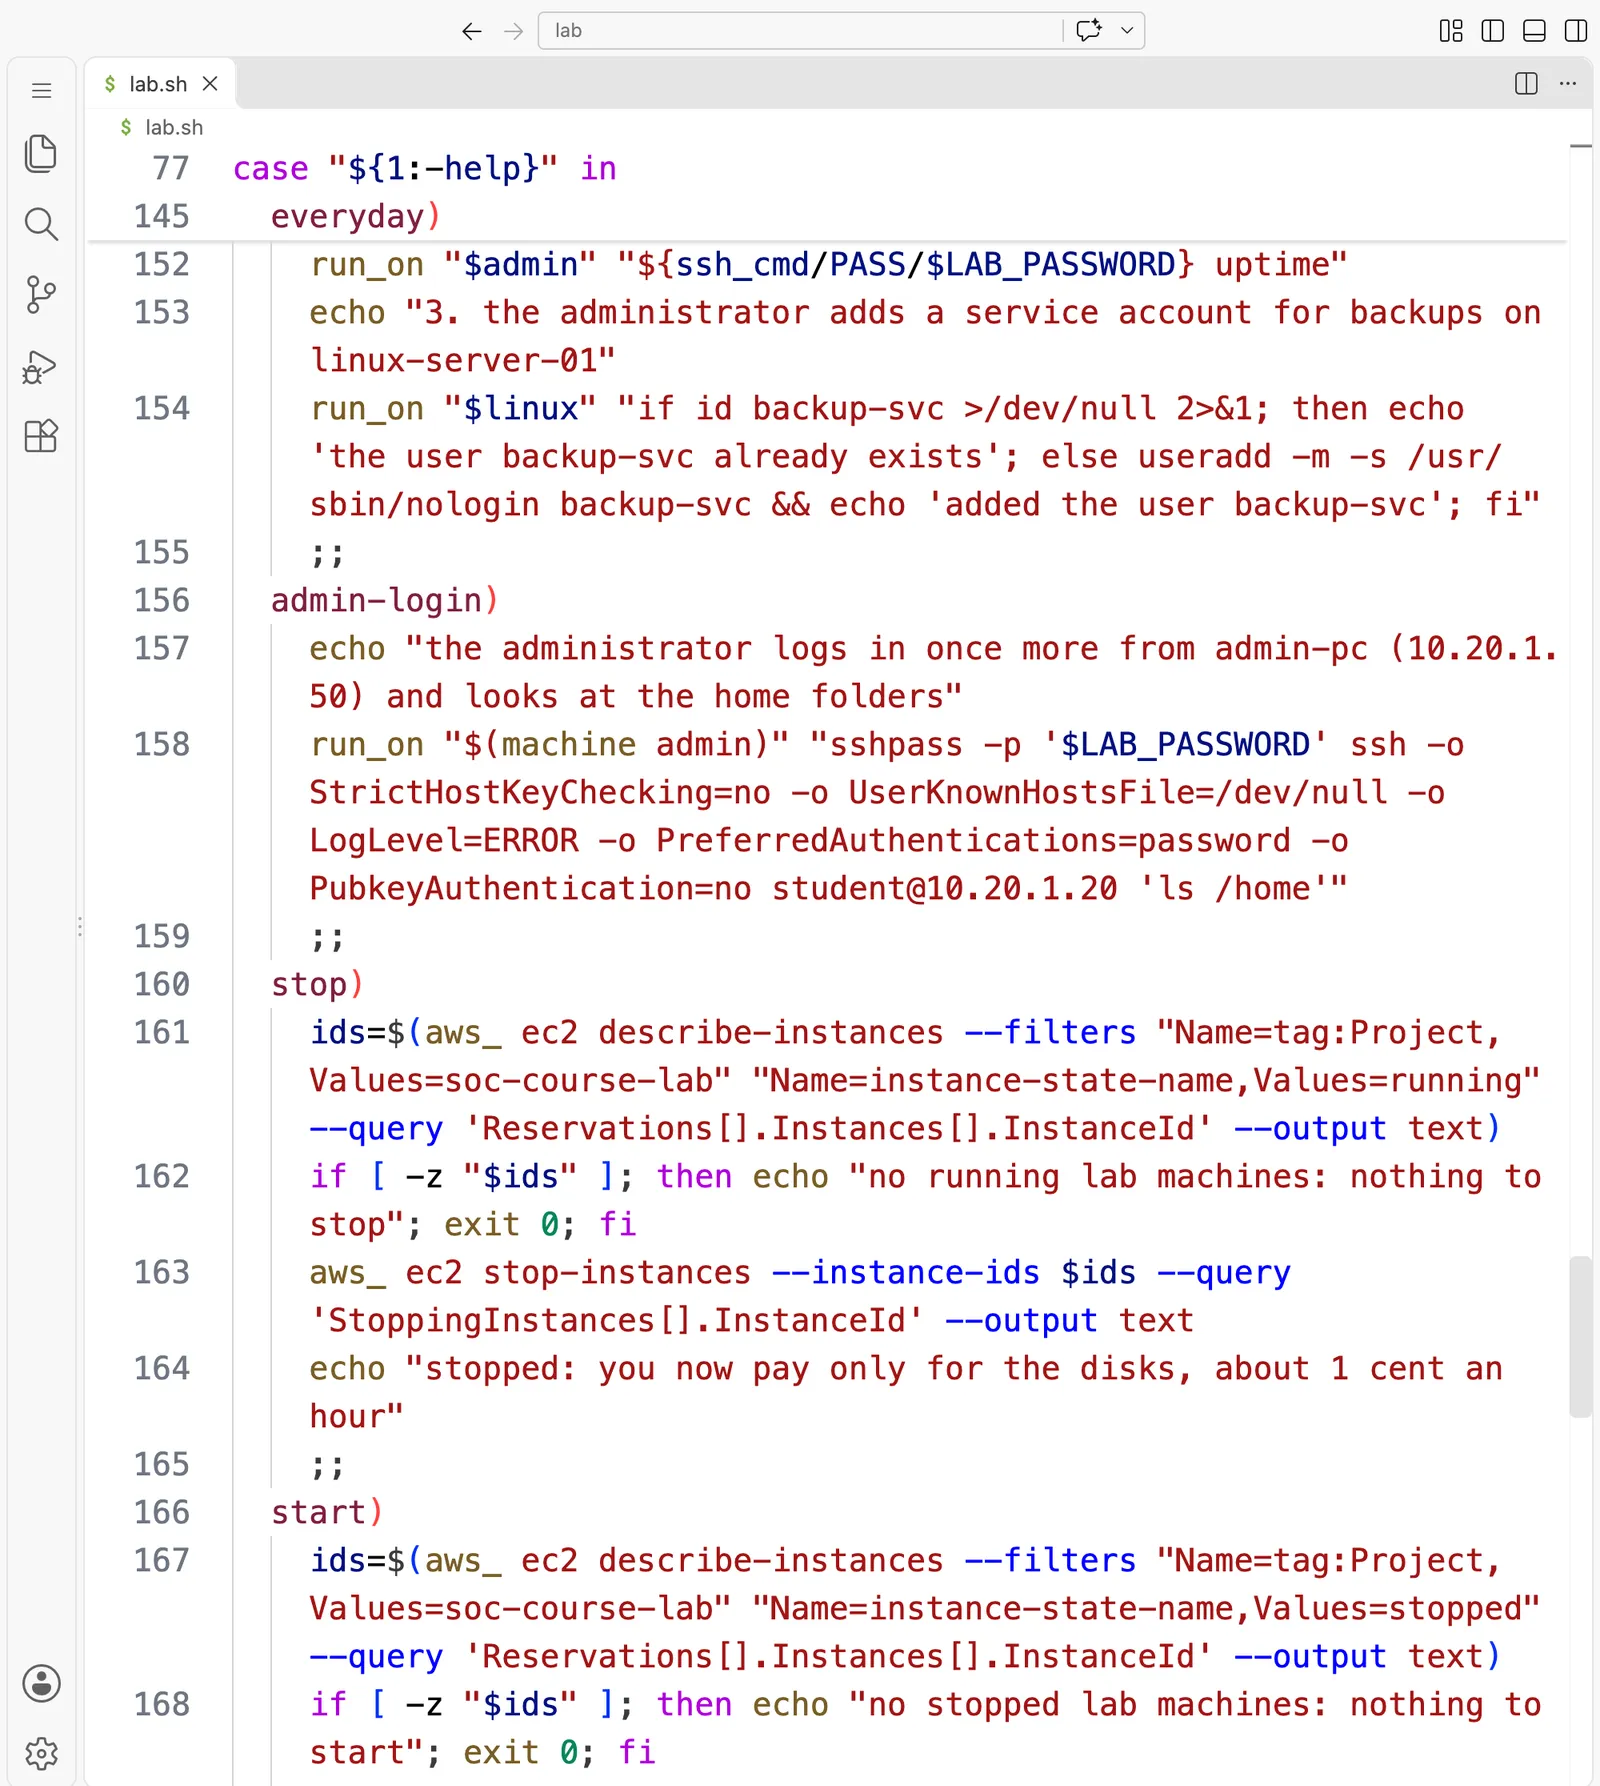
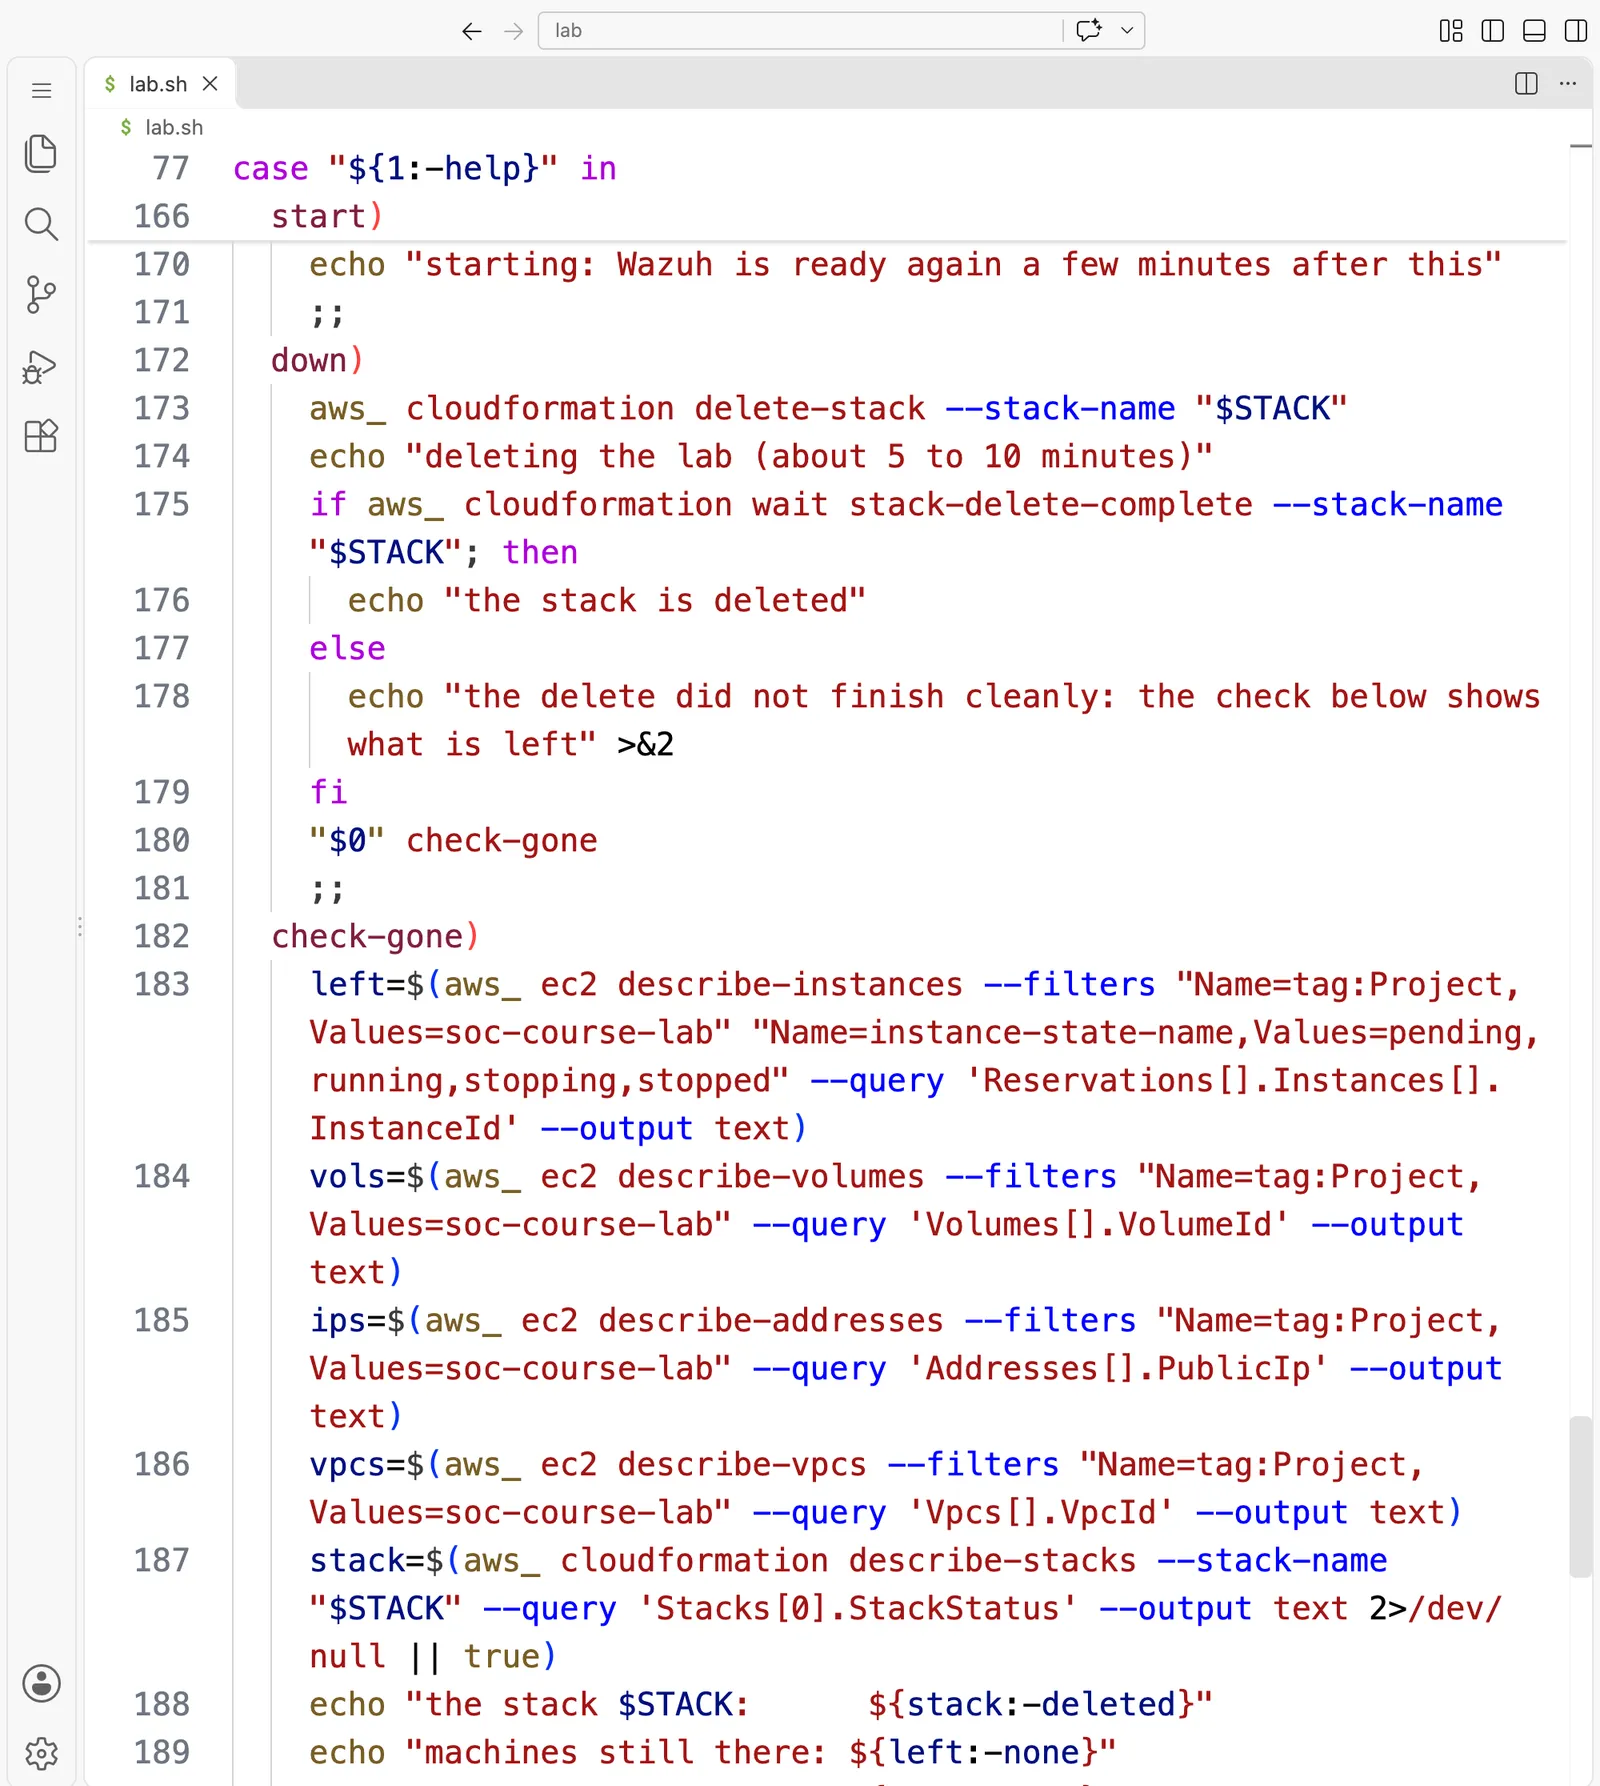
#!/usr/bin/env bash
# The AI SOC Analyst course lab on AWS: build it, use it, and remove it, one command at a time.
#
#   ./lab.sh quota                    check that your account may run the lab's 12 vCPUs (14 with Windows)
#   ./lab.sh budget you@example.com   a monthly $10 cost budget that emails you at 50% and 100%. Run this first.
#   ./lab.sh up                       build the lab from soc-lab.yaml (about 15 minutes until Wazuh is ready)
#   ./lab.sh up-windows               the same, with the Windows Server and Sysmon added (only on a lab that does not exist yet)
#   ./lab.sh status                   each machine, its private address, and whether Session Manager can reach it
#   ./lab.sh ready                    wait until Wazuh is installed, then list the agents that have joined it
#   ./lab.sh password                 print the Wazuh admin password (for the dashboard and the indexer)
#   ./lab.sh tunnel                   reach the dashboard at https://localhost:8443 and the indexer at localhost:9200
#   ./lab.sh kali                     open a Kali Linux shell on the attacker
#   ./lab.sh shell <machine>          open a shell on wazuh, linux, admin or windows
#   ./lab.sh run <machine> "<command>" run one command on a Linux machine and print what it printed
#   ./lab.sh everyday                 play the administrator's ordinary work on the practice server
#   ./lab.sh admin-login              one more ordinary login by the administrator, later in the shift
#   ./lab.sh stop | start             stop the machines between sessions (about 1 cent an hour), and start them again
#   ./lab.sh down                     delete the whole lab, then check that nothing is left
#   ./lab.sh check-gone               list anything still tagged Project=soc-course-lab
#
# Every machine sits in a private subnet. Nothing accepts a connection from the internet, so there is no SSH key
# and no open port: Session Manager reaches each machine from the inside. Attack only these machines.
#
# Author: Roni Das
# Created: 2026-11-13
set -euo pipefail

STACK="${SOC_LAB_STACK:-soc-lab}"
REGION="${AWS_REGION:-${AWS_DEFAULT_REGION:-$(aws configure get region 2>/dev/null || true)}}"
REGION="${REGION:-us-east-1}"
export AWS_PAGER=""   # print results straight to the terminal, never into a pager
HERE="$(cd "$(dirname "$0")" && pwd)"
TAG="Project=soc-course-lab"
LAB_PASSWORD="${LAB_PASSWORD:-Lab-Only-Pass-91}"

aws_() { aws --region "$REGION" "$@"; }

output() {   # the instance id the stack recorded for one machine
  aws_ cloudformation describe-stacks --stack-name "$STACK" \
    --query "Stacks[0].Outputs[?OutputKey=='$1'].OutputValue" --output text
}

machine() {  # a short name to an instance id
  case "$1" in
    wazuh) output WazuhServer ;; linux) output LinuxVictim ;; admin) output AdminComputer ;;
    kali) output KaliAttacker ;; windows) output WindowsVictim ;; nat) output NatInstance ;;
    *) echo "unknown machine: $1 (use wazuh, linux, admin, kali or windows)" >&2; exit 2 ;;
  esac
}

run_on() {   # run one shell command on a Linux machine through Session Manager, and print what it printed
  local id="$1" cmd="$2" cid status
  cid=$(aws_ ssm send-command --instance-ids "$id" --document-name AWS-RunShellScript \
        --parameters "$(python3 -c 'import json,sys; print(json.dumps({"commands": [sys.argv[1]]}))' "$cmd")" \
        --query Command.CommandId --output text)
  for _ in $(seq 1 60); do
    sleep 2
    status=$(aws_ ssm get-command-invocation --command-id "$cid" --instance-id "$id" --query Status --output text 2>/dev/null || true)
    case "$status" in Success|Failed|Cancelled|TimedOut) break ;; esac
  done
  aws_ ssm get-command-invocation --command-id "$cid" --instance-id "$id" --query StandardOutputContent --output text
  [ "$status" = "Success" ]
}

deploy() {
  # Building over an existing lab could replace or restart its machines, so the script refuses to.
  if aws_ cloudformation describe-stacks --stack-name "$STACK" >/dev/null 2>&1; then
    echo "a lab called $STACK already exists. Use ./lab.sh start to wake it up, or ./lab.sh down to delete it first." >&2
    exit 1
  fi
  aws_ cloudformation deploy --stack-name "$STACK" --template-file "$HERE/soc-lab.yaml" \
    --capabilities CAPABILITY_IAM --tags "$TAG" \
    --parameter-overrides "IncludeWindows=$1" "LabPassword=$LAB_PASSWORD" ${LAB_OVERRIDES:-}
  echo "The machines are starting. Wazuh takes about 10 to 15 more minutes to install: run ./lab.sh ready"
}

case "${1:-help}" in
  budget)
    email="${2:?say the email address for the alerts: ./lab.sh budget you@example.com}"
    account=$(aws sts get-caller-identity --query Account --output text)
    if aws budgets describe-budget --account-id "$account" --budget-name soc-course-lab >/dev/null 2>&1; then
      echo "the budget soc-course-lab already exists: nothing to do"; exit 0
    fi
    aws budgets create-budget --account-id "$account" \
      --budget '{"BudgetName":"soc-course-lab","BudgetLimit":{"Amount":"10","Unit":"USD"},"TimeUnit":"MONTHLY","BudgetType":"COST"}' \
      --notifications-with-subscribers "[
        {\"Notification\":{\"NotificationType\":\"ACTUAL\",\"ComparisonOperator\":\"GREATER_THAN\",\"Threshold\":50,\"ThresholdType\":\"PERCENTAGE\"},\"Subscribers\":[{\"SubscriptionType\":\"EMAIL\",\"Address\":\"$email\"}]},
        {\"Notification\":{\"NotificationType\":\"ACTUAL\",\"ComparisonOperator\":\"GREATER_THAN\",\"Threshold\":100,\"ThresholdType\":\"PERCENTAGE\"},\"Subscribers\":[{\"SubscriptionType\":\"EMAIL\",\"Address\":\"$email\"}]},
        {\"Notification\":{\"NotificationType\":\"FORECASTED\",\"ComparisonOperator\":\"GREATER_THAN\",\"Threshold\":100,\"ThresholdType\":\"PERCENTAGE\"},\"Subscribers\":[{\"SubscriptionType\":\"EMAIL\",\"Address\":\"$email\"}]}]"
    echo "budget soc-course-lab: \$10 a month, emails at 50% and 100% spent, and when the forecast passes \$10"
    ;;
  quota)
    have=$(aws_ service-quotas get-service-quota --service-code ec2 --quota-code L-1216C47A --query Quota.Value --output text)
    echo "your limit for standard EC2 machines in $REGION: ${have%.*} vCPUs"
    echo "the lab needs 12 vCPUs, or 14 with Windows"
    if [ "${have%.*}" -ge 14 ]; then echo "enough: go ahead"
    elif [ "${have%.*}" -ge 12 ]; then echo "enough for the lab without Windows: use ./lab.sh up, not up-windows"; else
      echo "not enough yet. Ask AWS to raise it to 16, then wait for the email that says it is done:"
      echo "  aws service-quotas request-service-quota-increase --region $REGION --service-code ec2 --quota-code L-1216C47A --desired-value 16"
      exit 1; fi
    ;;
  up) deploy false ;;
  up-windows) deploy true ;;
  status)
    aws_ ec2 describe-instances --filters "Name=tag:Project,Values=soc-course-lab" \
      "Name=instance-state-name,Values=pending,running,stopping,stopped" \
      --query 'sort_by(Reservations[].Instances[], &PrivateIpAddress)[].[Tags[?Key==`Name`]|[0].Value, PrivateIpAddress, InstanceType, State.Name]' \
      --output table
    aws_ ssm describe-instance-information --filters "Key=tag:Project,Values=soc-course-lab" \
      --query 'InstanceInformationList[].[ComputerName, PingStatus]' --output table
    ;;
  ready)
    wazuh=$(machine wazuh)
    echo "waiting for Wazuh to finish installing (it checks every 30 seconds)"
    tries=0
    until run_on "$wazuh" "test -f /root/wazuh-ready && echo yes" >/dev/null 2>&1; do
      tries=$((tries + 1))
      if [ "$tries" -ge 80 ]; then
        echo; echo "Wazuh is not ready after 40 minutes. Its install log ends with:" >&2
        run_on "$wazuh" "tail -5 /root/wazuh-install.log" >&2 || true
        exit 1
      fi
      sleep 30; printf "."
    done
    echo
    echo "Wazuh is installed. The agents that have joined it:"
    run_on "$wazuh" "/var/ossec/bin/agent_control -l | grep -E 'ID: 0'"
    ;;
  password) run_on "$(machine wazuh)" "cat /root/admin-password" ;;
  tunnel)
    wazuh=$(machine wazuh)
    echo "dashboard: https://localhost:8443   indexer: https://localhost:9200   (press Ctrl+C to close both)"
    aws_ ssm start-session --target "$wazuh" --document-name AWS-StartPortForwardingSession \
      --parameters '{"portNumber":["9200"],"localPortNumber":["9200"]}' >/dev/null &
    trap 'kill %1 2>/dev/null' EXIT
    aws_ ssm start-session --target "$wazuh" --document-name AWS-StartPortForwardingSession \
      --parameters '{"portNumber":["443"],"localPortNumber":["8443"]}'
    ;;
  kali)
    aws_ ssm start-session --target "$(machine kali)" --document-name AWS-StartInteractiveCommand \
      --parameters '{"command":["sudo kali"]}'
    ;;
  run) run_on "$(machine "${2:?say which machine}")" "${3:?say the command, in quotes}" ;;
  shell) aws_ ssm start-session --target "$(machine "${2:?say which machine: wazuh, linux, admin or windows}")" ;;
  everyday)
    admin=$(machine admin); linux=$(machine linux)
    ssh_cmd="sshpass -p PASS ssh -o StrictHostKeyChecking=no -o UserKnownHostsFile=/dev/null -o LogLevel=ERROR -o PreferredAuthentications=password -o PubkeyAuthentication=no student@10.20.1.20"
    echo "1. the administrator logs in from admin-pc (10.20.1.50) with the right password and checks the disk"
    run_on "$admin" "${ssh_cmd/PASS/$LAB_PASSWORD} 'df -h / | tail -1'"
    echo "2. the administrator mistypes the password once, then gets it right"
    run_on "$admin" "${ssh_cmd/PASS/${LAB_PASSWORD%?}} true; echo 'Permission denied, please try again.'" || true
    run_on "$admin" "${ssh_cmd/PASS/$LAB_PASSWORD} uptime"
    echo "3. the administrator adds a service account for backups on linux-server-01"
    run_on "$linux" "if id backup-svc >/dev/null 2>&1; then echo 'the user backup-svc already exists'; else useradd -m -s /usr/sbin/nologin backup-svc && echo 'added the user backup-svc'; fi"
    ;;
  admin-login)
    echo "the administrator logs in once more from admin-pc (10.20.1.50) and looks at the home folders"
    run_on "$(machine admin)" "sshpass -p '$LAB_PASSWORD' ssh -o StrictHostKeyChecking=no -o UserKnownHostsFile=/dev/null -o LogLevel=ERROR -o PreferredAuthentications=password -o PubkeyAuthentication=no student@10.20.1.20 'ls /home'"
    ;;
  stop)
    ids=$(aws_ ec2 describe-instances --filters "Name=tag:Project,Values=soc-course-lab" "Name=instance-state-name,Values=running" --query 'Reservations[].Instances[].InstanceId' --output text)
    if [ -z "$ids" ]; then echo "no running lab machines: nothing to stop"; exit 0; fi
    aws_ ec2 stop-instances --instance-ids $ids --query 'StoppingInstances[].InstanceId' --output text
    echo "stopped: you now pay only for the disks, about 1 cent an hour"
    ;;
  start)
    ids=$(aws_ ec2 describe-instances --filters "Name=tag:Project,Values=soc-course-lab" "Name=instance-state-name,Values=stopped" --query 'Reservations[].Instances[].InstanceId' --output text)
    if [ -z "$ids" ]; then echo "no stopped lab machines: nothing to start"; exit 0; fi
    aws_ ec2 start-instances --instance-ids $ids --query 'StartingInstances[].InstanceId' --output text
    echo "starting: Wazuh is ready again a few minutes after this"
    ;;
  down)
    aws_ cloudformation delete-stack --stack-name "$STACK"
    echo "deleting the lab (about 5 to 10 minutes)"
    if aws_ cloudformation wait stack-delete-complete --stack-name "$STACK"; then
      echo "the stack is deleted"
    else
      echo "the delete did not finish cleanly: the check below shows what is left" >&2
    fi
    "$0" check-gone
    ;;
  check-gone)
    left=$(aws_ ec2 describe-instances --filters "Name=tag:Project,Values=soc-course-lab" "Name=instance-state-name,Values=pending,running,stopping,stopped" --query 'Reservations[].Instances[].InstanceId' --output text)
    vols=$(aws_ ec2 describe-volumes --filters "Name=tag:Project,Values=soc-course-lab" --query 'Volumes[].VolumeId' --output text)
    ips=$(aws_ ec2 describe-addresses --filters "Name=tag:Project,Values=soc-course-lab" --query 'Addresses[].PublicIp' --output text)
    vpcs=$(aws_ ec2 describe-vpcs --filters "Name=tag:Project,Values=soc-course-lab" --query 'Vpcs[].VpcId' --output text)
    stack=$(aws_ cloudformation describe-stacks --stack-name "$STACK" --query 'Stacks[0].StackStatus' --output text 2>/dev/null || true)
    echo "the stack $STACK:      ${stack:-deleted}"
    echo "machines still there: ${left:-none}"
    echo "disks still there:    ${vols:-none}"
    echo "elastic addresses:    ${ips:-none}"
    echo "lab networks:         ${vpcs:-none}"
    if [ -z "$left$vols$ips$vpcs$stack" ]; then echo "nothing is left: the lab costs nothing now"; else echo "something is left: run ./lab.sh down again"; exit 1; fi
    ;;
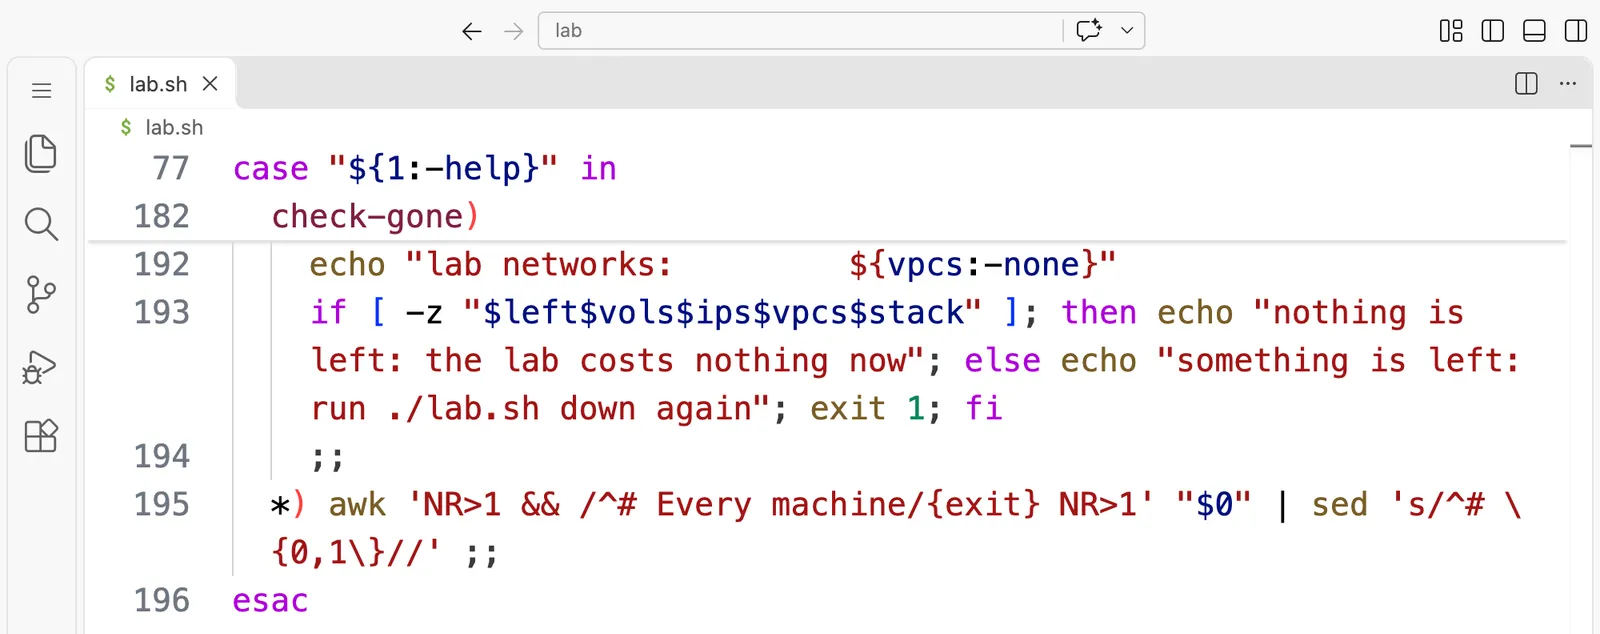
  *) awk 'NR>1 && /^# Every machine/{exit} NR>1' "$0" | sed 's/^# \{0,1\}//' ;;
esac
soc-lab.yaml
The template is the longest file in the course, so it is shown here as text you can copy, without screenshots. It is the same file as lab/soc-lab.yaml in the zip.
AWSTemplateFormatVersion: "2010-09-09"
Description: >-
  AI SOC Analyst course lab (systemdesign.academy). One VPC with private subnets: a Wazuh 4.14 all-in-one
  server, an Ubuntu practice server, an administrator's computer, a Kali Linux attacker and, if you ask for it,
  a Windows Server with Sysmon. Nothing accepts connections from the internet. You reach every machine through
  AWS Systems Manager Session Manager. This is your own lab: attack only these machines.

Parameters:
  IncludeWindows:
    Type: String
    AllowedValues: ["true", "false"]
    Default: "false"
    Description: Add the Windows Server 2022 practice server with Sysmon (about $0.063 an hour more).
  LabPassword:
    Type: String
    NoEcho: true
    Default: Lab-Only-Pass-91
    MinLength: 8
    Description: The weak password of the user "student" on the practice server. The attack in the course guesses it.
  # The machine sizes. The defaults are the cheapest types that meet each machine's needs in us-east-1. Every Linux
  # machine is Graviton (arm64). If you change a type to an Intel or AMD (x86) type, change its image to the amd64 one.
  WazuhType: {Type: String, Default: t4g.xlarge, Description: "Wazuh needs at least 4 vCPU and 8 GiB of memory"}
  LinuxVictimType: {Type: String, Default: t4g.micro}
  KaliType: {Type: String, Default: t4g.small}
  AdminType: {Type: String, Default: t4g.nano}
  NatType: {Type: String, Default: t4g.nano}
  WindowsType: {Type: String, Default: t3.medium}
  UbuntuAmi:
    Type: AWS::SSM::Parameter::Value<AWS::EC2::Image::Id>
    Default: /aws/service/canonical/ubuntu/server/24.04/stable/current/arm64/hvm/ebs-gp3/ami-id
    Description: Ubuntu 24.04 for the Wazuh server, the practice server and the Kali host (Graviton by default)
  AdminAmi:
    Type: AWS::SSM::Parameter::Value<AWS::EC2::Image::Id>
    Default: /aws/service/canonical/ubuntu/server/24.04/stable/current/arm64/hvm/ebs-gp3/ami-id
    Description: Ubuntu 24.04 for the administrator computer (Graviton by default)
  NatAmi:
    Type: AWS::SSM::Parameter::Value<AWS::EC2::Image::Id>
    Default: /aws/service/ami-amazon-linux-latest/al2023-ami-kernel-default-arm64
    Description: Amazon Linux 2023 for the NAT instance (Graviton by default)
  WindowsAmi:
    Type: AWS::SSM::Parameter::Value<AWS::EC2::Image::Id>
    Default: /aws/service/ami-windows-latest/Windows_Server-2022-English-Full-Base

Conditions:
  WithWindows: !Equals [!Ref IncludeWindows, "true"]
  # Burstable types (t3, t3a, t4g) get "standard" CPU credits, so a busy machine slows down instead of adding charges.
  # The Wazuh server is the exception (see its comment).
  VictimBurst: !Or [!Equals [!Select [0, !Split [".", !Ref LinuxVictimType]], t4g], !Equals [!Select [0, !Split [".", !Ref LinuxVictimType]], t3], !Equals [!Select [0, !Split [".", !Ref LinuxVictimType]], t3a]]
  KaliBurst: !Or [!Equals [!Select [0, !Split [".", !Ref KaliType]], t4g], !Equals [!Select [0, !Split [".", !Ref KaliType]], t3], !Equals [!Select [0, !Split [".", !Ref KaliType]], t3a]]
  AdminBurst: !Or [!Equals [!Select [0, !Split [".", !Ref AdminType]], t4g], !Equals [!Select [0, !Split [".", !Ref AdminType]], t3], !Equals [!Select [0, !Split [".", !Ref AdminType]], t3a]]
  NatBurst: !Or [!Equals [!Select [0, !Split [".", !Ref NatType]], t4g], !Equals [!Select [0, !Split [".", !Ref NatType]], t3], !Equals [!Select [0, !Split [".", !Ref NatType]], t3a]]
  WindowsBurst: !Or [!Equals [!Select [0, !Split [".", !Ref WindowsType]], t4g], !Equals [!Select [0, !Split [".", !Ref WindowsType]], t3], !Equals [!Select [0, !Split [".", !Ref WindowsType]], t3a]]

Resources:
  # ---------- the network: one VPC, one small public subnet for the NAT instance, two private subnets ----------
  Vpc:
    Type: AWS::EC2::VPC
    Properties:
      CidrBlock: 10.20.0.0/16
      EnableDnsSupport: true
      EnableDnsHostnames: true
      Tags: [{Key: Name, Value: soc-lab-vpc}, {Key: Project, Value: soc-course-lab}]
  Igw:
    Type: AWS::EC2::InternetGateway
    Properties:
      Tags: [{Key: Name, Value: soc-lab-igw}, {Key: Project, Value: soc-course-lab}]
  IgwAttach:
    Type: AWS::EC2::VPCGatewayAttachment
    Properties: {VpcId: !Ref Vpc, InternetGatewayId: !Ref Igw}
  PublicSubnet:
    Type: AWS::EC2::Subnet
    Properties:
      VpcId: !Ref Vpc
      CidrBlock: 10.20.0.0/24
      AvailabilityZone: !Select [0, !GetAZs ""]
      MapPublicIpOnLaunch: false
      Tags: [{Key: Name, Value: soc-lab-public-nat-only}, {Key: Project, Value: soc-course-lab}]
  LabSubnet:
    Type: AWS::EC2::Subnet
    Properties:
      VpcId: !Ref Vpc
      CidrBlock: 10.20.1.0/24
      AvailabilityZone: !Select [0, !GetAZs ""]
      MapPublicIpOnLaunch: false
      Tags: [{Key: Name, Value: soc-lab-private-servers}, {Key: Project, Value: soc-course-lab}]
  AttackerSubnet:
    Type: AWS::EC2::Subnet
    Properties:
      VpcId: !Ref Vpc
      CidrBlock: 10.20.2.0/24
      AvailabilityZone: !Select [0, !GetAZs ""]
      MapPublicIpOnLaunch: false
      Tags: [{Key: Name, Value: soc-lab-private-attacker}, {Key: Project, Value: soc-course-lab}]
  PublicRoutes:
    Type: AWS::EC2::RouteTable
    Properties:
      VpcId: !Ref Vpc
      Tags: [{Key: Name, Value: soc-lab-public-routes}, {Key: Project, Value: soc-course-lab}]
  PublicDefault:
    Type: AWS::EC2::Route
    DependsOn: IgwAttach
    Properties: {RouteTableId: !Ref PublicRoutes, DestinationCidrBlock: 0.0.0.0/0, GatewayId: !Ref Igw}
  PublicAssoc:
    Type: AWS::EC2::SubnetRouteTableAssociation
    Properties: {SubnetId: !Ref PublicSubnet, RouteTableId: !Ref PublicRoutes}
  PrivateRoutes:
    Type: AWS::EC2::RouteTable
    Properties:
      VpcId: !Ref Vpc
      Tags: [{Key: Name, Value: soc-lab-private-routes}, {Key: Project, Value: soc-course-lab}]
  PrivateDefault:
    Type: AWS::EC2::Route
    Properties: {RouteTableId: !Ref PrivateRoutes, DestinationCidrBlock: 0.0.0.0/0, InstanceId: !Ref NatInstance}
  LabAssoc:
    Type: AWS::EC2::SubnetRouteTableAssociation
    Properties: {SubnetId: !Ref LabSubnet, RouteTableId: !Ref PrivateRoutes}
  AttackerAssoc:
    Type: AWS::EC2::SubnetRouteTableAssociation
    Properties: {SubnetId: !Ref AttackerSubnet, RouteTableId: !Ref PrivateRoutes}

  # ---------- security groups: only the lab's own traffic, nothing from the internet ----------
  NatSg:
    Type: AWS::EC2::SecurityGroup
    Properties:
      GroupDescription: NAT instance. Accepts traffic only from inside the lab VPC, so the private machines can download updates.
      VpcId: !Ref Vpc
      SecurityGroupIngress: [{IpProtocol: "-1", CidrIp: 10.20.0.0/16, Description: "from the lab machines only"}]
      Tags: [{Key: Name, Value: soc-lab-nat}, {Key: Project, Value: soc-course-lab}]
  WazuhSg:
    Type: AWS::EC2::SecurityGroup
    Properties:
      GroupDescription: Wazuh server. Agents may send events (1514) and enrol (1515). Nothing else comes in.
      VpcId: !Ref Vpc
      Tags: [{Key: Name, Value: soc-lab-wazuh}, {Key: Project, Value: soc-course-lab}]
  VictimSg:
    Type: AWS::EC2::SecurityGroup
    Properties:
      GroupDescription: Ubuntu practice server. SSH only from the attacker and the administrator computer.
      VpcId: !Ref Vpc
      Tags: [{Key: Name, Value: soc-lab-linux-victim}, {Key: Project, Value: soc-course-lab}]
  WindowsSg:
    Type: AWS::EC2::SecurityGroup
    Properties:
      GroupDescription: Windows practice server. Remote Desktop only from the attacker.
      VpcId: !Ref Vpc
      Tags: [{Key: Name, Value: soc-lab-windows-victim}, {Key: Project, Value: soc-course-lab}]
  AdminSg:
    Type: AWS::EC2::SecurityGroup
    Properties:
      GroupDescription: The administrator computer. Nothing comes in.
      VpcId: !Ref Vpc
      Tags: [{Key: Name, Value: soc-lab-admin}, {Key: Project, Value: soc-course-lab}]
  AttackerSg:
    Type: AWS::EC2::SecurityGroup
    Properties:
      GroupDescription: Kali attacker. Nothing comes in. Out only to the lab, plus web ports for software downloads.
      VpcId: !Ref Vpc
      SecurityGroupEgress:
        - {IpProtocol: "-1", CidrIp: 10.20.0.0/16, Description: "anything inside the lab"}
        - {IpProtocol: tcp, FromPort: 443, ToPort: 443, CidrIp: 0.0.0.0/0, Description: "HTTPS for apt, Docker images and Session Manager"}
        - {IpProtocol: tcp, FromPort: 80, ToPort: 80, CidrIp: 0.0.0.0/0, Description: "HTTP for apt mirrors"}
      Tags: [{Key: Name, Value: soc-lab-attacker}, {Key: Project, Value: soc-course-lab}]
  WazuhFromLinux:
    Type: AWS::EC2::SecurityGroupIngress
    Properties: {GroupId: !Ref WazuhSg, IpProtocol: tcp, FromPort: 1514, ToPort: 1515, SourceSecurityGroupId: !Ref VictimSg, Description: "Linux agent"}
  WazuhFromWindows:
    Type: AWS::EC2::SecurityGroupIngress
    Properties: {GroupId: !Ref WazuhSg, IpProtocol: tcp, FromPort: 1514, ToPort: 1515, SourceSecurityGroupId: !Ref WindowsSg, Description: "Windows agent"}
  VictimFromAttacker:
    Type: AWS::EC2::SecurityGroupIngress
    Properties: {GroupId: !Ref VictimSg, IpProtocol: tcp, FromPort: 22, ToPort: 22, SourceSecurityGroupId: !Ref AttackerSg, Description: "SSH from the Kali attacker"}
  VictimFromAdmin:
    Type: AWS::EC2::SecurityGroupIngress
    Properties: {GroupId: !Ref VictimSg, IpProtocol: tcp, FromPort: 22, ToPort: 22, SourceSecurityGroupId: !Ref AdminSg, Description: "SSH from the administrator"}
  WindowsFromAttacker:
    Type: AWS::EC2::SecurityGroupIngress
    Properties: {GroupId: !Ref WindowsSg, IpProtocol: tcp, FromPort: 3389, ToPort: 3389, SourceSecurityGroupId: !Ref AttackerSg, Description: "RDP from the Kali attacker"}

  # ---------- one role for every machine: Session Manager only ----------
  SsmRole:
    Type: AWS::IAM::Role
    Properties:
      AssumeRolePolicyDocument:
        Version: "2012-10-17"
        Statement: [{Effect: Allow, Principal: {Service: ec2.amazonaws.com}, Action: sts:AssumeRole}]
      # Only what Session Manager and Run Command need. Unlike AmazonSSMManagedInstanceCore, it cannot read
      # Parameter Store, because the practice server is meant to be broken into and its role must be worth nothing.
      Policies:
        - PolicyName: soc-lab-session-manager-only
          PolicyDocument:
            Version: "2012-10-17"
            Statement:
              - Effect: Allow
                Action:
                  - ssm:UpdateInstanceInformation
                  - ssm:ListInstanceAssociations
                  - ssm:ListAssociations
                  - ssm:DescribeAssociation
                  - ssm:UpdateInstanceAssociationStatus
                  - ssm:UpdateAssociationStatus
                  - ssm:PutInventory
                  - ssm:PutComplianceItems
                  - ssm:GetDocument
                  - ssm:DescribeDocument
                  - ssmmessages:CreateControlChannel
                  - ssmmessages:CreateDataChannel
                  - ssmmessages:OpenControlChannel
                  - ssmmessages:OpenDataChannel
                  - ec2messages:AcknowledgeMessage
                  - ec2messages:DeleteMessage
                  - ec2messages:FailMessage
                  - ec2messages:GetEndpoint
                  - ec2messages:GetMessages
                  - ec2messages:SendReply
                Resource: "*"
      Tags: [{Key: Project, Value: soc-course-lab}]
  SsmProfile:
    Type: AWS::IAM::InstanceProfile
    Properties: {Roles: [!Ref SsmRole]}

  # ---------- the machines ----------
  NatInstance:
    Type: AWS::EC2::Instance
    DependsOn: [IgwAttach, PublicDefault, PublicAssoc]
    Properties:
      CreditSpecification: !If [NatBurst, {CPUCredits: standard}, !Ref AWS::NoValue]
      BlockDeviceMappings: [{DeviceName: /dev/xvda, Ebs: {VolumeSize: 8, VolumeType: gp3, DeleteOnTermination: true, Encrypted: true}}]
      ImageId: !Ref NatAmi
      InstanceType: !Ref NatType
      SourceDestCheck: false
      IamInstanceProfile: !Ref SsmProfile
      MetadataOptions: {HttpTokens: required}
      PropagateTagsToVolumeOnCreation: true
      NetworkInterfaces:
        - {DeviceIndex: "0", SubnetId: !Ref PublicSubnet, PrivateIpAddress: 10.20.0.10, AssociatePublicIpAddress: true, GroupSet: [!Ref NatSg]}
      Tags: [{Key: Name, Value: soc-lab-nat}, {Key: Project, Value: soc-course-lab}]
      UserData:
        Fn::Base64: |
          #!/bin/bash
          # A NAT instance, as in the AWS VPC guide: forward and masquerade traffic from the private subnets.
          set -eu
          until dnf install -y iptables-services; do sleep 10; done
          systemctl enable --now iptables
          echo "net.ipv4.ip_forward=1" > /etc/sysctl.d/custom-ip-forwarding.conf
          sysctl -p /etc/sysctl.d/custom-ip-forwarding.conf
          IF=$(ip route | awk '/^default/ {print $5; exit}')
          iptables -t nat -A POSTROUTING -o "$IF" -j MASQUERADE
          iptables -F FORWARD
          service iptables save

  WazuhServer:
    Type: AWS::EC2::Instance
    DependsOn: PrivateDefault
    Properties:
      ImageId: !Ref UbuntuAmi
      InstanceType: !Ref WazuhType
      # The Wazuh server keeps AWS's default "unlimited" credits, so its CPU-heavy first install is not slowed down.
      # Borrowed CPU time above the baseline costs $0.04 per vCPU-hour on t4g: about a cent or two for the install.
      IamInstanceProfile: !Ref SsmProfile
      MetadataOptions: {HttpTokens: required}
      PropagateTagsToVolumeOnCreation: true
      BlockDeviceMappings: [{DeviceName: /dev/sda1, Ebs: {VolumeSize: 50, VolumeType: gp3, DeleteOnTermination: true, Encrypted: true}}]
      NetworkInterfaces:
        - {DeviceIndex: "0", SubnetId: !Ref LabSubnet, PrivateIpAddress: 10.20.1.10, GroupSet: [!Ref WazuhSg]}
      Tags: [{Key: Name, Value: soc-lab-wazuh-server}, {Key: Project, Value: soc-course-lab}]
      UserData:
        Fn::Base64: |
          #!/bin/bash
          # Wazuh 4.14 all-in-one with the official installation assistant (indexer, server and dashboard).
          set -eu
          export HOME=/root
          hostnamectl set-hostname wazuh-server
          until curl -sf --max-time 5 -o /dev/null https://packages.wazuh.com/key/GPG-KEY-WAZUH; do sleep 10; done
          cd /root
          curl -sfO https://packages.wazuh.com/4.14/wazuh-install.sh
          bash ./wazuh-install.sh -a > /root/wazuh-install.log 2>&1
          tar -O -xf wazuh-install-files.tar wazuh-install-files/wazuh-passwords.txt > /root/wazuh-passwords.txt
          awk "/indexer_username: 'admin'/{getline; gsub(/.*: '|'.*/,\"\"); print; exit}" /root/wazuh-passwords.txt > /root/admin-password
          chmod 600 /root/wazuh-passwords.txt /root/admin-password
          # keep the lab on 4.14: stop apt from upgrading Wazuh by accident, as the Wazuh quickstart advises
          sed -i "s/^deb /#deb /" /etc/apt/sources.list.d/wazuh.list
          touch /root/wazuh-ready

  LinuxVictim:
    Type: AWS::EC2::Instance
    DependsOn: PrivateDefault
    Properties:
      ImageId: !Ref UbuntuAmi
      InstanceType: !Ref LinuxVictimType
      CreditSpecification: !If [VictimBurst, {CPUCredits: standard}, !Ref AWS::NoValue]
      IamInstanceProfile: !Ref SsmProfile
      MetadataOptions: {HttpTokens: required}
      PropagateTagsToVolumeOnCreation: true
      BlockDeviceMappings: [{DeviceName: /dev/sda1, Ebs: {VolumeSize: 8, VolumeType: gp3, DeleteOnTermination: true, Encrypted: true}}]
      NetworkInterfaces:
        - {DeviceIndex: "0", SubnetId: !Ref LabSubnet, PrivateIpAddress: 10.20.1.20, GroupSet: [!Ref VictimSg]}
      Tags: [{Key: Name, Value: soc-lab-linux-server-01}, {Key: Project, Value: soc-course-lab}]
      UserData:
        Fn::Base64: !Sub |
          #!/bin/bash
          # The practice server: user "student" with a weak password, SSH password logins on, and a Wazuh agent.
          # No "set -x" here, so the lab password is not copied into the boot log.
          set -euo pipefail
          export HOME=/root
          hostnamectl set-hostname linux-server-01
          echo "127.0.1.1 linux-server-01" >> /etc/hosts
          useradd -m -s /bin/bash student
          echo 'student:${LabPassword}' | chpasswd
          # sshd keeps the first value it reads, and the cloud image's own file says "no", so this file sorts first
          printf 'PasswordAuthentication yes\nKbdInteractiveAuthentication no\n' > /etc/ssh/sshd_config.d/10-soc-lab.conf
          systemctl restart ssh
          # rsyslog read the old hostname at boot: restart it so /var/log/auth.log says linux-server-01 too
          systemctl restart rsyslog
          until curl -sf --max-time 5 -o /dev/null https://packages.wazuh.com/key/GPG-KEY-WAZUH; do sleep 10; done
          curl -sf https://packages.wazuh.com/key/GPG-KEY-WAZUH | gpg --no-default-keyring --keyring gnupg-ring:/usr/share/keyrings/wazuh.gpg --import
          chmod 644 /usr/share/keyrings/wazuh.gpg
          echo "deb [signed-by=/usr/share/keyrings/wazuh.gpg] https://packages.wazuh.com/4.x/apt/ stable main" > /etc/apt/sources.list.d/wazuh.list
          APT="apt-get -o DPkg::Lock::Timeout=600"
          $APT update
          WAZUH_MANAGER=10.20.1.10 WAZUH_AGENT_NAME=linux-server-01 $APT install -y wazuh-agent=4.14.10-1
          echo "wazuh-agent hold" | dpkg --set-selections
          systemctl daemon-reload
          systemctl enable --now wazuh-agent

  AdminComputer:
    Type: AWS::EC2::Instance
    DependsOn: PrivateDefault
    Properties:
      ImageId: !Ref AdminAmi
      InstanceType: !Ref AdminType
      CreditSpecification: !If [AdminBurst, {CPUCredits: standard}, !Ref AWS::NoValue]
      BlockDeviceMappings: [{DeviceName: /dev/sda1, Ebs: {VolumeSize: 8, VolumeType: gp3, DeleteOnTermination: true, Encrypted: true}}]
      IamInstanceProfile: !Ref SsmProfile
      MetadataOptions: {HttpTokens: required}
      PropagateTagsToVolumeOnCreation: true
      NetworkInterfaces:
        - {DeviceIndex: "0", SubnetId: !Ref LabSubnet, PrivateIpAddress: 10.20.1.50, GroupSet: [!Ref AdminSg]}
      Tags: [{Key: Name, Value: soc-lab-admin-pc}, {Key: Project, Value: soc-course-lab}]
      UserData:
        Fn::Base64: |
          #!/bin/bash
          # The administrator's own computer, so ordinary admin logins come from a known address.
          set -eu
          hostnamectl set-hostname admin-pc
          until curl -sf --max-time 5 -o /dev/null https://packages.wazuh.com/key/GPG-KEY-WAZUH; do sleep 10; done
          APT="apt-get -o DPkg::Lock::Timeout=600"
          $APT update && $APT install -y sshpass

  KaliAttacker:
    Type: AWS::EC2::Instance
    DependsOn: PrivateDefault
    Properties:
      ImageId: !Ref UbuntuAmi
      InstanceType: !Ref KaliType
      CreditSpecification: !If [KaliBurst, {CPUCredits: standard}, !Ref AWS::NoValue]
      IamInstanceProfile: !Ref SsmProfile
      MetadataOptions: {HttpTokens: required}
      PropagateTagsToVolumeOnCreation: true
      BlockDeviceMappings: [{DeviceName: /dev/sda1, Ebs: {VolumeSize: 20, VolumeType: gp3, DeleteOnTermination: true, Encrypted: true}}]
      NetworkInterfaces:
        - {DeviceIndex: "0", SubnetId: !Ref AttackerSubnet, PrivateIpAddress: 10.20.2.66, GroupSet: [!Ref AttackerSg]}
      Tags: [{Key: Name, Value: soc-lab-kali-attacker}, {Key: Project, Value: soc-course-lab}]
      UserData:
        Fn::Base64: |
          #!/bin/bash
          # The attacker: Kali Linux from the official kalilinux/kali-rolling image, with hydra and sshpass added.
          # It shares this machine's network, so its address is 10.20.2.66.
          set -eu
          hostnamectl set-hostname kali
          until curl -sf --max-time 5 -o /dev/null https://packages.wazuh.com/key/GPG-KEY-WAZUH; do sleep 10; done
          APT="apt-get -o DPkg::Lock::Timeout=600"
          $APT update && $APT install -y docker.io
          mkdir -p /opt/kali
          printf 'FROM kalilinux/kali-rolling\nRUN apt-get update && apt-get install -y --no-install-recommends hydra sshpass openssh-client nmap iputils-ping && rm -rf /var/lib/apt/lists/*\nWORKDIR /lab\n' > /opt/kali/Dockerfile
          printf 'password\n123456\nqwerty\nletmein\nwelcome\nadmin\nstudent\n111111\niloveyou\ndragon\n' > /opt/kali/guesses.txt
          docker build -t soc-kali /opt/kali
          printf '#!/bin/sh\nexec docker run --rm -it --network host -v /opt/kali:/lab soc-kali bash\n' > /usr/local/bin/kali
          chmod 755 /usr/local/bin/kali
          touch /opt/kali/ready

  WindowsVictim:
    Type: AWS::EC2::Instance
    Condition: WithWindows
    DependsOn: PrivateDefault
    Properties:
      ImageId: !Ref WindowsAmi
      InstanceType: !Ref WindowsType
      CreditSpecification: !If [WindowsBurst, {CPUCredits: standard}, !Ref AWS::NoValue]
      IamInstanceProfile: !Ref SsmProfile
      MetadataOptions: {HttpTokens: required}
      PropagateTagsToVolumeOnCreation: true
      BlockDeviceMappings: [{DeviceName: /dev/sda1, Ebs: {VolumeSize: 30, VolumeType: gp3, DeleteOnTermination: true, Encrypted: true}}]
      NetworkInterfaces:
        - {DeviceIndex: "0", SubnetId: !Ref LabSubnet, PrivateIpAddress: 10.20.1.30, GroupSet: [!Ref WindowsSg]}
      Tags: [{Key: Name, Value: soc-lab-win-server-01}, {Key: Project, Value: soc-course-lab}]
      UserData:
        Fn::Base64: |
          <powershell>
          # Windows practice server: Sysmon with the SwiftOnSecurity configuration (CC BY 4.0), and a Wazuh agent that reads it.
          $ErrorActionPreference = "Stop"
          New-Item -ItemType Directory -Force C:\lab | Out-Null
          while ($true) { try { Invoke-WebRequest https://packages.wazuh.com/key/GPG-KEY-WAZUH -UseBasicParsing -TimeoutSec 10 | Out-Null; break } catch { Start-Sleep 10 } }
          Invoke-WebRequest https://download.sysinternals.com/files/Sysmon.zip -OutFile C:\lab\Sysmon.zip -UseBasicParsing
          Expand-Archive C:\lab\Sysmon.zip C:\lab\sysmon -Force
          Invoke-WebRequest https://raw.githubusercontent.com/SwiftOnSecurity/sysmon-config/1836897f12fbd6a0a473665ef6abc34a6b497e31/sysmonconfig-export.xml -OutFile C:\lab\sysmonconfig.xml -UseBasicParsing
          & C:\lab\sysmon\Sysmon64.exe -accepteula -i C:\lab\sysmonconfig.xml
          Invoke-WebRequest https://packages.wazuh.com/4.x/windows/wazuh-agent-4.14.10-1.msi -OutFile C:\lab\wazuh-agent.msi -UseBasicParsing
          Start-Process msiexec.exe -Wait -ArgumentList '/i C:\lab\wazuh-agent.msi /q WAZUH_MANAGER="10.20.1.10" WAZUH_AGENT_NAME="win-server-01"'
          Add-Content "C:\Program Files (x86)\ossec-agent\ossec.conf" "`n<ossec_config><localfile><location>Microsoft-Windows-Sysmon/Operational</location><log_format>eventchannel</log_format></localfile></ossec_config>"
          Start-Service wazuhsvc
          New-Item C:\lab\ready -ItemType File | Out-Null
          </powershell>

Outputs:
  WazuhServer: {Value: !Ref WazuhServer}
  LinuxVictim: {Value: !Ref LinuxVictim}
  AdminComputer: {Value: !Ref AdminComputer}
  KaliAttacker: {Value: !Ref KaliAttacker}
  NatInstance: {Value: !Ref NatInstance}
  WindowsVictim: {Condition: WithWindows, Value: !Ref WindowsVictim}
Sources
- Our own builds of 13 November 2026, in our own AWS account in us-east-1, with the template and the script in this zip. The first build, from 01:46 to 02:48 UTC, used the first version of the template, with the Windows server; it gave the Windows and Sysmon screenshots, the check and quota outputs, the dashboard screenshots and the shift that the other pages use. Our account's limit on ordinary EC2 machines was 1 virtual CPU, so both builds passed
LAB_OVERRIDESwith larger machine types from a separate limit:g5g.xlargefor the Linux machines,g4dn.xlargefor Windows, andt2.microwith the x86 Amazon Linux image for the NAT instance. The second build, from 03:11 to 03:32 UTC, used the corrected template that this zip ships; it gave the outputs of steps 5, 6 and 9. Every output above is filled from thescriptrecordings of our VS Code terminal,runs/session-2026-11-13-cloud-*.log, with the prompt set to show only the folder name. The one exception is the output of./lab.sh tunnel, which is the terminal's own text saved with its screenshot, because the tunnel was still open when that recording ended. The dashboard screenshots were taken in our own headless browser through./lab.sh tunnel. auth-sample.log: 60 lines of/var/log/auth.logfrom our lab's practice server, from 02:09:30 to 02:11:51 UTC on 13 November 2026, copied unchanged.- Wazuh quickstart, version 4.14: hardware for an all-in-one server (4 vCPU, 8 GiB and 50 GB for 1 to 25 agents), the installation assistant, the password file, and disabling the package source after installing: https://documentation.wazuh.com/current/quickstart.html. The agent on Linux and Windows: https://documentation.wazuh.com/current/installation-guide/wazuh-agent/wazuh-agent-package-linux.html and https://documentation.wazuh.com/current/installation-guide/wazuh-agent/wazuh-agent-package-windows.html. The ports: https://documentation.wazuh.com/current/getting-started/architecture.html.
- Kali Linux on AWS, and the official Docker images: https://www.kali.org/docs/cloud/aws/ and https://www.kali.org/docs/containers/official-kalilinux-docker-images/.
- AWS penetration testing policy: https://aws.amazon.com/security/penetration-testing/.
- AWS Session Manager, port forwarding and the plugin: https://docs.aws.amazon.com/systems-manager/latest/userguide/session-manager-working-with-sessions-start.html. NAT instances: https://docs.aws.amazon.com/vpc/latest/userguide/VPC_NAT_Instance.html. AWS Budgets: https://docs.aws.amazon.com/cli/latest/reference/budgets/create-budget.html and https://aws.amazon.com/aws-cost-management/aws-budgets/pricing/. Public IPv4 pricing: https://aws.amazon.com/vpc/pricing/.
- AWS EC2 on-demand prices for us-east-1, read with
aws pricing get-productson 13 November 2026: t4g.xlarge $0.1344, t4g.small $0.0168, t4g.micro $0.0084, t4g.nano $0.0042, and t3.medium with Windows $0.0600 an hour; gp3 storage $0.08 per GB-month; a public IPv4 address $0.005 an hour. - Sysmon: https://learn.microsoft.com/en-us/sysinternals/downloads/sysmon. The SwiftOnSecurity Sysmon configuration, CC BY 4.0: https://github.com/SwiftOnSecurity/sysmon-config.
- Microsoft, "Install WSL": https://learn.microsoft.com/en-us/windows/wsl/install. Astral, installing uv: https://docs.astral.sh/uv/getting-started/installation/.