Contents Start here
Start here
Before you start: what you should already know, and how to rent the GPU this course runs on
The Python and terminal basics this course assumes, a five-minute self-check, and renting an RTX 4090 on RunPod, setting it up, asking a model your first question and switching the GPU off.
Free page
About 27 minutes to read, and about 50 minutes for the hands-on lab.
Your progress0 of 6 checks answered right
It fills only when a prediction matches the measured result. Reading a page does not move it. It is kept in this browser.
This page is free. It tells you what the course expects you to know already, then walks you through renting an NVIDIA GPU by the hour on RunPod, connecting to it from your own terminal, installing the tools the free pages use, and asking a language model your first question on that GPU. It ends by switching the GPU off, so it stops costing money. Everything below was run for real on a rented NVIDIA RTX 4090 on 13 November 2026, and every output is copied from that run.
After this page you will have:
- checked that you know the few basics the course assumes, with a five-minute self-check;
- opened a RunPod account, rented one GPU, and connected to it with
sshfrom your own computer; - installed llama.cpp built for NVIDIA GPUs, which runs language models, and the Hugging Face
hfcommand, which downloads them; - downloaded a small open model and asked it your first question on the GPU;
- switched the GPU off, and checked that nothing is left running.
Time: about 30 minutes, of which about 15 to 20 minutes are on the rented GPU.
Cost: about 22 cents to 30 cents of GPU time. The RTX 4090 we rented cost $0.89 an hour on RunPod's secure cloud on 13 November 2026, and while you follow this page the pod exists for about 15 to 20 minutes. RunPod's community cloud listed the same card at $0.34 an hour that morning, but had none free when we tried, which happens often. You pay in advance by adding credit to your RunPod account. When the credit runs out, RunPod stops your rented machines, which it calls pods, and a pod like ours, with no volume disk (storage that outlives the pod), is deleted, so your spending cannot go past the credit you put in.
The problem: a lost evening, and a bill for it
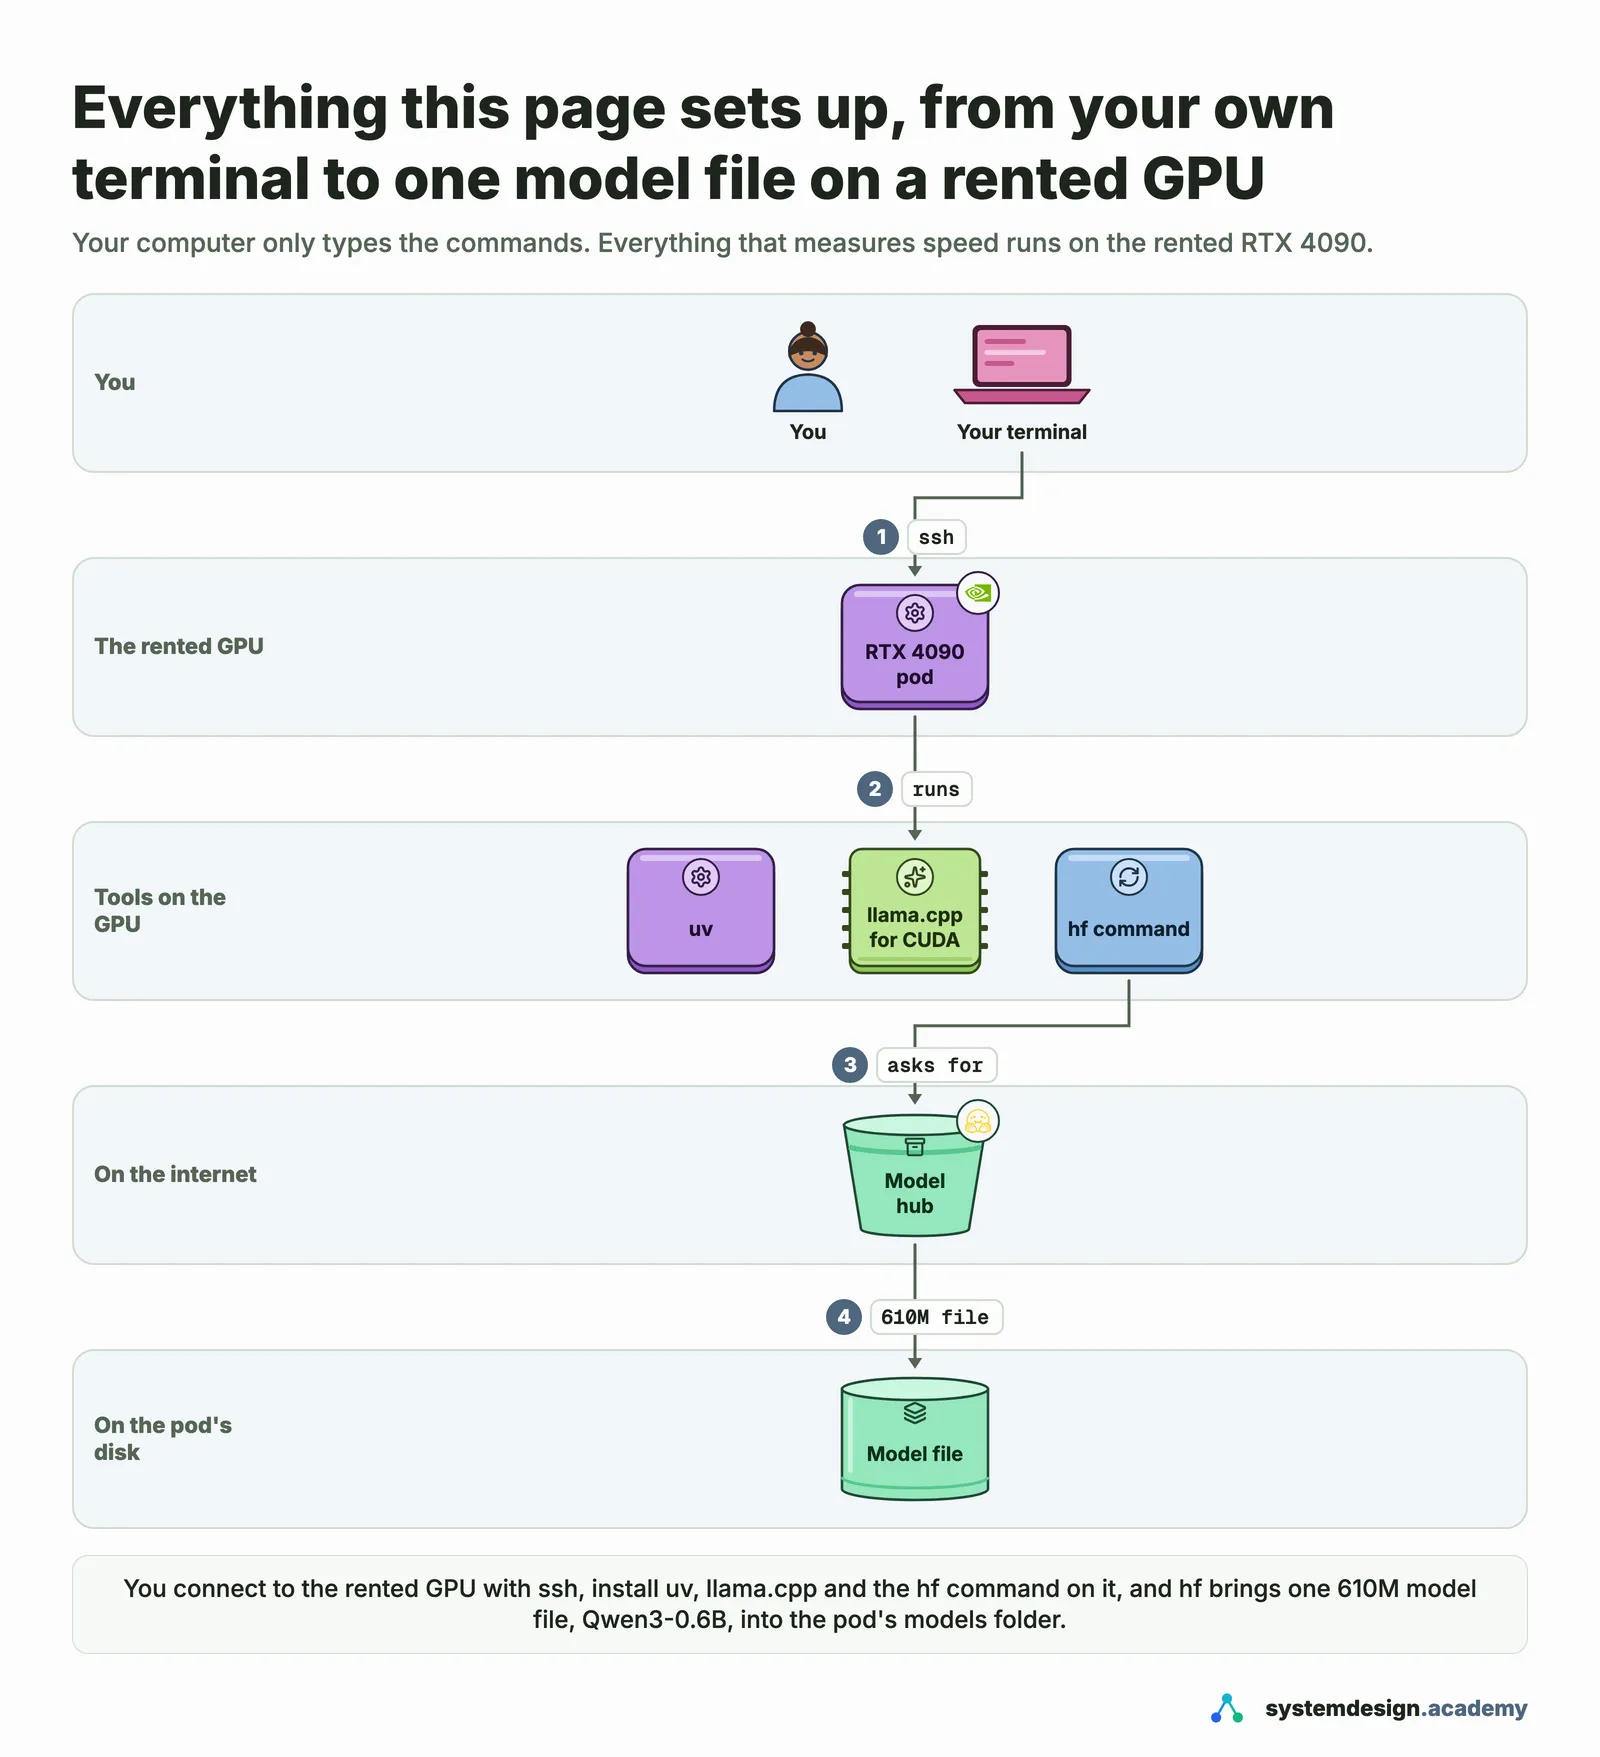
Most people who try to learn this subject lose their first evening the same way. A tutorial says "start the server", and the server is not installed. Then it wants a GPU they do not have, or a model that needs an account and a week's wait for approval, or forty gigabytes of disk. When the GPU is rented by the hour, that lost evening also arrives as a bill.
This page exists so that does not happen to you. It takes about half an hour, it costs a few cents, and when it is done you know how to rent a GPU, use it and switch it off again, which every hands-on page in the course does.
Why the setup, and switching it off, matter
- Every number in this course is measured on a real rented NVIDIA GPU. A model server's speed depends on the GPU it runs on, so the course measures on GPUs that you rent by the hour in a data centre, the same way companies rent them, and not on a personal computer. The RTX 4090 we use is sold as a consumer card, but it runs the same CUDA software as NVIDIA's data-centre cards. This page gets you onto one.
- Knowing how to switch a GPU off saves real money. A rented GPU keeps billing until you stop it. You practise the switch-off step here, once, while the stakes are a few cents.
- You see a real model answer today. Having watched a model write on a GPU you control makes the later pages much easier to follow.
What you should already know
The course assumes three things, and only three.
- You can read simple Python. You know what a variable, a function, a loop, a list and a dictionary are, and you can follow a 50-line program. You do not need to write large programs.
- You are at home in a terminal. You can change folders with
cd, list files withls, run a command and read its output, and stop a program with Control and C. - You know the Git basics. You can clone a repository and see what changed. The free pages do not need Git, but later pages do.
The course does not assume any knowledge of AI or machine learning, any GPU knowledge, any maths beyond school level, or any Kubernetes. Each of those is explained on the page where you first need it.
A five-minute self-check
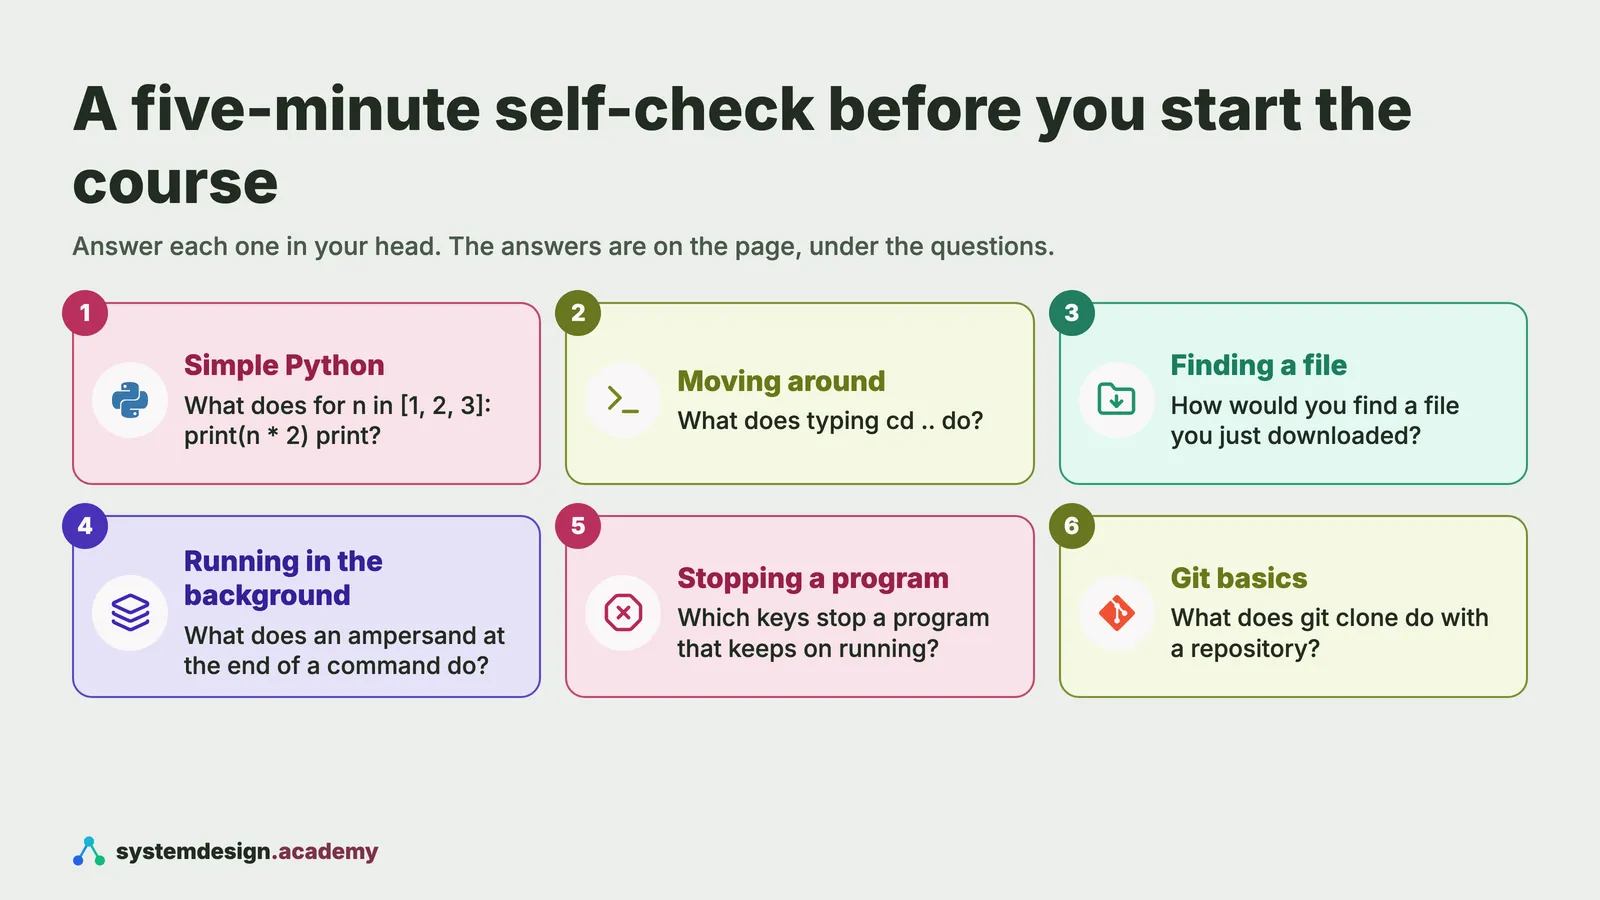
Answer these in your head before you read on. The answers are just below.
- What does this print?
for n in [1, 2, 3]: print(n * 2) - What does
cd ..do? - You downloaded a file in your browser. How would you find it from the terminal?
- What does a
&at the end of a command do? - A program keeps running and you want it to stop. Which keys do you press?
- What does
git clonedo?
Answers. (1) It prints 2, 4 and 6, one per line. (2) It moves you up one folder. (3) Look in your Downloads folder: cd ~/Downloads and then ls. (4) It runs the command in the background, so the terminal is free for the next command while the first one keeps running. We start every model server this way. (5) Control and C. (6) It copies a Git repository from a server, such as GitHub, into a new folder on your computer.
If you missed two or more, spend a few hours on a beginner Python course and a terminal tutorial first. You will enjoy this course far more, and the time comes back to you quickly.
What you need before you begin
- Your own computer, with a terminal and
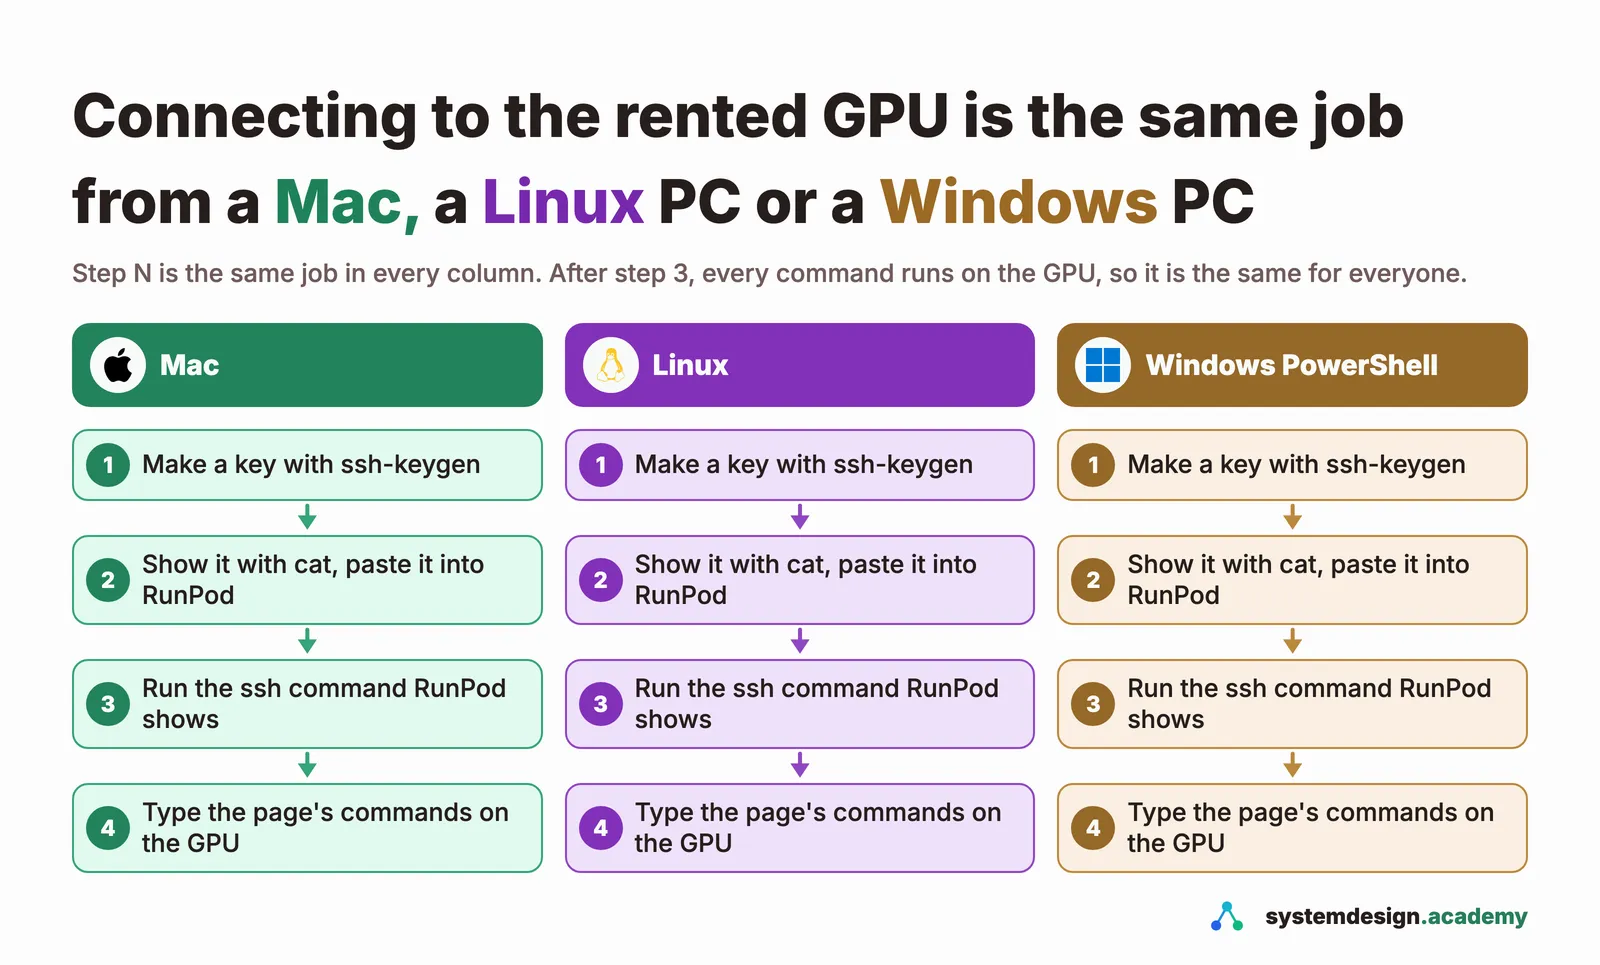
ssh. A Mac, a Linux PC, or a Windows PC all work. On Windows, use PowerShell, which hassshbuilt in, or the Ubuntu terminal of WSL2. Your computer does no heavy work on this page: it only types commands into the rented GPU. - A RunPod account with a little credit. RunPod is one of several companies that rent GPUs by the hour. We use it because it is simple, it charges by the second, and it lets you pay in advance. Ten dollars of credit is far more than all the free pages need.
- An
sshkey, which is how RunPod knows the connection is really you. Step 1 below shows how to make one if you do not have one yet.
The GPU we rent is an NVIDIA GeForce RTX 4090 with 24 GB of memory. It is the card most of this course uses, because it is the cheapest GPU that comfortably holds the models we measure. If RunPod has no RTX 4090 free when you try, an L4 (also 24 GB, $0.44 an hour on the community cloud and $0.69 on the secure cloud when we checked) runs every llama.cpp step on the free pages; your speeds will be lower, and the patterns will be the same. We did not run the last step of "The KV cache", which starts vLLM with a model of 8 billion numbers, on an L4, and it may not fit there.
Note: No GPU yet? You can still try the free pages on your own computer for nothing. llama.cpp also runs on an ordinary laptop or desktop processor: install it with
brew install llama.cppon a Mac or Linux, orwinget install llama.cppon Windows, and most llama.cpp commands on these pages then work the same way. Skipnvidia-smi, the llama.cpp download in step 7, the comparison with and without the GPU, and vLLM. Your numbers will be much lower and will not match ours, because the course's measurements all come from the rented GPU. Treat it as a way to practise the commands, and rent the GPU when you want to see the real numbers.
The tools, and what each one does
- RunPod pod: RunPod calls one rented machine a pod. Ours had one RTX 4090 GPU, 12 virtual processors (RunPod calls them vCPUs) and 31 GB of memory, and runs Ubuntu Linux. You type into it from your own computer over
ssh. nvidia-smiis NVIDIA's own command that shows the GPU, its memory, and what is running on it. It is already installed on the pod.- uv runs Python programs and installs Python tools, each in its own tidy environment, so nothing clashes with the Python already on the pod. The pages with code run every program with
uv run. - llama.cpp is an open-source program that runs language models. Its project publishes a ready-built copy for NVIDIA GPUs, so there is nothing to compile. It comes with several commands we use:
llama-cliasks a model a question,llama-serverruns a model server,llama-benchmeasures speed, andllama-tokenizeshows how text is cut into tokens. - The
hfcommand downloads models from the Hugging Face model hub, the website where most open models are published. - The model, Qwen3-0.6B, is a small open language model from the Qwen team at Alibaba, released under the Apache 2.0 licence. It needs no account and no approval. We use a copy in the GGUF file format, which is the format llama.cpp reads, with its numbers stored in about 8.5 bits each: 8 bits per number, plus one shared 16-bit number for every block of 32, which sets how large those 32 numbers are.
Why llama.cpp on the free pages, and not vLLM? Both run on the same GPU. llama.cpp comes with small built-in tools that measure each half of a request on its own, and a server that reports its own timings with every answer, which is exactly what the free pages need. vLLM is a widely used serving engine to serve many people at once, and most of the course is about it; the page "The KV cache" already shows you vLLM's own memory budget on this same GPU, and the page "Serving a model with vLLM" installs it properly.
Hands-on, part 1: rent a GPU on RunPod
These steps happen in your web browser and in your own terminal. The RunPod website changes its layout from time to time, so look for the names in quotes rather than an exact position on the screen.
Step 1: Make an ssh key, if you do not have one
In your own terminal (PowerShell on Windows), check whether you already have a key:
cat ~/.ssh/id_ed25519.pub
If it prints one line starting with ssh-ed25519, you have a key; skip to step 2. If it says No such file (in PowerShell: Cannot find path ... because it does not exist), make one, and press Enter at each question to accept the defaults:
ssh-keygen -t ed25519
Then run the cat command above again, and copy the line it prints. That line is your public key. It is safe to share; the other file, without .pub, is your private key, and it never leaves your computer.
Step 2: Open a RunPod account and add credit
- Sign up at https://www.runpod.io.
- Open "Billing" and add credit. Ten dollars is plenty for the free pages; RunPod also needs at least one hour's worth of credit for the pod you choose before it will start it. Leave "auto-pay" switched off, so your spending can never go past the credit you added, and switch on the low-balance email, so RunPod warns you before your credit runs out.
- Open "Settings", find "SSH Public Keys", paste the line you copied in step 1, and save.
Step 3: Rent one RTX 4090
- Open "Pods" and choose "Deploy".
- Pick the RTX 4090 GPU, with a GPU count of 1. You can choose "Community Cloud", which is cheaper when a card is free, or "Secure Cloud", which runs in a data centre and was the only one with a free RTX 4090 when we tried.
- A template is RunPod's ready-made setup for a pod, and its image is the saved copy of the software the pod starts with. For the template, choose "Change Template" and pick RunPod's official one whose name starts with "Runpod Pytorch" (its image starts with
runpod/pytorch:). We used the imagerunpod/pytorch:1.0.3-cu1281-torch280-ubuntu2404, which has CUDA 12.8 and Ubuntu 24.04; any recent version of the same template works. - Choose "Edit Template". Set "Container Disk" to 50 GB and "Volume Disk" to 0 GB, check that "Expose TCP Ports" includes 22 (that is the port
sshuses), and save with "Set Overrides". The template may fill in a volume disk for you: a volume is storage that survives after the pod is gone, and it keeps billing even when the pod is stopped, so set it to 0; the free pages do not need one. - Check the price shown on the page, then choose "Deploy On-Demand". The price per hour is what you pay for every second the pod exists.
Step 4: Connect to the pod
When the pod's status turns to "Running", open it and choose "Connect". Under "SSH over exposed TCP", RunPod shows a command like this one, with your pod's own address and port number in place of the capital letters:
ssh root@IP-ADDRESS -p PORT -i ~/.ssh/id_ed25519
If "SSH over exposed TCP" is not listed, which can happen on the community cloud, use the command under "SSH" instead; it looks like ssh POD-ID@ssh.runpod.io -i ~/.ssh/id_ed25519 and works for everything on the free pages.
Paste the command into your own terminal and press Enter. The first time, ssh asks whether you trust this new machine; type yes. The prompt changes to something like root@ followed by a code: every command you type now runs on the rented GPU, not on your computer.
Hands-on, part 2: set up the GPU and ask your first question
Note: How we made the outputs and pictures. You do not need to do any of this. On 13 November 2026 we rented one RTX 4090 on RunPod's secure cloud with the image above, and connected to it with
sshfrom VS Code's terminal on our own computer. A small script typed each command and pressed Enter, with the prompt shortened toinference-lab $; those are the terminal screenshots. The same session was recorded word for word with the standardscripttool, and the text under each command comes from that recording, with only the colour codes removed. GitHub was slow when we first ran the llama.cpp download, so it stopped part of the way; we finished it with the same command before the recording, which is why the recordedcurlprints nothing and finishes at once. Pictures were only cropped, never edited.
Every command below is in its own box. Copy one, paste it into the terminal that is connected to your pod, press Enter, and compare what you see with the output under it. A command prints nothing unless an output is shown under it.
Step 5: Make a folder and look at the GPU
mkdir -p ~/inference-lab
cd ~/inference-lab
Now ask NVIDIA's own tool what GPU you rented:
nvidia-smi
Fri Nov 13 01:34:54 2026
+-----------------------------------------------------------------------------------------+
| NVIDIA-SMI 595.91.07              Driver Version: 595.91.07      CUDA Version: 13.2     |
+-----------------------------------------+------------------------+----------------------+
| GPU  Name                 Persistence-M | Bus-Id          Disp.A | Volatile Uncorr. ECC |
| Fan  Temp   Perf          Pwr:Usage/Cap |           Memory-Usage | GPU-Util  Compute M. |
|                                         |                        |               MIG M. |
|=========================================+========================+======================|
|   0  NVIDIA GeForce RTX 4090        On  |   00000000:C3:00.0 Off |                  Off |
|  0%   28C    P8             14W /  450W |       1MiB /  24564MiB |      0%      Default |
|                                         |                        |                  N/A |
+-----------------------------------------+------------------------+----------------------+

+-----------------------------------------------------------------------------------------+
| Processes:                                                                              |
|  GPU   GI   CI              PID   Type   Process name                        GPU Memory |
|        ID   ID                                                               Usage      |
|=========================================================================================|
|  No running processes found                                                             |
+-----------------------------------------------------------------------------------------+
The table is dense, so read only three parts of it. The name in the middle row, NVIDIA GeForce RTX 4090, is the GPU. The memory column says 1 MiB / 24,564 MiB: almost all of its 24,564 MiB of memory is free, because nothing is running on it yet. And the top line says the driver supports CUDA 13.2, NVIDIA's software layer that programs use to run on the GPU; the llama.cpp copy we install next needs CUDA 12.8 or newer.
Then check the free disk space:
df -h /
Filesystem      Size  Used Avail Use% Mounted on
overlay          50G  219M   50G   1% /
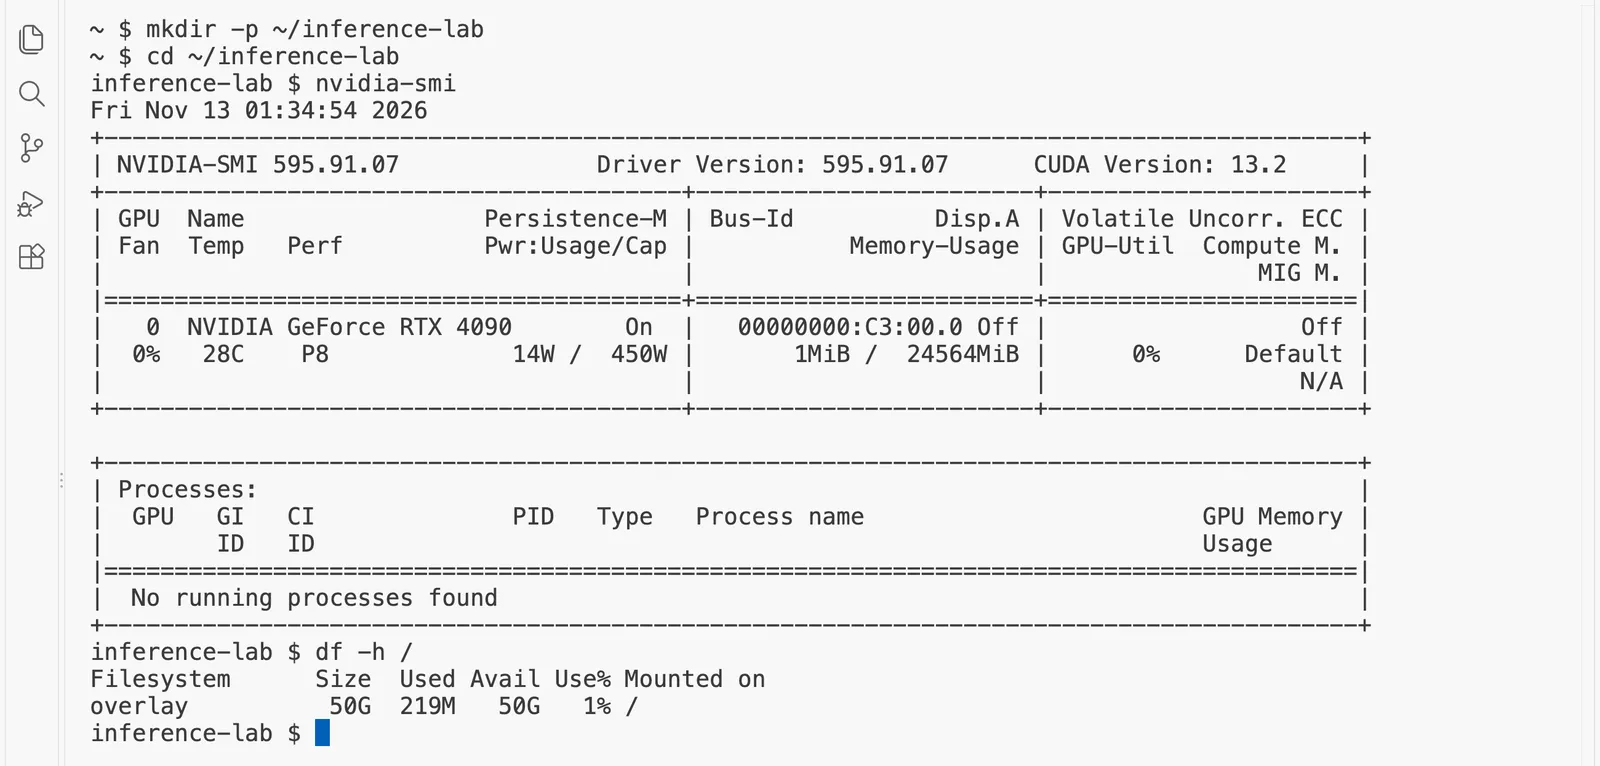
The Avail column says the pod has 50G free, which is far more than the free pages need.
Step 6: Install uv
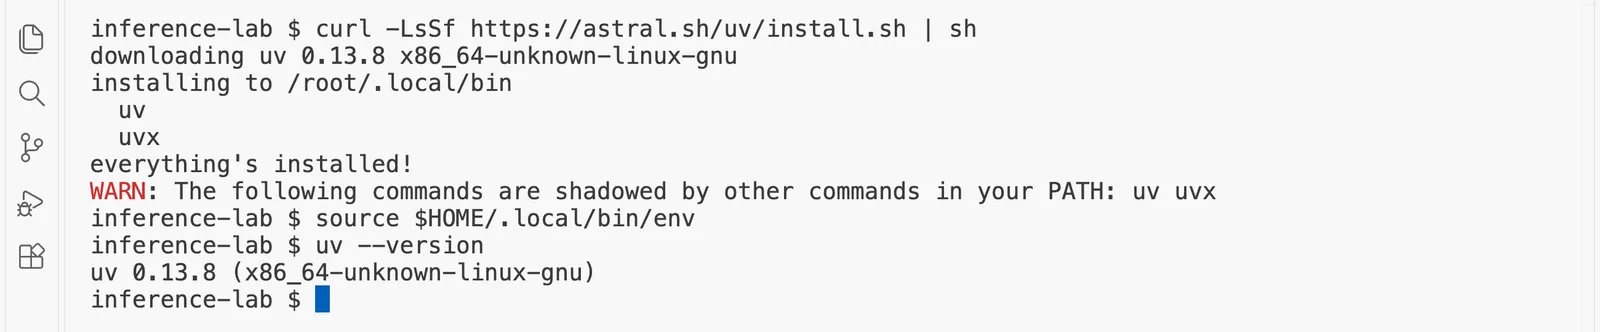
curl -LsSf https://astral.sh/uv/install.sh | sh
downloading uv 0.13.8 x86_64-unknown-linux-gnu
installing to /root/.local/bin
  uv
  uvx
everything's installed!
WARN: The following commands are shadowed by other commands in your PATH: uv uvx
The installer puts uv in a folder called ~/.local/bin. Its last line, a warning, says that another copy of uv already exists on the pod: RunPod's template comes with an older one. The next command puts the new folder first in this terminal's search path, so the new copy wins, and the one after it checks the version:
source $HOME/.local/bin/env
uv --version
uv 0.13.8 (x86_64-unknown-linux-gnu)
Step 7: Install llama.cpp for NVIDIA GPUs
llama.cpp publishes a ready-built copy for Linux with NVIDIA's CUDA. Download it from the project's release page:
curl -sLO -C - https://github.com/ggml-org/llama.cpp/releases/download/b12110/llama-b12110-bin-ubuntu-cuda-12.8-x64.tar.gz
The settings mean: work silently (-s), follow GitHub's redirect to the real file (-L), save it under its own name (-O), and if an earlier try stopped part of the way, continue from where it stopped (-C -). The download normally takes under a minute and prints nothing. GitHub's downloads are sometimes slow for a few minutes; if your prompt has not come back after two minutes, press Control and C and run the same command again, and it carries on rather than starting over. Check that all of it arrived:
ls -lh *.tar.gz
-rw-r--r-- 1 root root 179M Nov 13 01:33 llama-b12110-bin-ubuntu-cuda-12.8-x64.tar.gz
It should be about 179M. Unpack it; this makes a folder called llama-b12110 that holds every llama.cpp command:
tar -xzf llama-b12110-bin-ubuntu-cuda-12.8-x64.tar.gz
Now tell the shell where those commands are. The first line saves the setting for every later connection to this pod; the second applies it to this terminal now:
echo 'export PATH="$HOME/inference-lab/llama-b12110:$PATH"' >> ~/.bashrc
export PATH="$HOME/inference-lab/llama-b12110:$PATH"
llama-cli --version
version: 0.9.0-dev (build 12110, commit cd959bae9)
built with GNU 13.3.0 for Linux x86_64
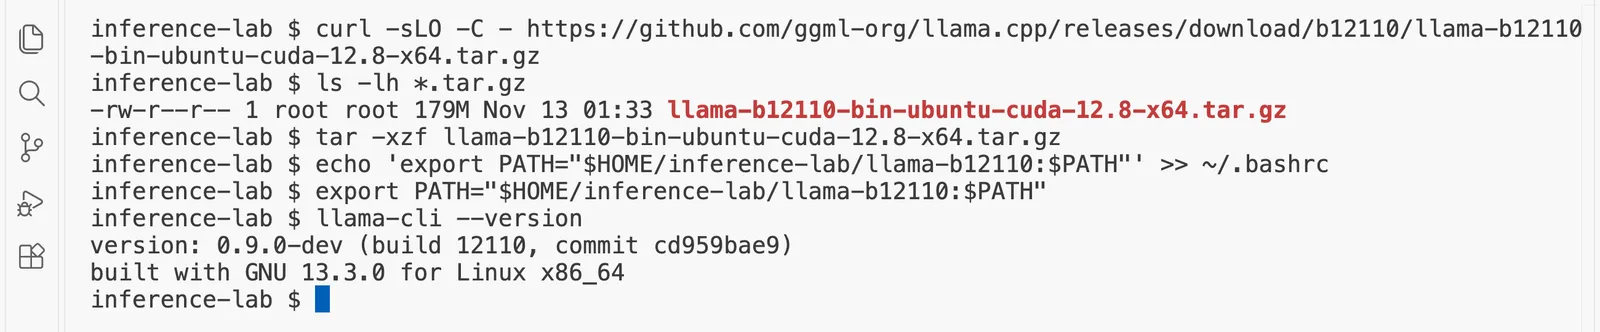
We used build 12110, released on 4 November 2026. A newer build is fine: the commands on the free pages have not changed for many releases.
Step 8: Install the hf command
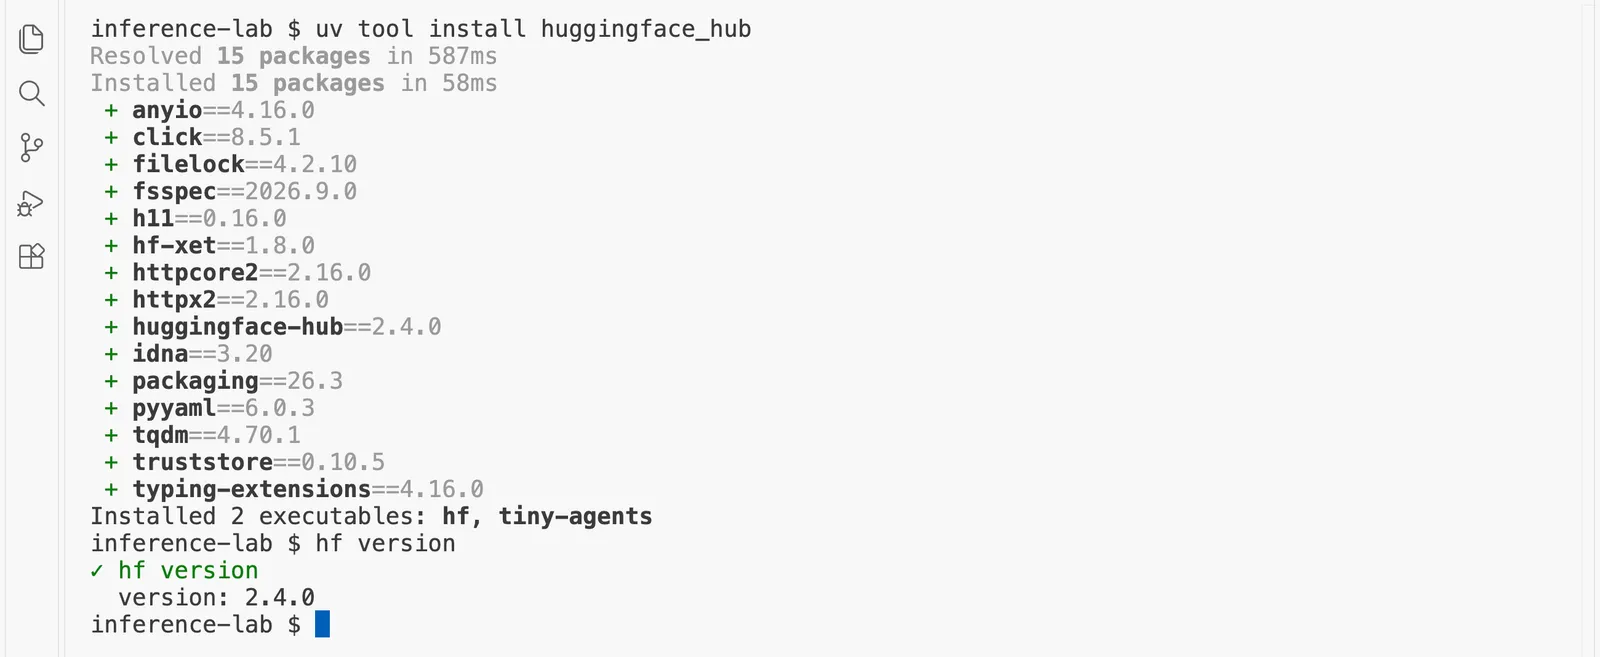
uv tool install huggingface_hub
Resolved 15 packages in 587ms
Installed 15 packages in 58ms
 + anyio==4.16.0
 + click==8.5.1
 + filelock==4.2.10
 + fsspec==2026.9.0
 + h11==0.16.0
 + hf-xet==1.8.0
 + httpcore2==2.16.0
 + httpx2==2.16.0
 + huggingface-hub==2.4.0
 + idna==3.20
 + packaging==26.3
 + pyyaml==6.0.3
 + tqdm==4.70.1
 + truststore==0.10.5
 + typing-extensions==4.16.0
Installed 2 executables: hf, tiny-agents
hf version
✓ hf version
  version: 2.4.0
Step 9: Download your first model
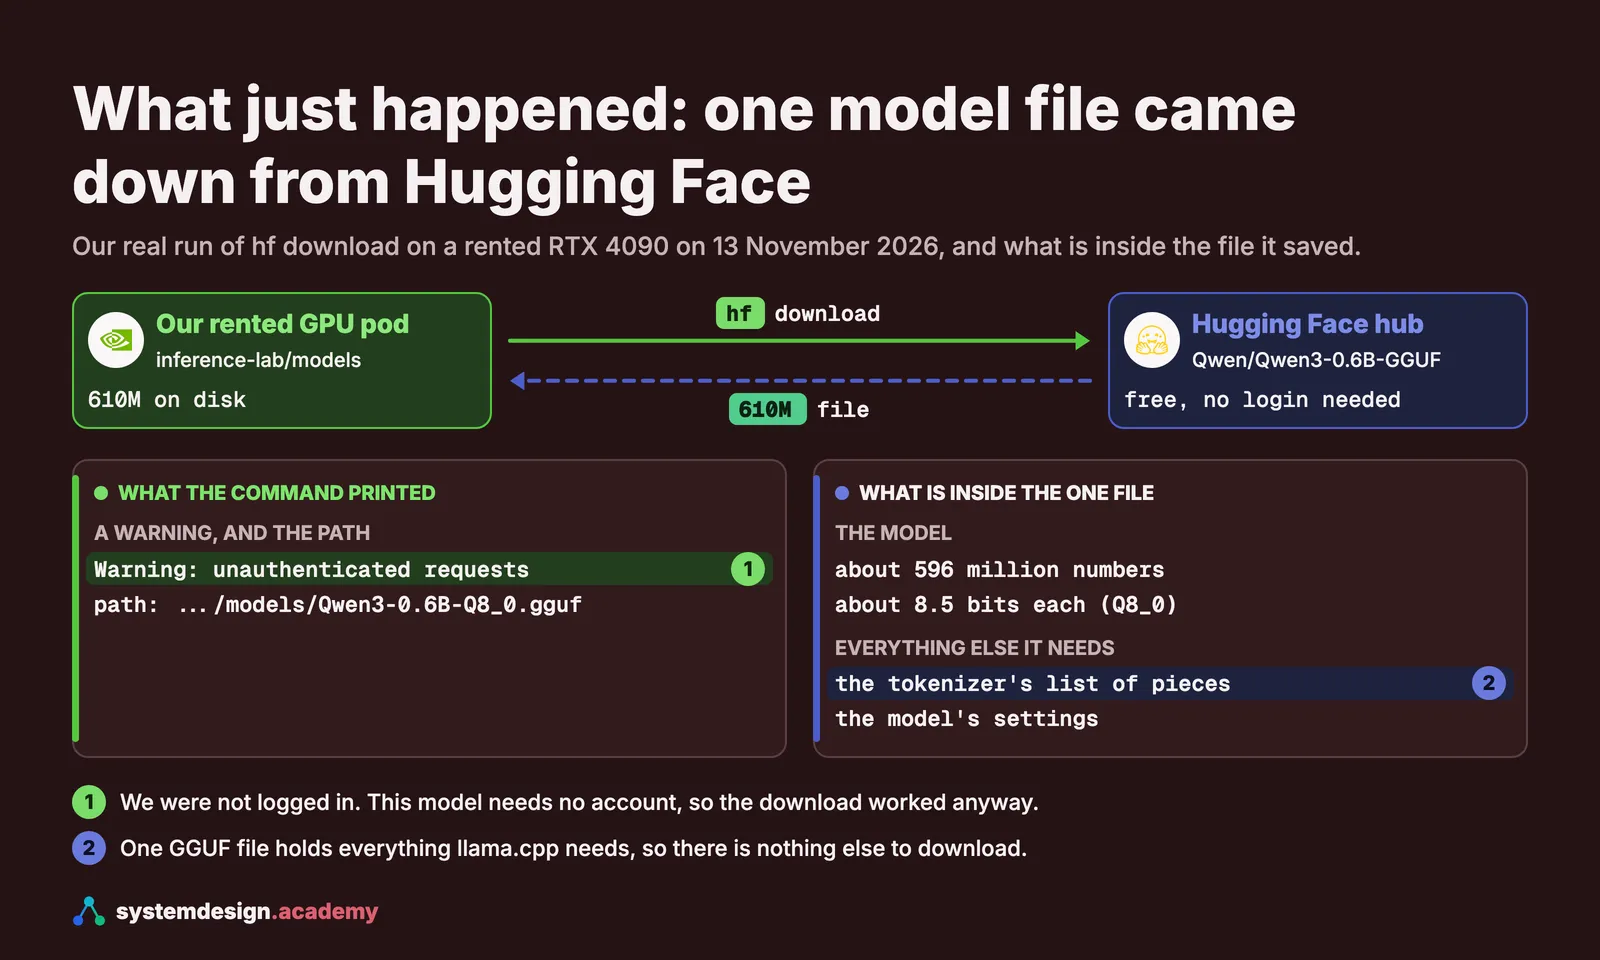
hf download Qwen/Qwen3-0.6B-GGUF Qwen3-0.6B-Q8_0.gguf --local-dir models
Warning: You are sending unauthenticated requests to the HF Hub. Please set a HF_TOKEN to enable higher rate limits and faster downloads.

Qwen3-0.6B-Q8_0.gguf: downloading bytes: ██████████████████████████████████████▌     |  560MB, 44.5MB/s
Qwen3-0.6B-Q8_0.gguf: downloading bytes: ███████████████████████████████████████████▍|  632MB, 30.0MB/s
Qwen3-0.6B-Q8_0.gguf: downloading bytes: ████████████████████████████████████████████|  635MB, 29.4MB/s
Qwen3-0.6B-Q8_0.gguf: reconstructing file: 100%|████████████████████████████|  639MB /  639MB, 38.1MB/s
✓ Downloaded
  path: /root/inference-lab/models/Qwen3-0.6B-Q8_0.gguf
Read the command from left to right: download from the Hugging Face repository Qwen/Qwen3-0.6B-GGUF the one file Qwen3-0.6B-Q8_0.gguf, and put it in a folder called models here. The last line, path:, says where the file is. On a rented pod the download of about 640 MB takes only a few seconds, because data centres have very fast connections.
The warning about HF_TOKEN is harmless. A Hugging Face account and token give you faster downloads and access to models that need approval, but this model needs neither. Check the file's size:
du -h models/Qwen3-0.6B-Q8_0.gguf
610M models/Qwen3-0.6B-Q8_0.gguf

du counts in mebibytes, so the 639 million bytes on Hugging Face's page show as 610M here. That file is the whole model: about 596 million numbers, each stored in about 8.5 bits, plus the tokenizer's list of pieces.
Predict, then measure
Your first question runs on the GPU, and llama.cpp prints two speeds: reading the question and writing the answer. Which do you expect to be faster?
The measured result appears once you lock in. Only your first answer counts toward your progress.
Step 10: Ask your first question
llama-cli -m models/Qwen3-0.6B-Q8_0.gguf -p "In two sentences, what does a librarian do?" -n 100 -st --reasoning off
Here is what each part means:
-m models/Qwen3-0.6B-Q8_0.gguf: the model file to load.-p "...": the question, which llama.cpp calls the prompt.-n 100: write at most 100 tokens.-st: answer this one question and then exit. Without it, llama-cli waits for your next question, as a chat does.--reasoning off: Qwen3 can "think out loud" before answering, which writes many extra tokens. We switch that off on the free pages so the answers stay short.
Loading model...

▄▄ ▄▄
██ ██
██ ██  ▀▀█▄ ███▄███▄  ▀▀█▄    ▄████ ████▄ ████▄
██ ██ ▄█▀██ ██ ██ ██ ▄█▀██    ██    ██ ██ ██ ██
██ ██ ▀█▄██ ██ ██ ██ ▀█▄██ ██ ▀████ ████▀ ████▀
                                    ██    ██
                                    ▀▀    ▀▀

build      : b12110-cd959bae9
model      : models/Qwen3-0.6B-Q8_0.gguf
ftype      : Q8_0
modalities : text

available commands:
  /exit or Ctrl+C     stop or exit
  /regen              regenerate the last response
  /clear              clear the chat history
  /read <file>        add a text file
  /glob <pattern>     add text files using globbing pattern


> In two sentences, what does a librarian do?
A librarian helps people find and access information.

[ Prompt: 1153.7 t/s | Generation: 382.8 t/s ]


Exiting...
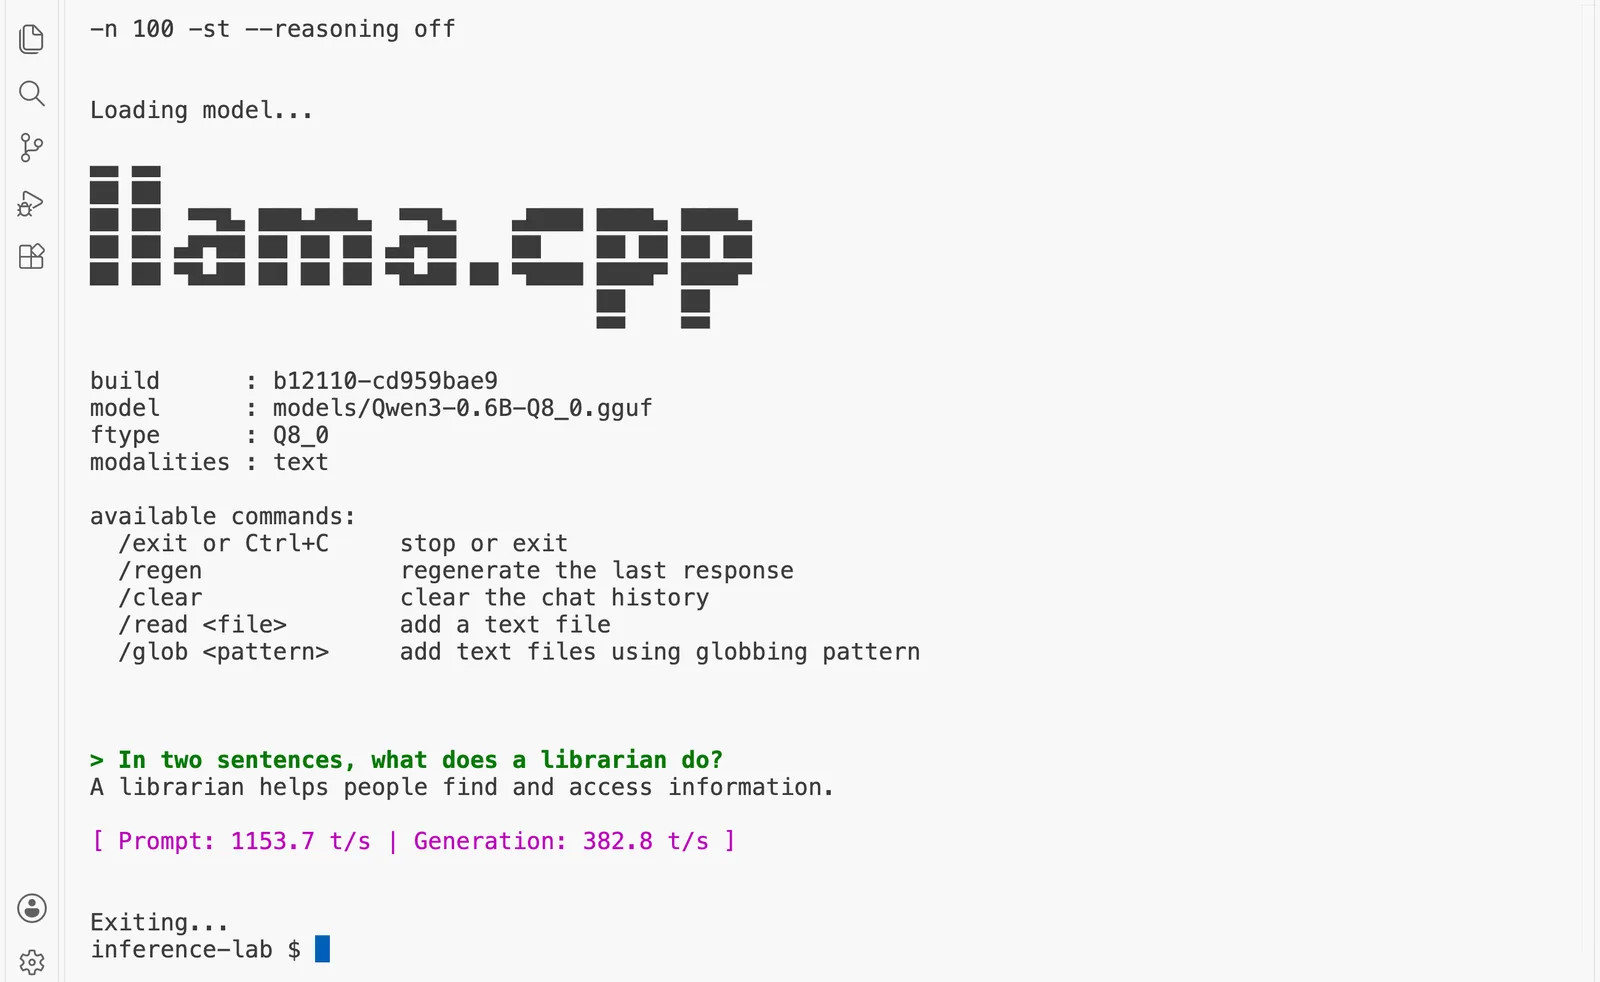
That is a real language model, answering on a GPU you rented a few minutes ago. Your answer may use different words, and it may be one sentence rather than two: a small model does not always follow instructions exactly.
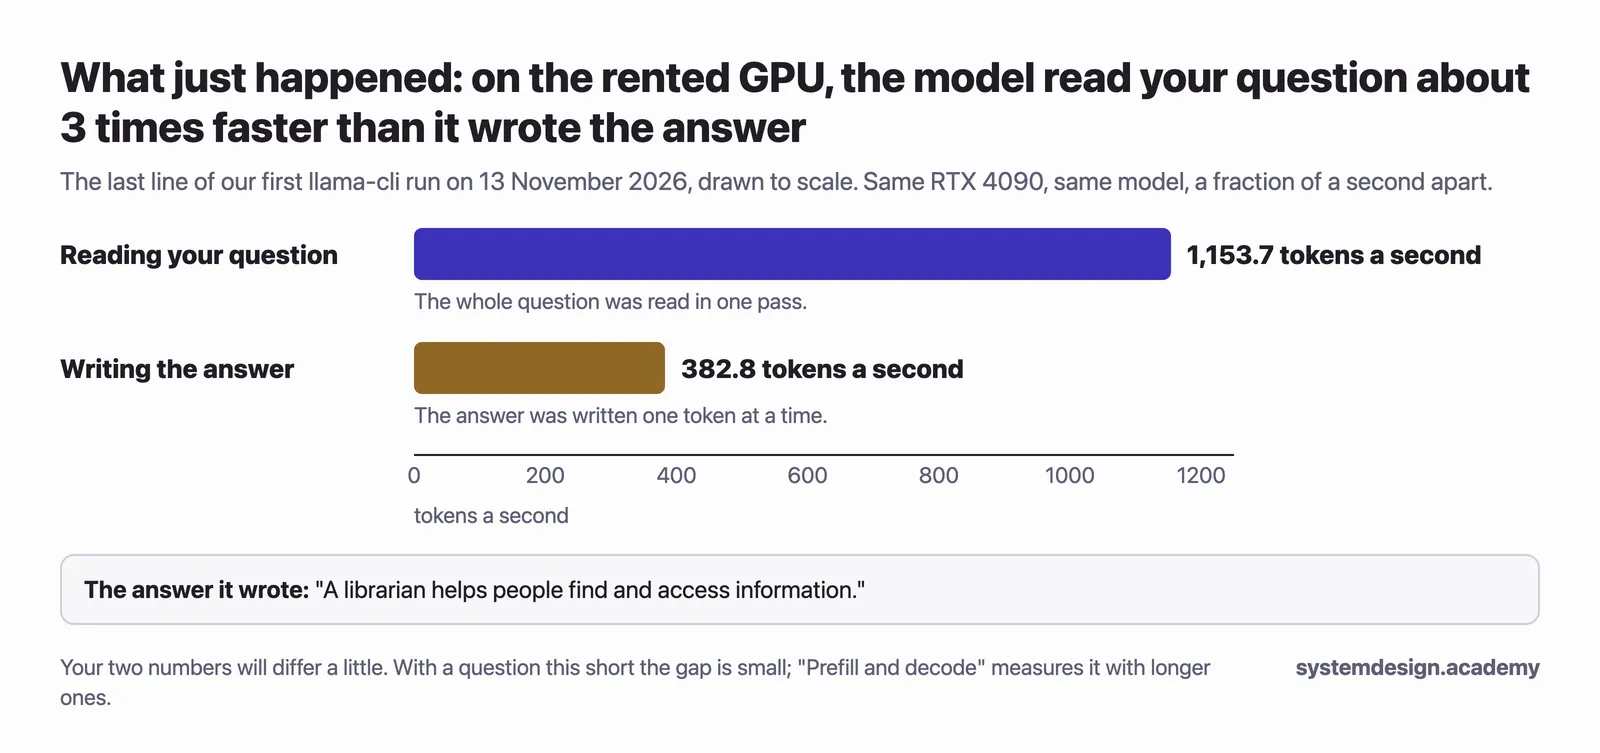
Now look at the last line in brackets. It is the most important line on this page.
- Prompt: 1,153.7 t/s means the model read the question at 1,153.7 tokens a second.
- Generation: 382.8 t/s means it wrote the answer at 382.8 tokens a second.
Reading was about 3.0 times faster than writing, on the same GPU, with the same model, a fraction of a second apart. Your two numbers will be a little different, but reading should be clearly faster than writing. The gap is small here only because the question is so short: with a dozen or so tokens to read, the GPU spends most of the reading time just getting started. With a question of a few thousand tokens, the free page "Prefill and decode" measures reading at many dozens of times the speed of writing on this same GPU, and explains why that gap decides how model servers are built.
Hands-on, part 3: switch the GPU off
If you are going straight on to "Prefill and decode", you can keep the pod running and use it there; the setup above is then already done. If you are taking a break, switch it off now. A rented pod keeps billing every second until you do.
- Type
exitto leave the pod. Your terminal is back on your own computer. - In RunPod's "Pods" page, find your pod and choose "Stop", then choose "Terminate" (the bin icon) and confirm.
- Check that the "Pods" page lists no pods any more.
"Stop" ends the GPU's bill and wipes the pod's container disk, so everything you installed is gone even though the pod is still listed; only a volume disk, which we set to 0, would keep its files and keep billing. "Terminate" deletes the pod itself. For the free pages, always stop and then terminate, so nothing is left in the list: the setup above takes about two minutes to repeat on a new pod.
If something goes wrong
Permission denied (publickey)when you connect. RunPod does not have your public key. Check that you pasted the line fromcat ~/.ssh/id_ed25519.pubinto "SSH Public Keys", then deploy a new pod: a pod only receives the keys that were saved before it started.- The pod stays at "Starting" for more than five minutes. Terminate it and deploy another; on a busy day a machine can be slow to download the template's image.
- No RTX 4090 is free. Try the other cloud type, or choose an L4. Every llama.cpp step on the free pages works on an L4; the vLLM step at the end of "The KV cache" may not fit there.
llama-cli: command not found. Theexport PATH=...line was not run in this terminal. Run it again, or open a new connection, which reads~/.bashrc.ls -lhshows a file much smaller than 179M, ortarsaysunexpected end of file. The download from GitHub stopped early; it happens now and then. Run the samecurlcommand again: the-C -setting makes it continue from where it stopped.- The download from Hugging Face stops halfway. Run the same
hf downloadcommand again: it continues where it stopped. - The model starts "thinking" with a
<think>tag. Check that--reasoning offis in your command.
Where each page's hands-on work runs
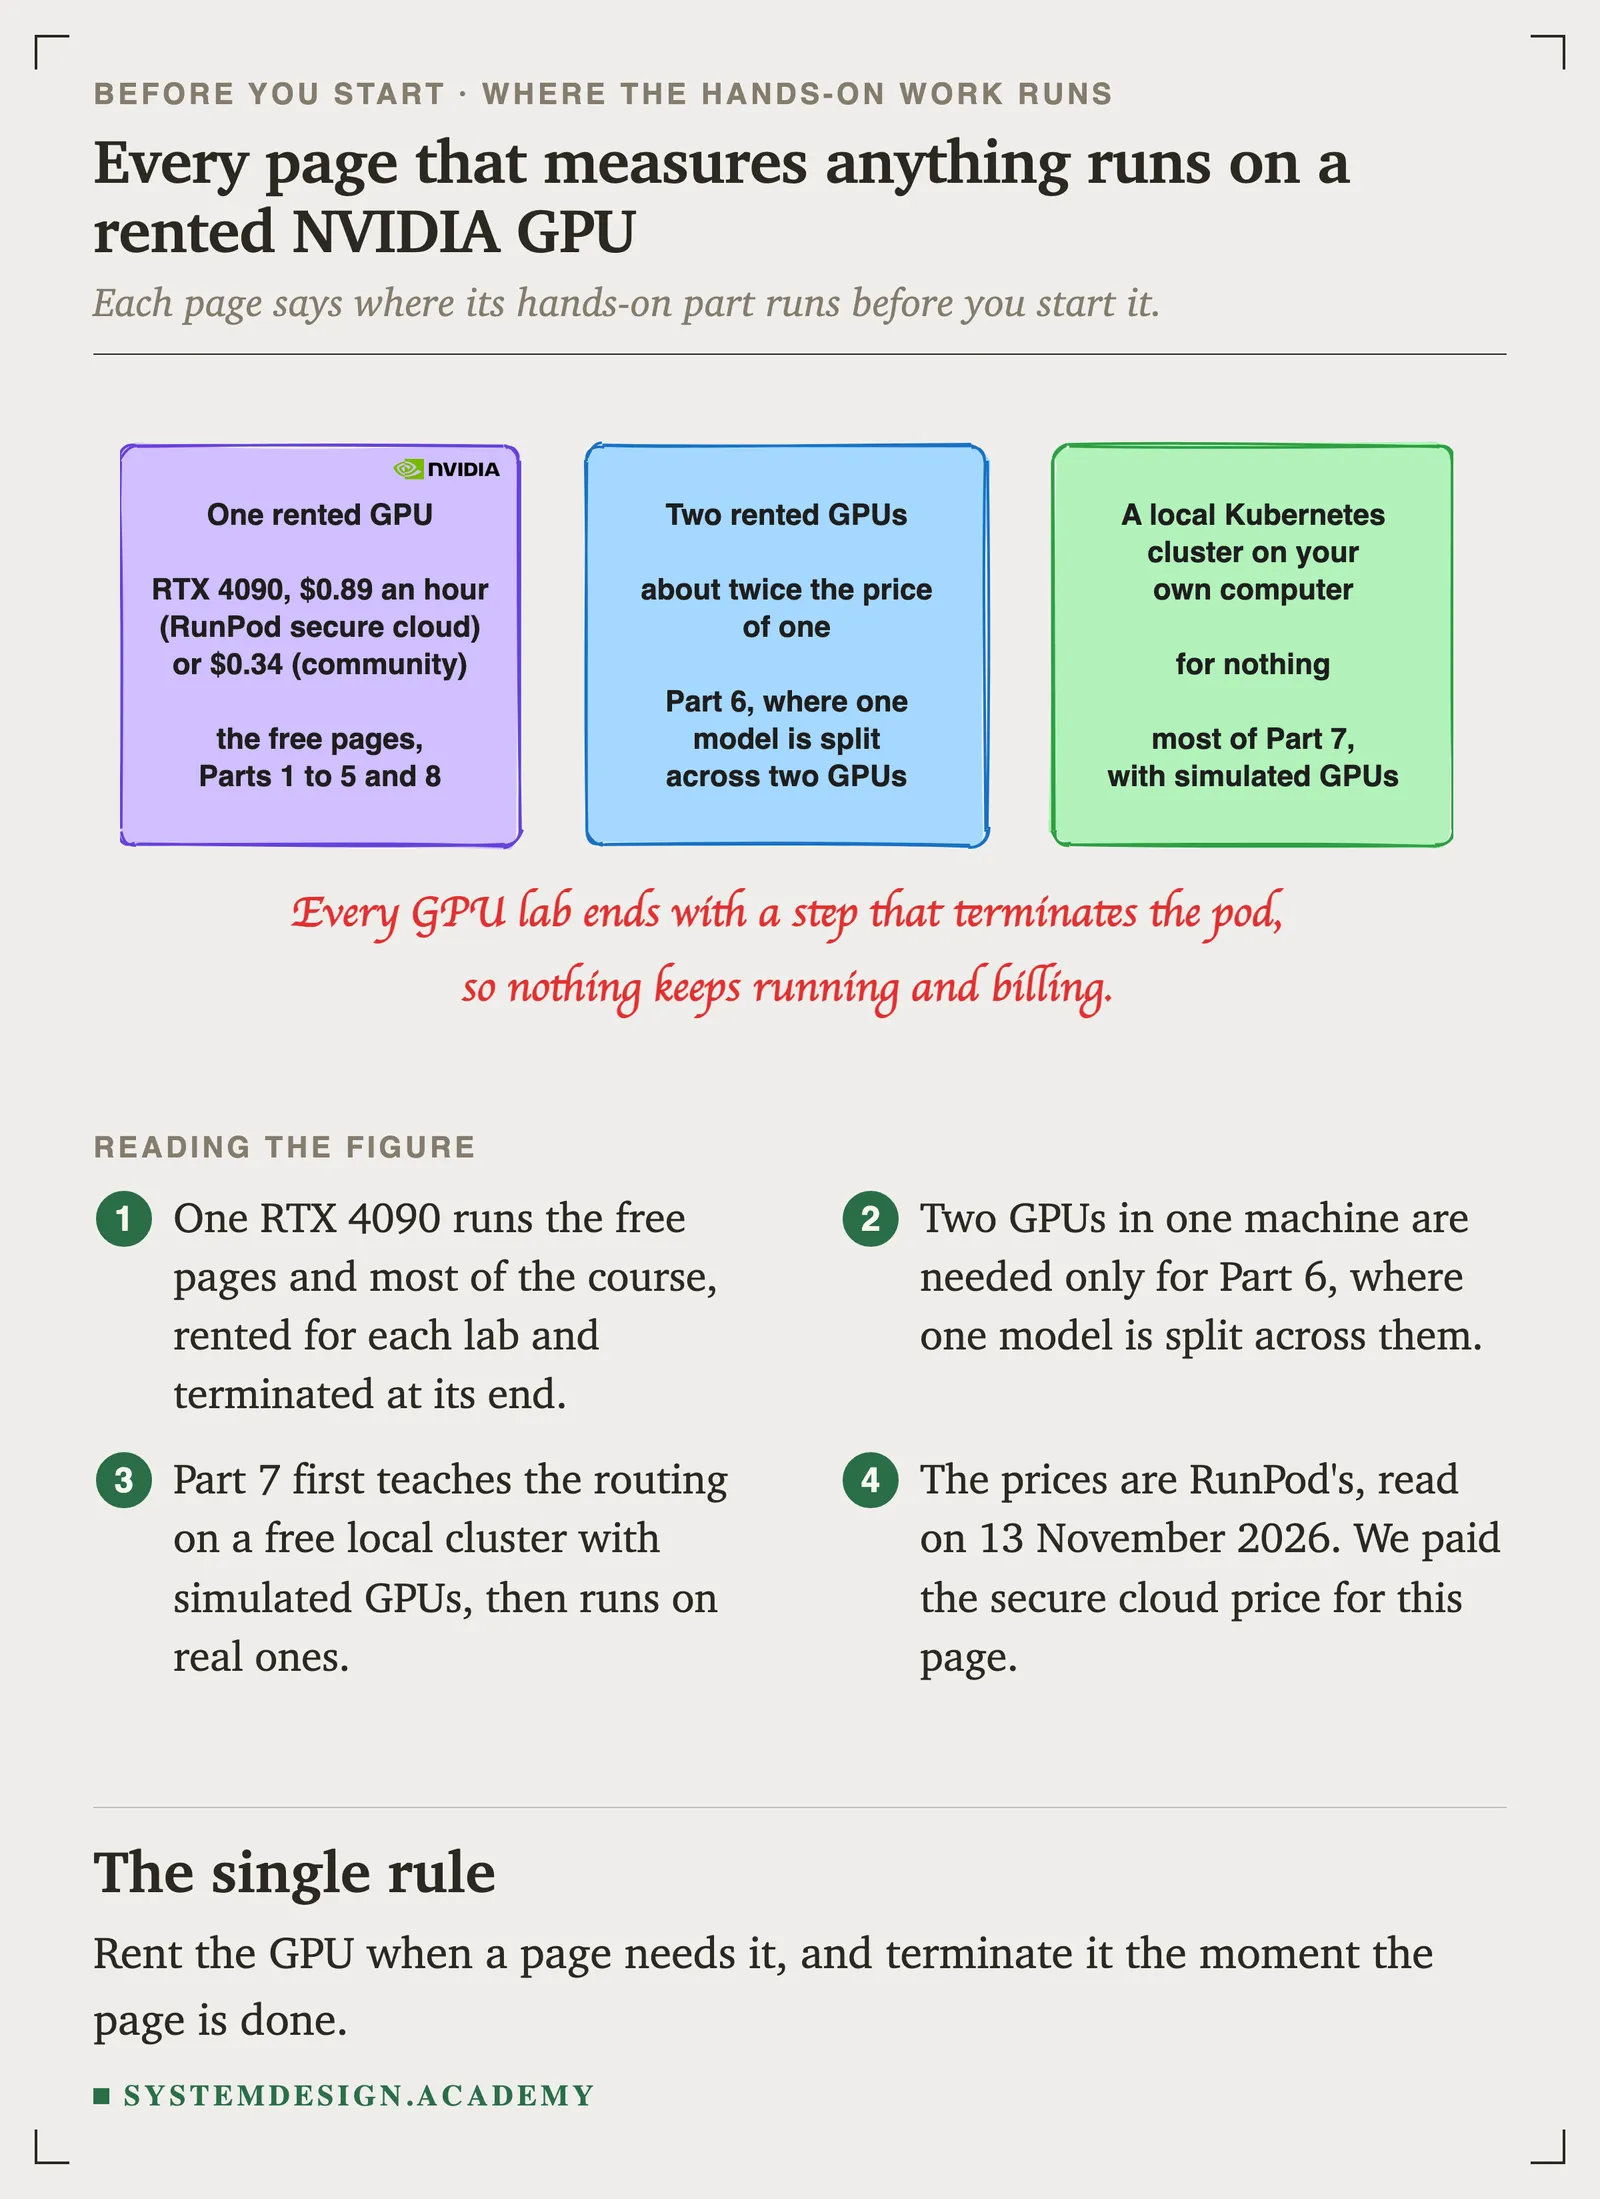
Every page that measures anything runs on a rented NVIDIA GPU, as this one did, so every number you see on these pages comes from the same kind of hardware a company would rent. Two parts of the course also use other places:
- One rented RTX 4090 for the free pages and for Parts 1 to 5 and 8, rented for each lab and terminated at its end.
- Two rented GPUs for Part 6, where one model is split across GPUs.
- A free local Kubernetes cluster on your own computer for most of Part 7, where the GPUs are simulated so you can learn the routing for nothing, followed by one page on real GPUs. It needs Docker, a tool that runs programs in sealed boxes called containers, or a similar tool, set up on the page "vLLM on Kubernetes".
The page "Renting a GPU without a surprise bill" goes further than this page: it compares RunPod with AWS and other clouds, explains why to ask AWS for GPU access on your first day if you plan to use AWS, and shows how to see exactly what you have spent.
Questions people ask
- How much does it cost to rent an RTX 4090 GPU on RunPod?
On 13 November 2026, RunPod listed the RTX 4090 at $0.34 an hour on its community cloud and $0.89 an hour on its secure cloud, charged by the second. We paid $0.89 an hour, because the community cloud had no free card that morning. Following this page keeps the pod for about 15 to 20 minutes, which is about 22 cents to 30 cents at that price.
- How do I connect to a RunPod GPU pod with SSH?
Make an ssh key on your own computer with
ssh-keygen -t ed25519, and paste the public key, the line printed bycat ~/.ssh/id_ed25519.pub, into "SSH Public Keys" in RunPod's settings before you deploy the pod. When the pod is running, its "Connect" tab shows a command of the formssh root@IP-ADDRESS -p PORT -i ~/.ssh/id_ed25519. Paste it into your terminal, and every command you type afterwards runs on the GPU.- What is the difference between stopping and terminating a RunPod pod?
Stopping a pod ends the GPU's bill and wipes its container disk, so everything you installed is lost; only a volume disk keeps its files, and it keeps billing while the pod is stopped. Terminating deletes the pod itself. For short labs like the ones in this course, use no volume disk, stop and then terminate the pod, and check that the "Pods" page lists nothing.
- How do I install llama.cpp with CUDA on a cloud GPU?
You do not need to compile it. The llama.cpp project publishes a ready-built copy for Linux with CUDA 12.8 on each release page; download it with
curl, unpack it withtar, and add its folder to yourPATH. On our RTX 4090,llama-cli --versionthen printed build 12110, and the first question was read at 1,153.7 tokens a second and answered at 382.8.- Do I need my own GPU to learn inference engineering?
No. You rent one by the hour only while a lab runs, and terminate it afterwards; ten dollars of credit covers all of this course's free pages many times over. If you want to practise the commands for nothing first, llama.cpp also runs on an ordinary laptop processor, but its speeds will not match the course's measurements, which all come from a rented NVIDIA GPU.
Knowledge check
Answer all five questions before you read the answers below them.
1. You run hf download and see Warning: You are sending unauthenticated requests to the HF Hub. What should you do?
- A. Stop: the download will fail without a token.
- B. Nothing, for this model: it needs no account, and the warning only means downloads may be slower.
- C. Create a Hugging Face account and request access to Qwen3 before you continue.
- D. Reinstall the
hfcommand withuv tool install.
2. What does -st do in the llama-cli command?
- A. It answers one question and then exits, instead of waiting for the next one.
- B. It sets the temperature.
- C. It streams the answer one token at a time.
- D. It turns on the model's thinking.
3. Try it. You will be guessing here, because the next page, "Prefill and decode", explains the answer. Do this before you switch the GPU off. Run the same llama-cli command again, but ask a longer question: inside the quotes, paste a paragraph of about 100 words from any web page that has no double quote marks or dollar signs in it, and end it with "In one sentence, summarise this paragraph." Compare the two numbers in the last line with your first run. What do you expect?
- A. Both numbers fall by the same amount.
- B. The writing speed doubles, because the answer is shorter.
- C. The prompt speed falls a lot, because there is more to read.
- D. The prompt speed rises, and the writing speed changes far less.
4. You have finished for the day and you want every RunPod charge to stop. What do you do?
- A. Type
exit, so the terminal disconnects from the pod. - B. Choose "Stop" on the pod, and leave it there for next time.
- C. Choose "Stop" and then "Terminate" on the pod, and check that the "Pods" page lists no pods.
- D. Close the browser tab with the RunPod website.
5. Why do the free pages use llama.cpp on the GPU, rather than vLLM?
- A. vLLM cannot run the Qwen models.
- B. llama.cpp is faster than vLLM for every workload.
- C. llama.cpp comes with small built-in tools that time each half of a request on its own, which is exactly what the free pages measure; vLLM comes later in the course.
- D. vLLM costs money and llama.cpp is free.
Answers
1. B. Qwen3-0.6B is published under the Apache 2.0 licence and is not gated, so no account or approval is needed; our download worked with the same warning. A and C are tempting because some models, such as Meta's Llama models, do need an account and approval, but this one does not. D would change nothing: the warning is about logging in, not about the tool.
2. A. -st is short for --single-turn: answer once and exit. B, C and D name other settings: llama-cli has separate options for temperature, it already shows the answer as it is written, and thinking is controlled by --reasoning.
3. D. With a longer question there is more to read, but the model reads all the question's tokens together in one pass, so the reading speed in tokens a second rises: the GPU has more work to do at once, and its fixed start-up cost is shared by more tokens. The writing speed depends mainly on the model and the GPU, not on how long the question was, so it changes far less. When we tried it on the same GPU with a paragraph of about 100 words about libraries, the last line said Prompt: 6416.4 t/s | Generation: 471.5 t/s: reading rose more than five times, from 1,153.7 to 6,416.4 tokens a second, while writing moved only from 382.8 to 471.5. (With answers of only a dozen or two tokens, the writing figure varies from run to run, so read it as roughly the same.) C is the tempting answer, because reading more text feels as if it should be slower; the total reading time does grow, but the speed per token does not fall. "Prefill and decode" measures this properly.
4. C. "Stop" ends the GPU's bill and "Terminate" deletes the pod, and checking the "Pods" page proves nothing is left. A only disconnects your terminal: the pod keeps running and billing every second. B ends the GPU's bill, but it wipes the pod's container disk, so nothing is kept for next time, and if you had added a volume disk, that disk would keep billing while the pod sits stopped. D changes nothing at all, because the pod runs in RunPod's data centre, not in your browser.
5. C. llama.cpp's llama-bench and llama-batched-bench measure reading and writing separately, and its server returns its own timings with every answer, so the free pages can show each half on its own. vLLM runs on the same GPU and is the engine most of the course is about; the page "The KV cache" already uses it once. A, B and D are not true: vLLM runs Qwen models, it is usually the faster server when many people share a GPU, and both are free, open-source projects.
What to remember from this page
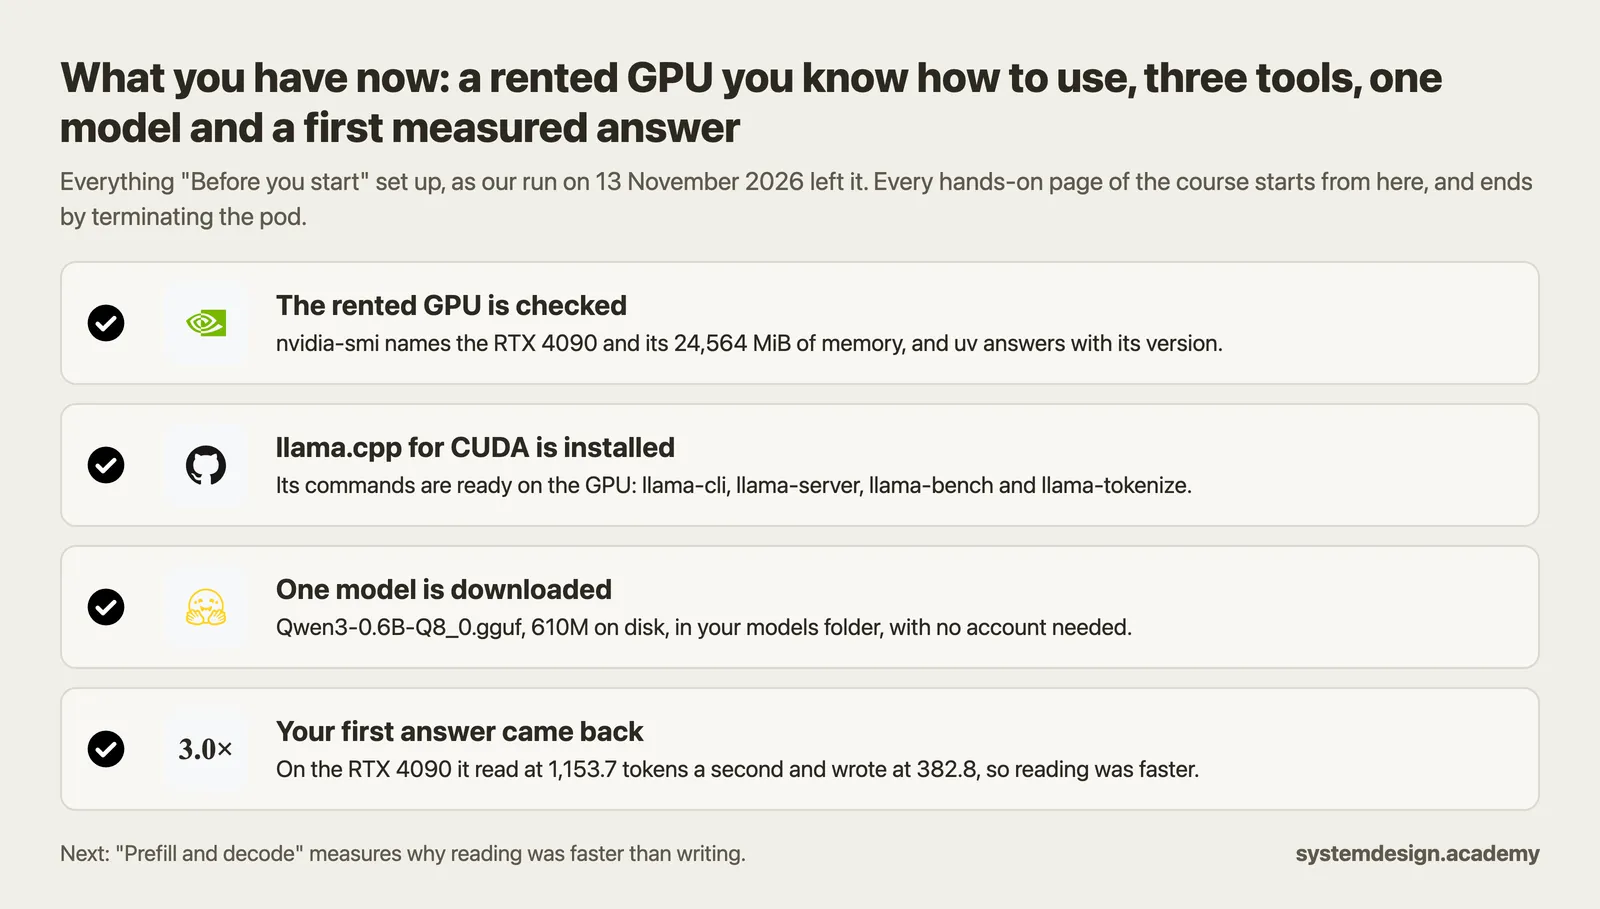
- The course assumes simple Python, the terminal and Git basics, and nothing about AI, GPUs or Kubernetes.
- You can now rent an RTX 4090 on RunPod, connect to it with
ssh, set it up in a few minutes, and terminate it so that nothing keeps billing. - On the GPU you installed llama.cpp built for CUDA, the
hfcommand and one small model, Qwen3-0.6B, in~/inference-lab/models. - Your first run already showed the course's central pattern: the model read the question faster per token than it wrote the answer.
Next: "Prefill and decode" measures that pattern properly on the same GPU, and explains why it happens.
Sources
Checked on 13 November 2026.
- Our own run on a RunPod pod with one NVIDIA GeForce RTX 4090 (24 GB), secure cloud, $0.89 an hour, image
runpod/pytorch:1.0.3-cu1281-torch280-ubuntu2404, NVIDIA driver 595.91.07, llama.cpp build 12110. The recording is in this page's run folder. - RunPod pricing, RTX 4090 at $0.34 an hour on community cloud and $0.89 on secure cloud, and L4 at $0.44 on community cloud, read from RunPod's price list on 13 November 2026: https://www.runpod.io/pricing
- llama.cpp release b12110, with the ready-built Linux copy for CUDA 12.8: https://github.com/ggml-org/llama.cpp/releases/tag/b12110
- llama.cpp installation page, for Homebrew and winget on your own computer: https://github.com/ggml-org/llama.cpp/blob/master/docs/install.md
- Hugging Face command-line guide, for installing the
hfcommand with thehuggingface_hubpackage and forhf download: https://huggingface.co/docs/huggingface_hub/main/en/guides/cli - Qwen3-0.6B GGUF on Hugging Face, Apache 2.0, not gated: https://huggingface.co/Qwen/Qwen3-0.6B-GGUF
- uv installation guide: https://docs.astral.sh/uv/getting-started/installation/